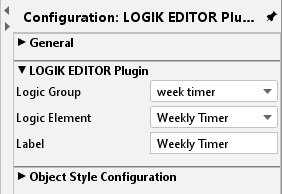
The element is used to access the “week timer” and “Astro timer” logic elements of LOGIK EDITOR from the CONTROL L visualisation.
CONTROL L support
This element can only be used for CONTROL L.
Specific parameters
Logic group:
Select the group in which the desired logic element is located.
Logic element:
Select the desired element within the group which should be accessible through the visualisation.
Title:
Automatically filled with the name of the desired logic element. A different title can be entered.
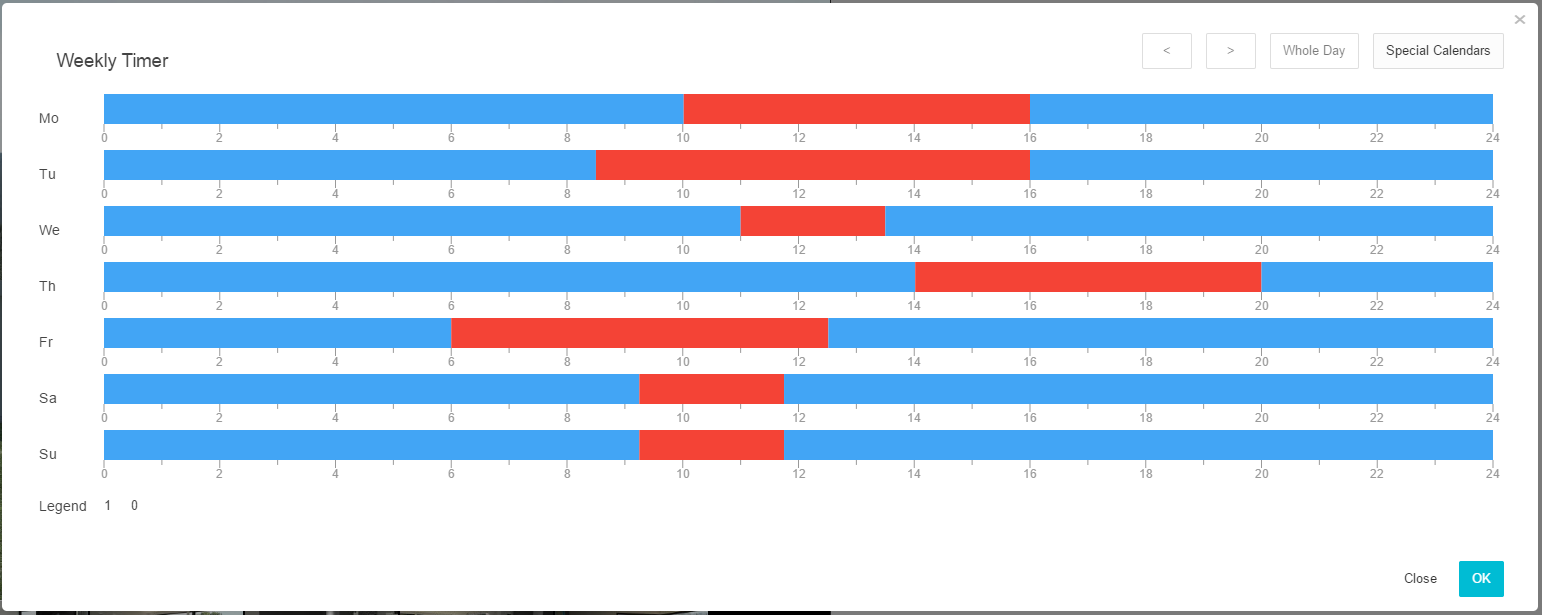
Week timer configuration from the visualisation
If the visualisation user clicks on the appropriate element, a modal dialogue which allows for access to the week configuration for the week timer appears.
Week overview
The overview shows the 24 hr timelines for all weekdays at a glance. Here, the switching times and periods are shown marked accordingly in colour. The colour representation is individually defined in LOGIKEDITOR for each output.
Detailed view
By clicking on any point in the week overview you can open the detailed view for the corresponding period, with the option of setting switching points by the minute. A box is displayed per minute. The view can be moved to the left or right using the arrow buttons at the top. The “whole day” button opens the week overview again.
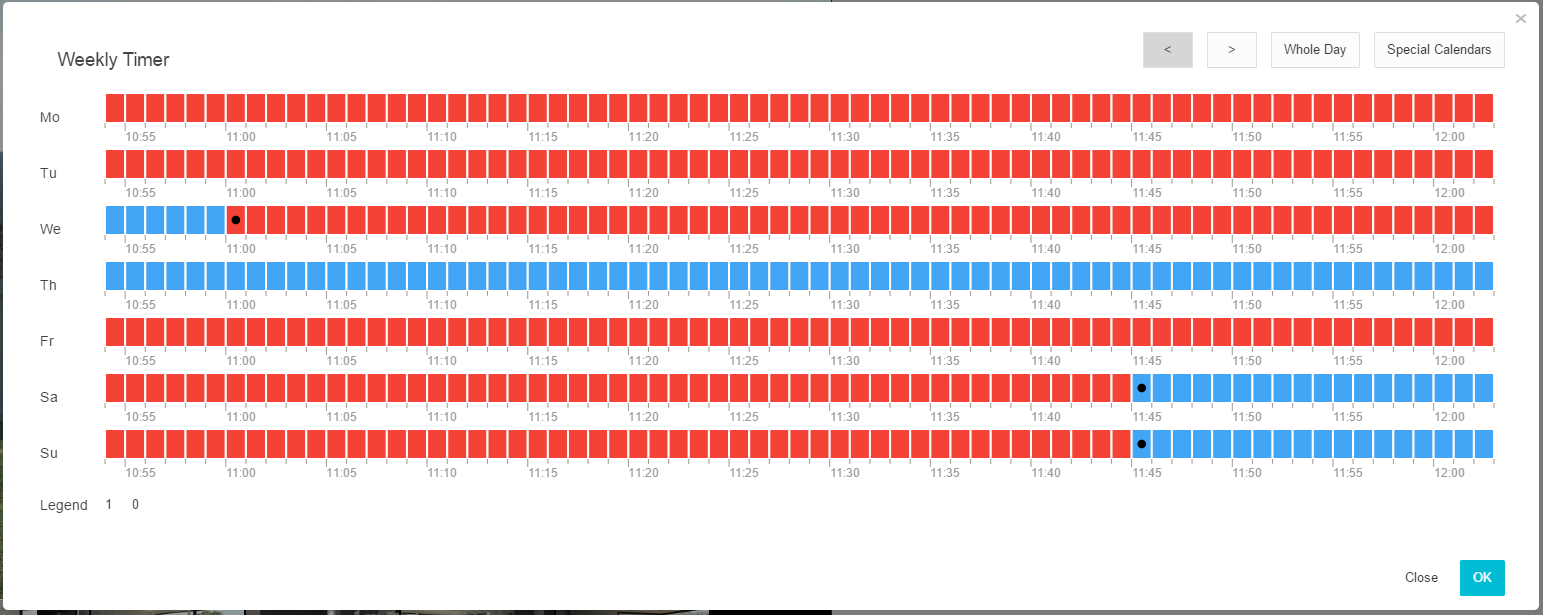
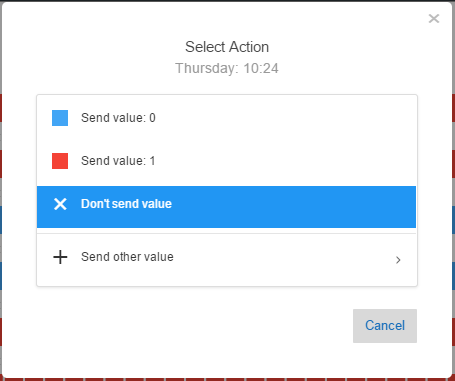
Setting switching times
To set the switching time, you need to click on one of the boxes in the detailed view. A further dialogue will appear which allows for selection of the actions (switches). Predefined actions can be selected. An action can be removed using “Don't send value” and there is the option of defining another value for the week timer output using “Send other value”.
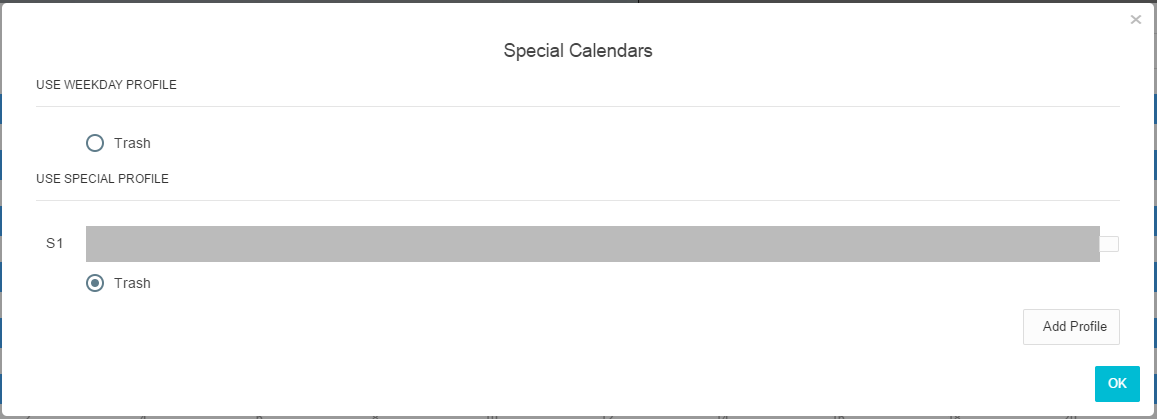
Special calendars
The week timer can be added for special days here. To this end, predefined special day profiles can be accessed, or a new profile can be created. The switching times defined here are executed if the special day input for the logic element is activated (see “week timer” description in the LOGIKEDITOR documentation) or a special calendar is defined in the calendar (see “calendar” description in the LOGIKEDITOR documentation).
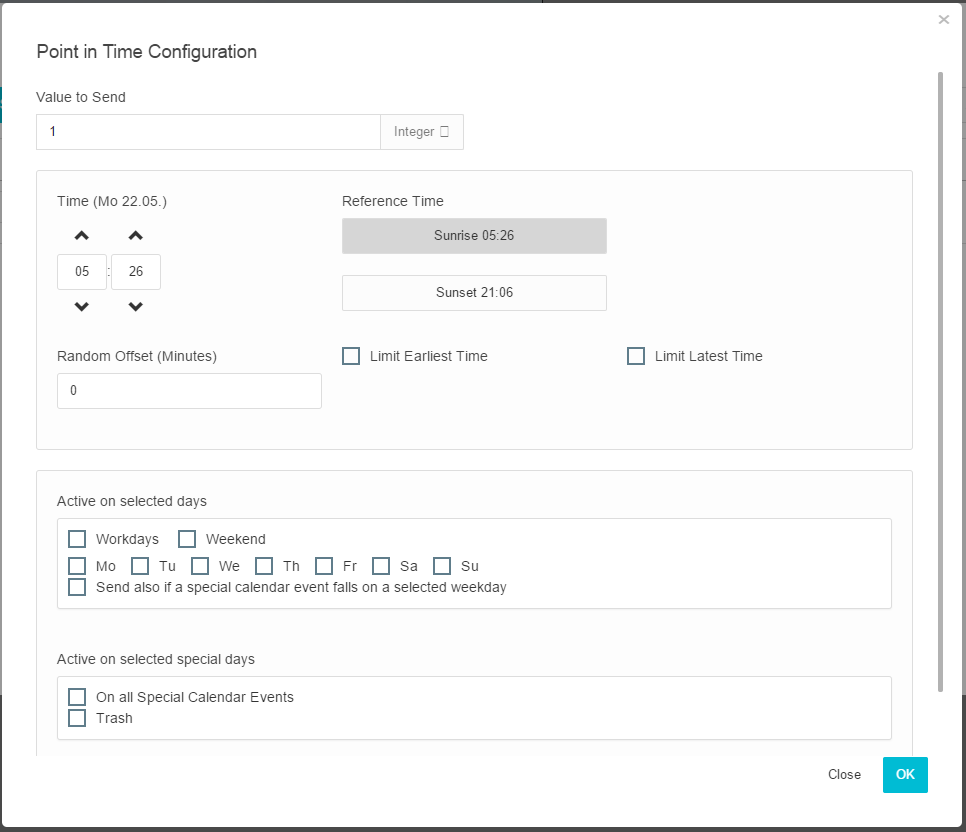
Astro timer configuration from the visualisation
If the visualisation user clicks on the appropriate element, a modal dialogue which allows for access to the switching time configuration for the Astro timer appears.
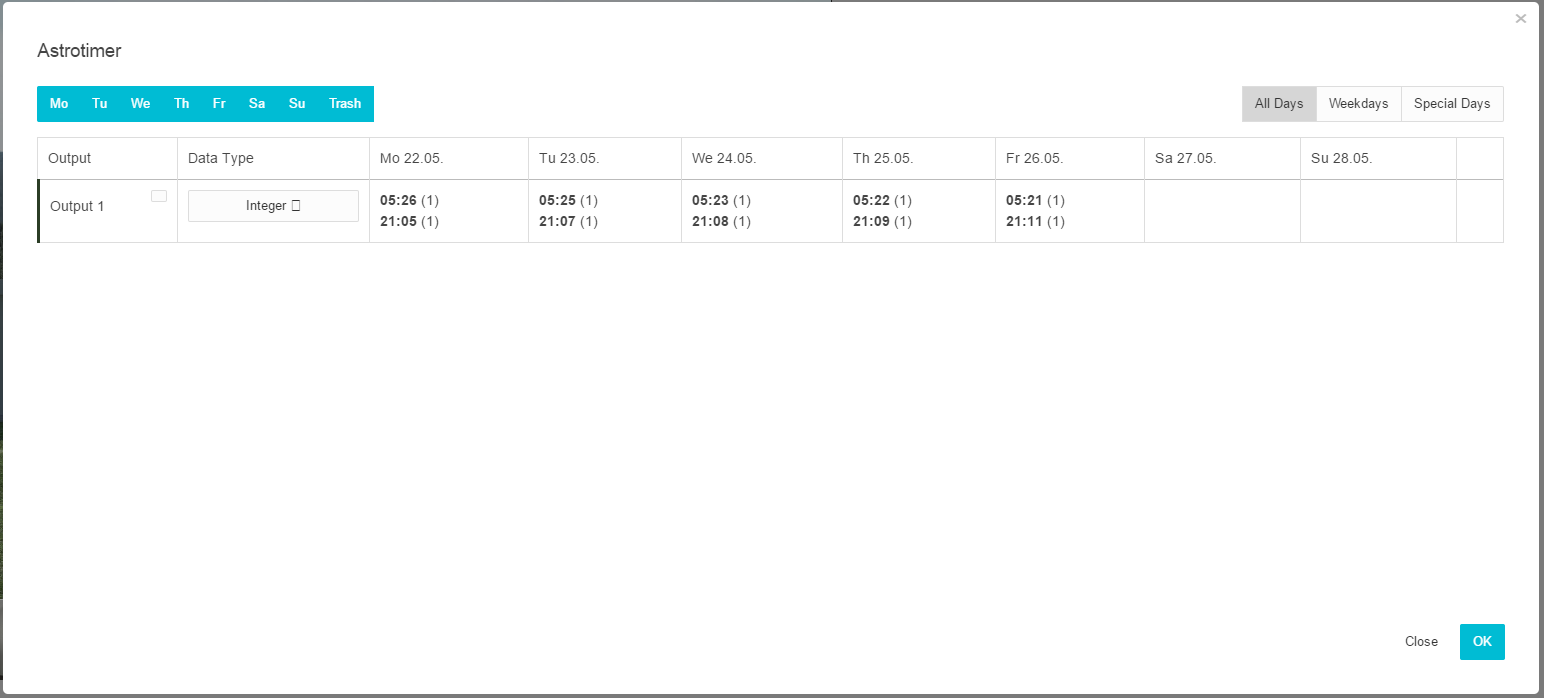
Switching time overview
You create a new switching configuration for an output with the help of the “+” button. The number of outputs is executed in the complete configuration in LOGIKEDITOR. The data type for the output is determined through the “data type” field. In addition, the individual switching times for the coming five days and, where applicable, the switches on special days are shown. The Mon-Sun order of the days is not changed here. The table can be sorted using the appropriate buttons at the top.
Switching configuration
The switches are configured in detail here. The data type for the value to be sent is configured in the switching times overview (s. o.). This includes the sunrise or sunset time for the actual day shown. A sun angle of -0.833° (“civil twilight”) is set for this. The reference period can be moved entirely using the “time” field. The Astro timer calculates the sequential switching in relation to this. If required, the switching can be moved to a random value and limited to an earliest and latest time. You define which weekdays and/or special days switching is executing on using the check boxes in the bottom section.