This element enables the user to access and edit several jobs. So, if the user may configure the settings of autotimers or change the outputs of a light scene. To do this the user gets a limited access to the job mask.
CONTROL L support
The element can also be used for CONTROL L. You will find more information about the User Interfaces in the following.
Specific parameters
Job
The dropdown menu provides all actually available jobs. The possible job types are:
-
Annual timer
-
Weekly timer
-
Light scene
The job name being selected in the Job Editor will be displayed as labelling within the visualization element.
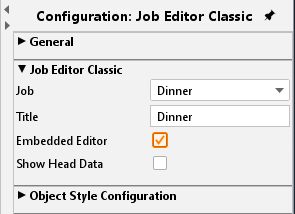
Tooltip
This text array defines the labelling being displayed in case of mouseover.
Integrated Editor
If this checkbox is activated the limited job mask will not be opened in a new (external) window but will be embedded into the visualization page. Especially for client PCs with a visualization running in the foreground permanently this is an important feature.
Object style configuration
All other options are described in chapter General Element Parameter.
Year timer configuration in CONTROL L
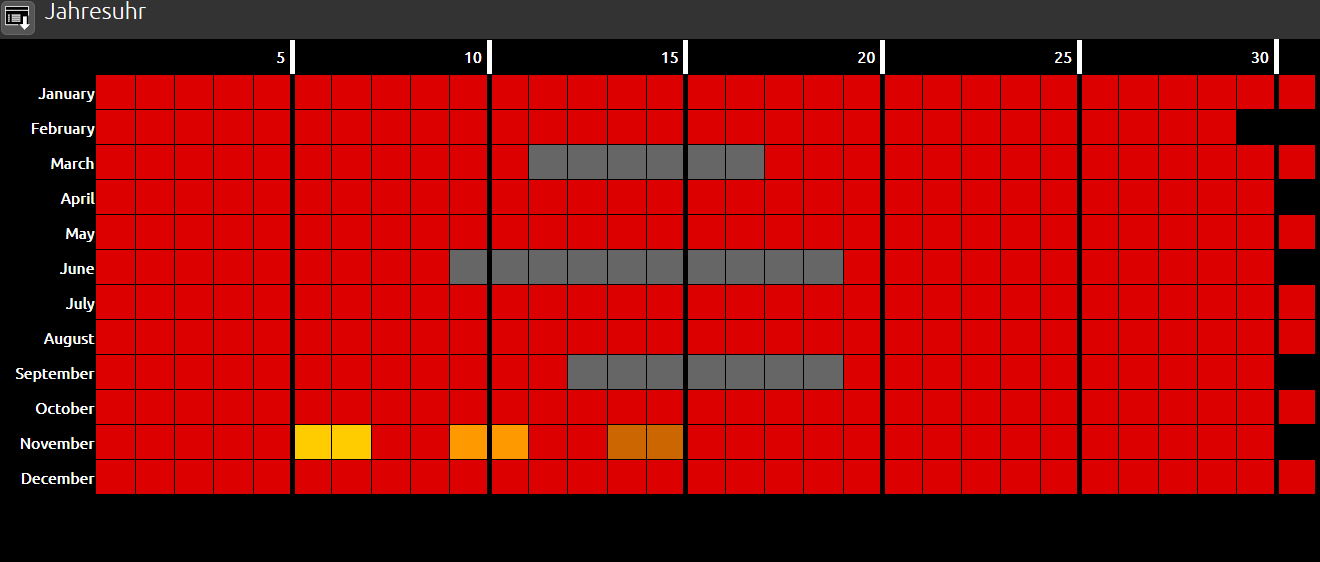
The year timer configuration in CONTROL L looks as follows:
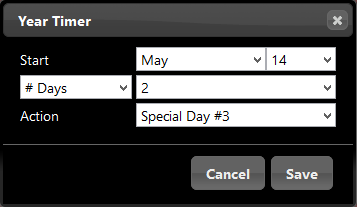
The year timer shows the complete calendar of a year. The days are represented by boxes. If you click on one of these boxes, a pop-up menu opens which can be used to set the different states.
Colour meanings:
-
Grey = Inactive
-
Red = Active
-
Yellow = Special day 1
-
Orange = Special day 2
-
Ochre = Special day 3
A menu in the left upper corner can be used to "Save", "Save & close" and "Close".
Note: If the option "Initialise timer" is enabled in the job, the timer will at once send its current state after each saving process. Depending on the extent of interconnection between the timer and other functions and the job, this can cause a temporary overload of the system! It is therefore recommended that you use this function sparingly.
Week timer configuration in CONTROL L
The week timer configuration in CONTROL L looks as follows:
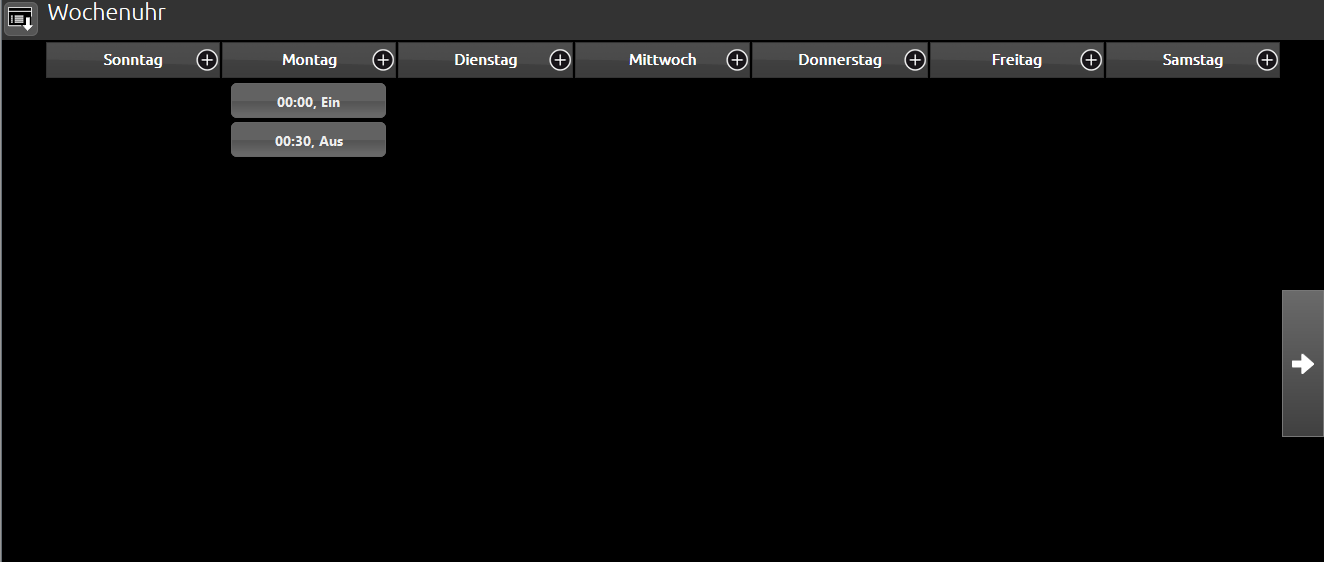
The week timer shows all days of a week and 3 additional special days in 10 columns that are arranged next to each other. You can use the arrow buttons on the left and right side of the screen, to move to the next or to previous columns. The "+" symbols next to each day can be used to create a new switching time. If you click on "+", a pop-up menu opens.
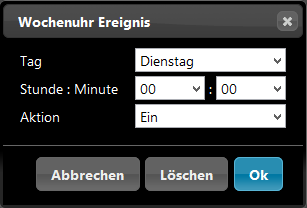
A menu in the left upper corner can be used to "Save", "Save & close" and "Close".
If the option "Initialise timer" is enabled in the job, the timer will at once send its current state after each saving process. Depending on the extent of interconnection between the timer and other functions and the job, this can cause a temporary overload of the system! It is therefore recommended that you use this function sparingly.
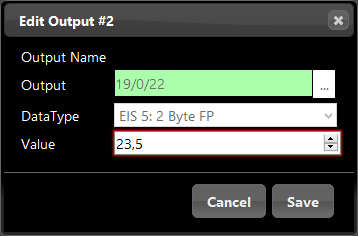
Lighting scenario configuration in CONTROL L
The lighting scenario configuration in CONTROL L looks as follows:
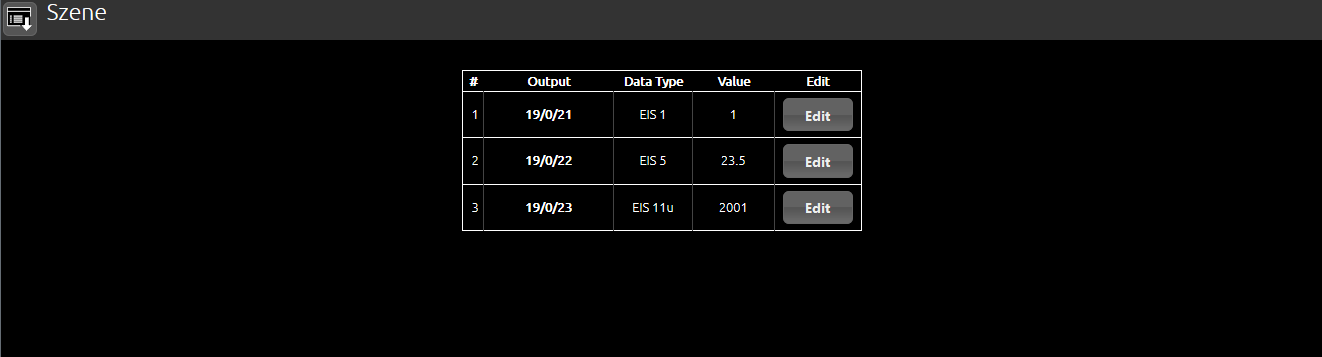
The lighting scenario configuration mask shows all outputs configured in the job. It shows the group addresses, the data type and the value. The user can only change the value by using the "Edit" function. Group address and data type cannot be modified in this mask. If you click on "Edit", a pop-up window appears in which the settings can be made.
A menu in the left upper corner can be used to "Save", "Save & close" and "Close".