Quick Reference Guide
EIBPORT V3.1
Item no. 10105 / 10505 / 10405
(STATUS 02.2026)
Factory defaults:
Default IP: 192.168.1.222
User name: admin
Password: eibPort
BAB TECHNOLOGIE GmbH
Hafenpromenade 1-2
DE - 44263 Dortmund
Phone: +49 (0) 231 / 476 425-30
Fax: +49 (0) 231 / 476 425-59
info@bab-tec.de
http://www.bab-tec.de
Made in Germany
SAFETY INFORMATION
Electronic devices may be mounted and assembled by qualified electricians only. The applicable accident prevention regulations shall be observed.
Network technology skills are required for the initial operation.
The choked bus voltage must not be used as operating voltage 12–30 V DC.
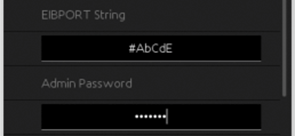
The EIBPORT string (character string) can be found on a label on the back of the device and in these instructions (see above). Please keep this string in a safe place. In case of loss, it is no longer possible to make configuration changes or to create backups.
If the device is connected to the internet, please observe the common safety measures in order to protect it from unauthorized access (firewall rules, passwords etc.).
Failure to observe these instructions can result in damage to the device, fire or other dangers. The Short Manual is part of the product and must remain with the end user.
Device structure
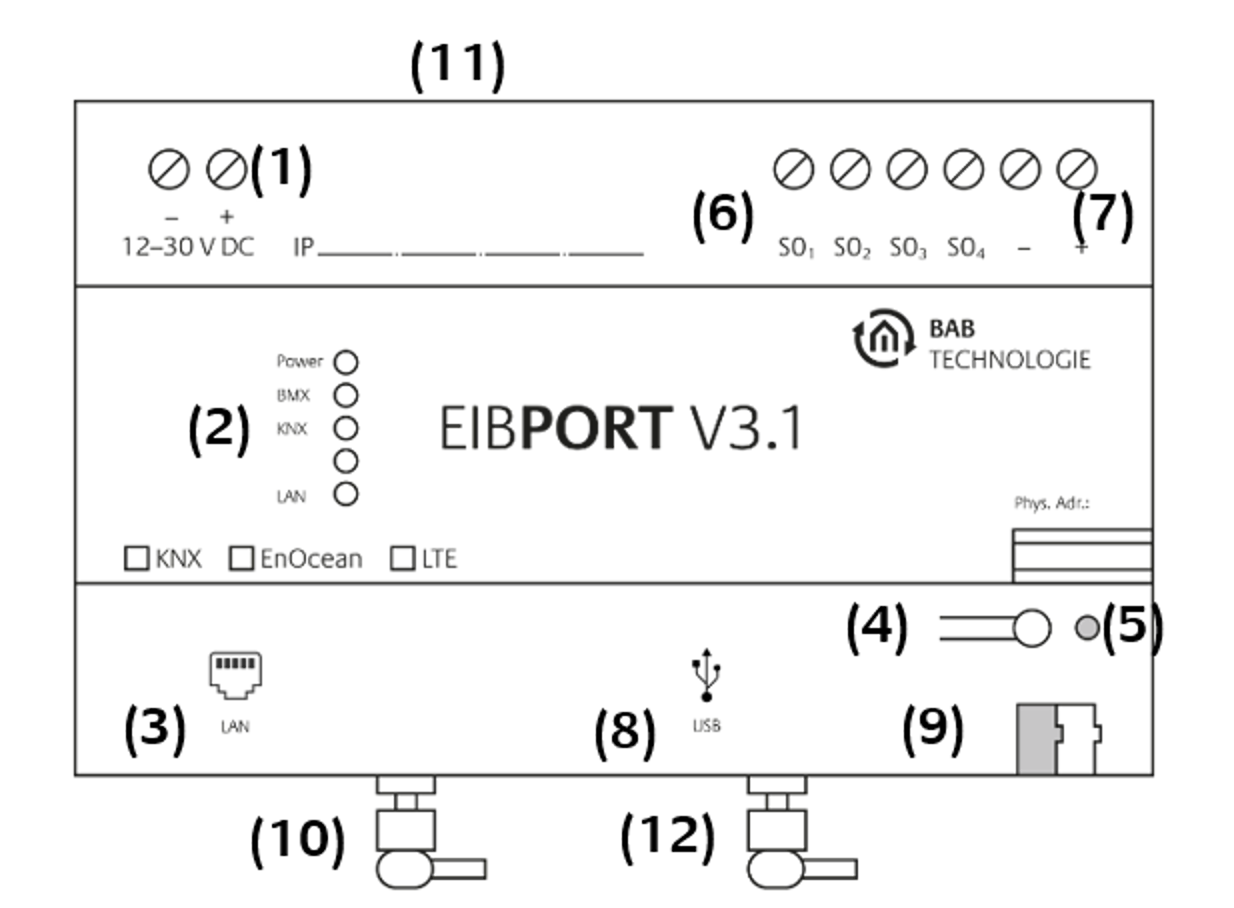
Connecting terminal for voltage supply 12–30 V DC, <= 4 VA
Signal LEDs
LAN (RJ-45) connector for Gigabit Ethernet
Test button for checking the KNX bus voltage (press ≥ 2 s) and for initiating the RECOVERY Function
Test button LED
4 x S0 interface (e. g. for energy counter)
Connecting terminal for S0 voltage supply 24 V DC
USB interface for SDMODULE and 1-Wire
("bus master" required, see separate compatibility list)Bus connecting terminal KNX/TP (for type 10105 / 10505 / 10405)
SMA female connector
EnOcean-antenna (for type 10505)
LTE-antenna “MAIN” (for type 10405)
SIM card slot (for type 10405)
SMA female connector for
LTE-antenna “SEC” (for type 10405)
Information for qualified electricians
Mounting of the device
Snap the device onto a mounting rail according to DIN EN 60715 (35x7,5 mm).
The device heats up in operation. Please observe the maximum ambient temperature and provide sufficient heat dissipation.
Connection of the device
For KNX: Connect bus line with the bus connecting terminal (figure 1, 9).
For EnOcean: Connect antenna for SMA female connector for EnOcean antenna (figure 1, 10).
For LTE: Connect LTE antenna with SMA socket (figure 1, 10 and 12). For more information, see chapter "INITIAL SETUP".
Connect voltage supply with the screw-type terminal (figure 1, 1) according to label (observe power consumption).
Plug network line (LAN) in the RJ45 female connector (figure 1, 3).
When using S0: Connect 24 V DC with the connecting terminal for the voltage supply of the S0 interface (figure 2, 5). Do not connect 230 V!
Connect S0 devices to S0 interfaces as follows (see figure 2, 4).
Connecting S0 Inputs
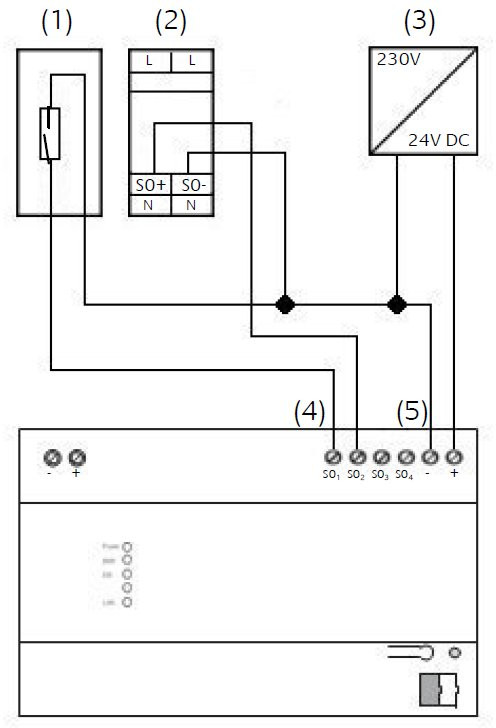
Reed contact for placing on the counter.
e. g. Eltako alternating current meter WSZ12D-32A
Voltage supply 24 V DC
S0 inputs (e. g. for energy amount counter)
Connecting terminal for S0 voltage supply 24V DC
Make ready for operation
For KNX: Switch on bus voltage. EIBPORT does not require any ETS application. It is not required to program the BCU. Further explanation in chapter "INITIAL SETUP".
For LTE: Please insert SIM card (device must be switched off) and note further explanations in chapter "INITIAL SETUP".
Switch on voltage supply. The device is ready for operation when the upper 3 LEDs (Power, BMX and KNX) and the LAN LED are green or flashing depending on the communication on LAN and KNX. Starting the device takes 1 minutes.
Operating status indication
Signal LEDs on the front of the device indicate the current operating status of the EIBPORT:
POWER LED
LED display | Status |
OFF | The device is not ready for operation. No operating voltage is supplied. |
GREEN | The operating system has been started |
Flashing ORANGE | The EIBPORT is currently booting. |
BMX LED
LED display | Status |
OFF | The application server has not been started. |
GREEN | The application server is ready for operation. |
Flashing GREEN | Communication takes place via the BMX protocol. |
KNX LED
LED display | Status |
OFF | The KNX driver has not been started. |
GREEN | KNX driver has been started. |
flashing ORANGE | KNX driver is processing telegrams. |
LAN LED
LED display | Status |
OFF | The EIBPORT is not connected to the LAN. |
GREEN | "Link" LED of the network connection |
flashing ORANGE | The EIBPORT exchanges Data with the LAN. |
Correct operating status
LED display | Status |
POWER | green |
BMX | green (flashes yellow during traffic) |
KNX | green (flashes yellow during traffic) |
LAN | green (flashes yellow during traffic) |
Access establishment
If the device has been started correctly according to the LEDs, the network access to the device can be established. If the device is located in another network area (observe standard IP address, see above), the IP address of the device must be adjusted first!
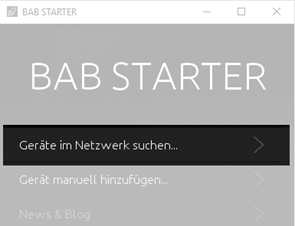
Please use the "BAB STARTER" application to configure and set up the EIBPORT.
BAB STARTER installation
For Microsoft Windows and Apple macOS, you get a ZIP file for download. This contains the installation file and must first be unpacked.
A detailed description of the BAB STARTER can be found in the accompanying documentation can be downloaded from www.bab-tec.de.
Windows installation
Run the unzipped file to start the installation.
Follow the instructions in the InstallShield Wizard and click on "Continue".
At the end, confirm the installation with "Finish".
Thereafter, the BAB STARTER can be found in the Windows Start menu file under "BAB TECHNOLOGIE GmbH".
macOS installation
Double-click the unzipped file to start the installation.
It is possible that your system will advise you of a non-verified developer. In this regard, please note the information on the "Apple Gatekeeper", see: https://support.apple.com/de-de/HT202491 , (Status 5 October 2015)
Follow the instructions of the installation process and click on "Continue" in order to continue the installation.
The message "The installation was successful" confirms the successful installation. The BAB STARTER symbol now appears in the "Programs" folder.
Adjust IP address
Use BAB STARTER in order to find the EIBPORT in the local network.
Start BAB STARTER via the following program icon:

Click on "Search for Devices…" in order to discover all currently available devices.
Entries under "Visited devices" may be outdated!
Please also observe the following notes:
In order for devices to be recognized, communication via "Multicast" in the network must be enabled.
Devices which are located in the same network area are displayed lighter than devices which are located in another network area.
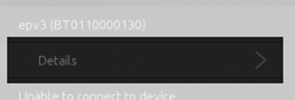
Search for the required EIBPORT from the list and click on the entry.
You can clearly recognize the EIBPORT by its serial number (BTXXXXXXXXXXXX); the device names displayed are not unique.
If the EIBPORT is not located in the same network address area, adjust the network setting of your computer beforehand!
Call "Details" via the menu,
to open the "Network Settings" submenu:
In this menu, you can change the IP address if the computer is located in the same network area as the EIBPORT. Overall, the menu allows the following settings:
EIBPORT name:
Assign a unique device name. This name will also be displayed in the BAB STARTER or in the DiscoveryTool.Use DHCP:
If activated, the EIBPORT waits for the automatic IP address assignment by a DHCP server.IP address:
Field for the manual assignment of an IP address. Enter the new IP address here.Subnet mask:
Enter the correct subnet mask. e. g. "255.255.255.0"Standard gateway:
IP address of the gateway of the local network. E. g. the internal IP address of the router.DNS server no. 1 – 3:
The IP address of a DNS server.
The DNS service is required for the resolution of host names to IP addresses. When the DNS service is not available, many services in the EIBPORT such as e-mail or weather display cannot be executed.
In order to save the settings, you require the EIBPORT string and the password of the user "admin".
Please click on "Apply Configuration" in order to save your settings:

A dialogue confirms the configuration change.
INITIAL SETUP
At the end of the initial setup, the settings can be checked with the BAB STARTER!
The function "Check settings" can be found under the menu item "Details".
Parameters in the ConfigTool
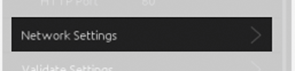
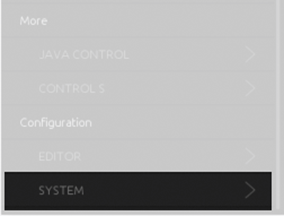
After having adjusted the IP address, make further settings within the context of an initial setup. The initial setup is made via the "System" menu ("ConfigTool"). The following parameters should be considered:
NTP time server for time synchronization
Physical address for KNX
Determination of the installation location
Set LTE SIM card parameters (only for LTE devices)
Access the EIBPORT in the BAB STARTER.
The device can be identified based on the serial numberAccess the "System" menu of the device
Enter user data (default settings: admin/eibPort) and the EIBPORT string (see above).
NTP time server for time synchronization
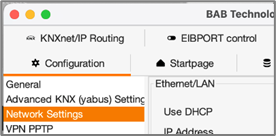
Switch to "Configuration" > "Network Settings" in the ConfigTool ("System").
The "Time server settings" can be found in the lower third.
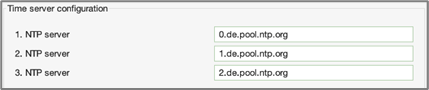
Enter the valid address of a time server (e. g. 130.149.17.21).
NTP is a time synchronization service via the network. As the EIBPORT works with an internal state table which derives its time stamps from the EIBPORT system time, it is important that this time is always correct!
Physical address for KNX
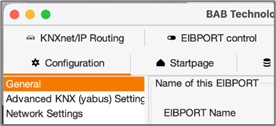
There is no ETS application for the EIBPORT. The physical addressing is carried out via the web interface.
Open the tab "Configuration" and the menu "General" in the ConfigTool.
Physical BCU address:
Enter the physical address of the EIBPORT here. The address must correspond to the installation location in the KNX system.
Please use a ETS "dummy" application for the ETS project to document the use of the physical address of the EIBPORT.
The ETS dummy application “Babtec.knxprod” can be found on the enclosed CD.
Indiv. Addresses for KNXnet/IP tunnelling:
Assign at least 2 free physical addresses from the KNX bus line in which the EIBPORT is located.
The ETS uses the "Tunnelling" connection in order to be able to use the EIBPORT as interface to the KNX bus. KNXnet/IP Tunnelling is activated by default in the EIBPORT (since f/w 3.4.2). The ETS requires the correct address in order to use the Tunnelling connection!
Determination of the installation location
Installation location: Choose the country in which the EIBPORT is installed.
This setting determines the time zone and the information on the position of the sun of the Astro Timer.
Click on "Save data to eibPort".
Insert LTE SIM card
(For detailed information on the LTE modem, please note the separate documentation "EIBPORT LTE Documentation " on the enclosed CD or download from www.bab-tec.de).
In order to start the initial commissioning of the SIM card, proceed as follows:
Switch off the device
Insert the SIM card in the correct orientation into the SIM card slot (please refer to the detailed documentation!)
Check that an LTE antenna is connected to the SMA socket labelled “MAIN” (Figure 1, 10)
A cold start is always required to recognize/read the SIM card.
Further programming
(A detailed description of all EIBPORT functions can be found in the EIBPORT documentation on
www.bab-tec.de).
For further programming, please use the EIBPORT editors. These included:
Editor for free visualization (CONTROL L / JAVA CONTROL)
Editor for CUBEVISION2+
Editor for CONTROL S
Editor for EIBPORT Jobs (services)
Graphical editor for logic groups
Free Component Builder 2 - Editor
Rest API interface
EnOcean configuration (only for devices with EnOcean interface)
ESF data and KNX Project import
You have the following options for retrieving the visualization:
CONTROL L = free visualization, web-based
CUBEVISION 2 = automatically generated 3D visualization, web-based, automatically scaled to the different display sizes.
CUBEVISION2+ APP = free of charge for iOS® und Android®.
JAVA CONTROL = Java-based, free visualization (only via the BAB STARTER)
CONTROL S = basic table visualization for simpler terminal devices, web-based.
Notes concerning browser use
The web-based EIBPORT visualizations (CONTROL L, CUBEVISION2+) use current browser technologies such as HTML 5 and CSS.
Therefore, please only use the following browsers for display:
Google Chrome
Mozilla Firefox
Apple Safari
EIBPORT RECOVERY Function
(From date of manufacture: 01.2021)
The recovery function of the EIBPORT restores the factory state if required.
All project data will be deleted!
To start the recovery function, press the test button (Fig. 1, 4) and switch on the EIBPORT.
Keep the test button pressed (approx. 10 seconds) until the red test button LED (Fig. 1, 5) lights up.
From this moment the recovery function is activated and the test button can be released.
ATTENTION: During this process, the device must never be disconnected from the power supply.
Plug & Play VPN Service
The pre-installed VPN service in the EIBPORT is a comfortable "Plug & Play" solution for secure remote access.
The integrated “HOOC CONNECT E” gateway establishes an encrypted and secured VPN connection with the HOOC Cloud for the external access.
The configuration of port forwarding or special requirements on the internet connection as well as additional hardware are not necessary.
Further information and the separate documentation can be found at the following internet address: http://bab-tec.de/hooc
Firmware updates
You can find information concerning firmware updates for the EIBPORT on our website and in our newsletter. Firmware updates are carried out directly via the EIBPORT web interface. For more information, see the EIBPORT manual.
Technical data
Dimensions (W x H x D): 144 x 90 x 64.5 mm
Operating voltage: 12 – 30 V DC
Power consumption: ≤ 4 VA
Bus voltage via KNX/EIB
Ambient temperature: 0 to 35 °C
Processor: quad-core ARM
Memory: 2 GB RAM, 16 GB Flash
Operating system: Embedded Linux
GENERAL INFORMATIONS
Disposal instructions

Old appliances must not be disposed of with household waste! Dispose of old appliances at a collection point for electronic waste or via your specialist dealer. Dispose of the packaging material in the collection containers for cardboard and paper.
[WEEE-Reg.-Nr.DE55712707]

[DE1921130422687]
Warranty
We reserve the right to make technical and formal changes to our product in the interest of technical progress. We provide a warranty in accordance with the statutory requirements.
If you are not sure whether your device is damaged, please contact our support:
+49 (0) 231 / 476 425 30 or
Please request an RMA form before you send the damaged device.
Please observe that we cannot accept unpaid deliveries or deliveries without RMA form!
///