4.1 CONTROL ELEMENTS
Various control elements are available for creating the CUBEVISION visualisation. You can select these and insert them into your project. The properties and functions of the elements are to be configured according to your applications.
The following control elements are available:
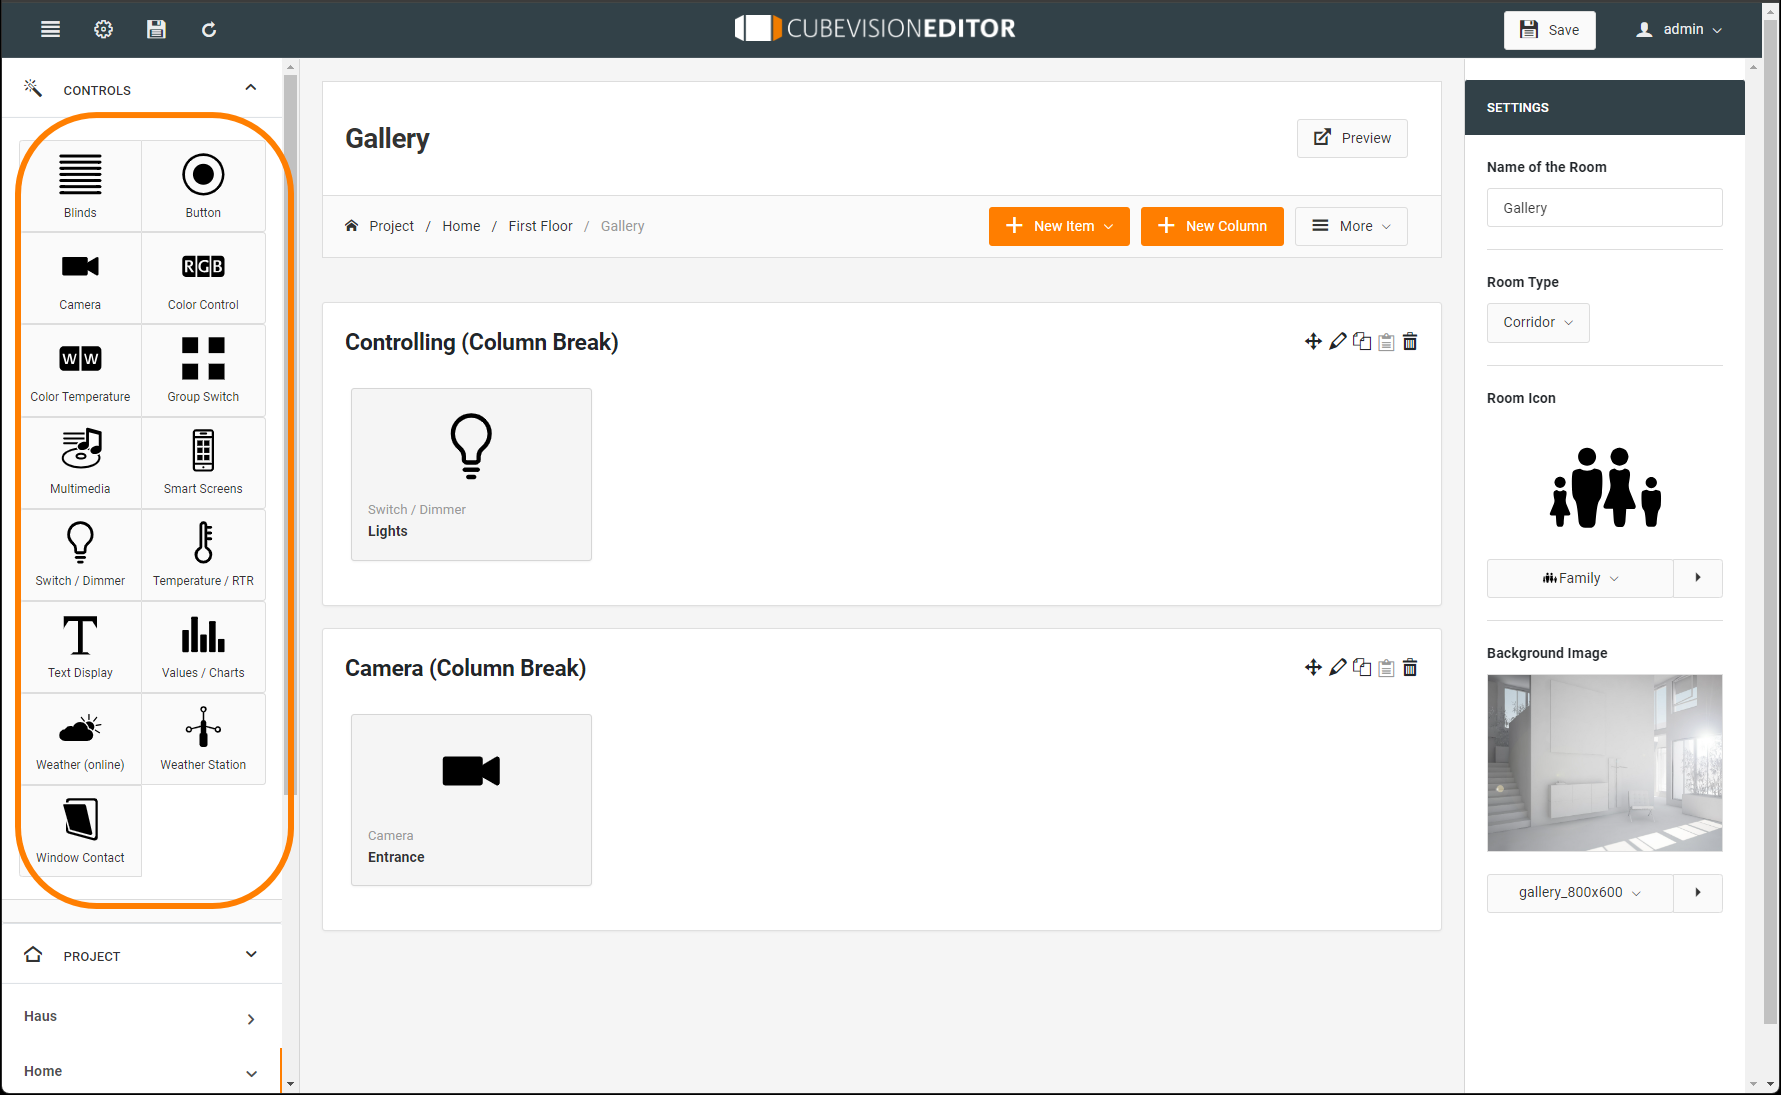
CUBEVISION Editor - Control elements
Blinds
Button
Camera
Color Control (RGB)
Color Temperature (Tuneable White)
Group Switch
Multimedia
Smart Screens
Switch / Dimmer
Temperature / RTR
Text Display
Values / Charts
Weather (online)
Weather Station
Window Contact
The elements are either dragged&dropped from the left-hand column of the control elements into the desired room column or automatically inserted at the end of the room currently called up via the "+ New element" drop-down list (subsequent screen copy).

Bedienelement – Add element direct via Pull-Down menu
There are various tools in the editing screen for configuring the operating elements (described in the order from left to right).
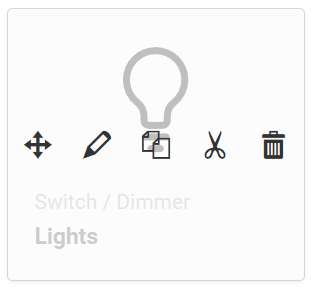
The first control icon can be used to move the elements within the open project
The pencil icon is used to call up the configuration for the respective element type in order to make or change the configuration.
The copy icon is used to duplicate the control element with the current configuration. This allows templates to be duplicated quickly and only specific settings need to be adjusted.
The cut icon can be used to insert the configured control element anywhere in all projects in CUBEVISIONEDITOR via the clipboard.
The delete symbol is used to delete the control element with all its settings.
Standard settings for the control elements
The following settings are standard options that are equally available in almost all controls. The setting menu is in the right column with the following options:
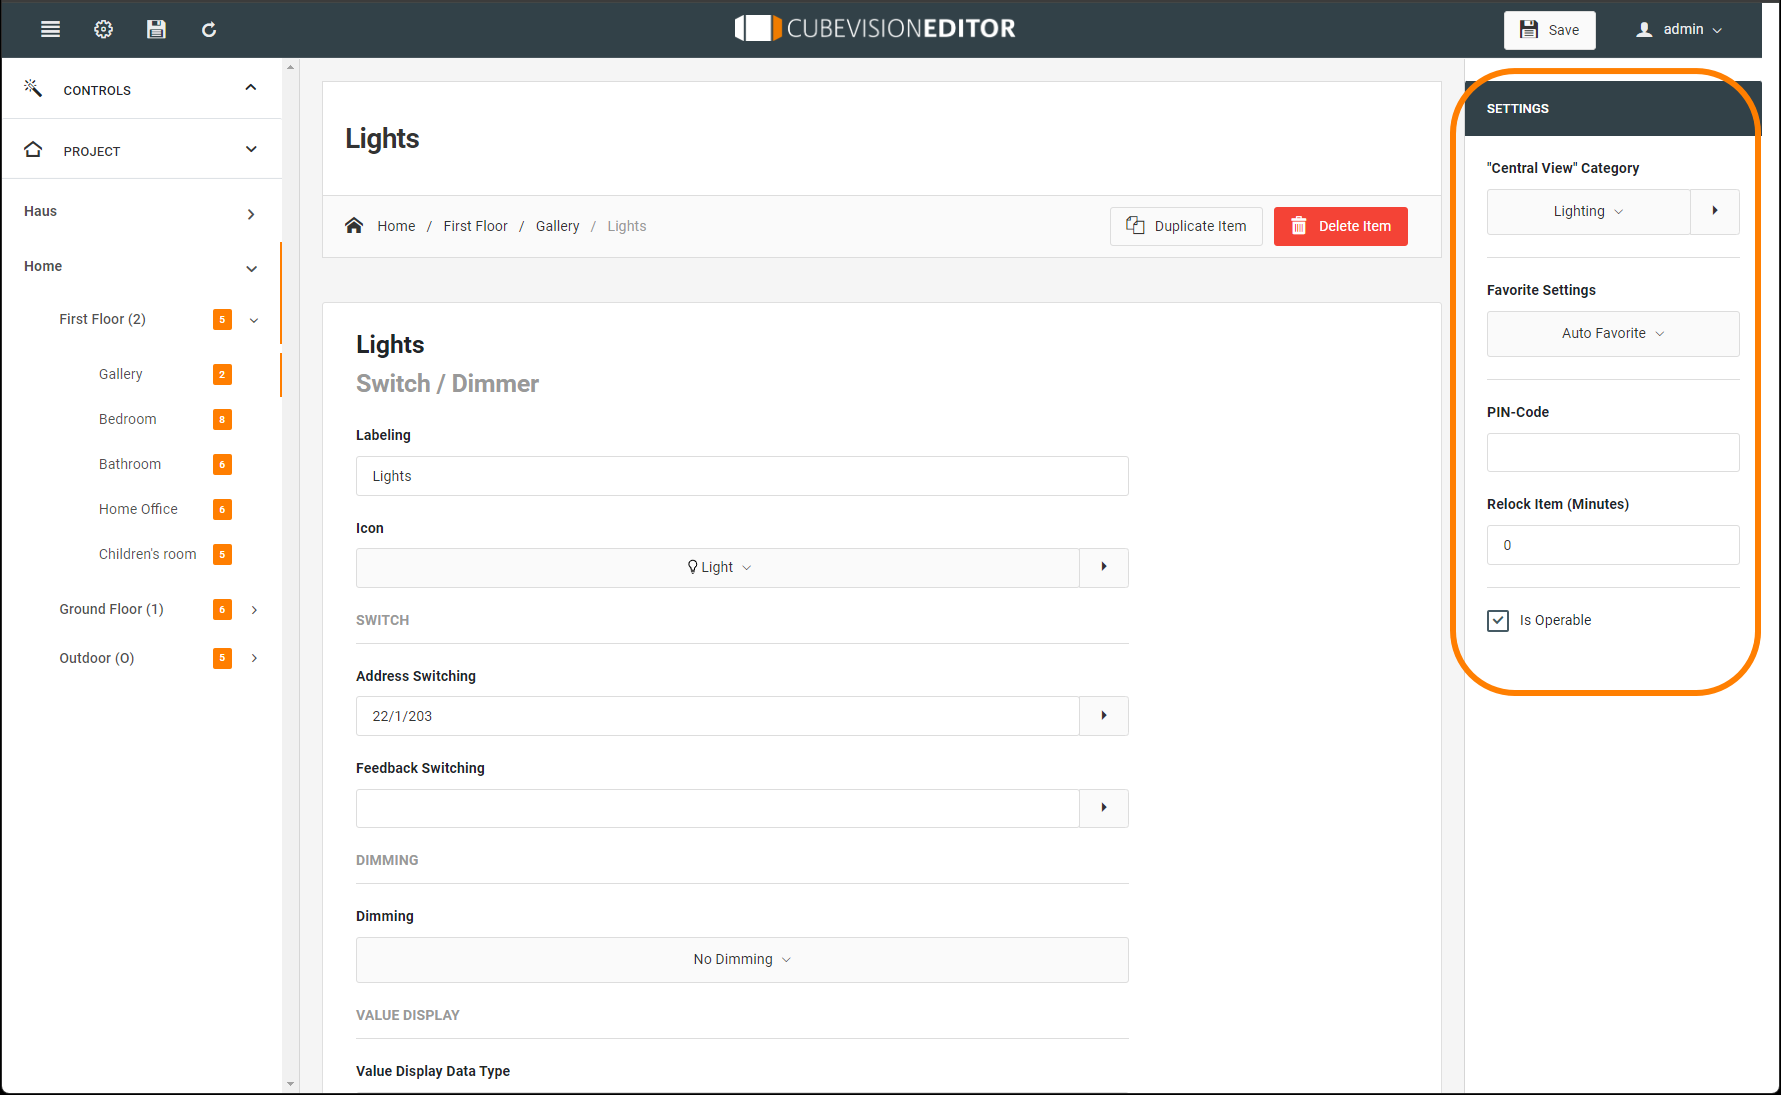
"Central View" Category: determine here which Central View category ("Central View") the respective element is assigned to. The "Central View" menu bar is displayed above the CUBEVISION and provides central access to a group of elements. In this way you can, for example, group all light switches or all heating controls behind a central menu item. The categories can be configured in a separate menu, accessible with the help of the arrow key to the right of the selection.
Favourite Settings: This menu item determines whether this control element is listed as a favourite in the ICP or is displayed at all. Possible options are:
Automatic Favourite.
Include this control element in the Favourites function. This means that the CUBEVISION determines the position of the control element in the ICP itself (favourite ranking) and changes it if necessary. The more often the control element is used, the higher it is placed in the list.Always Show as Favourite.
This selection deactivates the favourite ranking for this control element and the position of the control element can be set manually. The control element is always shown in the ICP.Never show as favourite.
With this selection, the control element is not displayed in the ICP, i.e., only in the ECP.

CUBEVISIONEDITOR - Settings Operating elements
Favourite Rank
This option is only active if the favourite setting "Always show as favourite" is selected. The option offers the selection of which fixed position the control element takes in the ICP. A position value from 1 to 8 is assigned.
PIN-Code
The element is locked. To unlock it, the specified PIN code must be entered.
Relock item (Minutes)
The PIN code must be entered again after the specified time in minutes.
Is Operable
This parameter defines whether an element can be operated or whether it should only serve as a pure display element. In this case, this control element does not send telegrams, but only receives telegrams.
The favorites list (ICP) is max. 8 height units high. Depending on the space required by each individual control element (depending on the element, 1 to 8 height units are required), 8 elements do not always fit in the ICP.
///