10 SMART FUNCTION CREATOR
SCENES AND SMART HOME FUNCTIONS DIRECTLY IN THE VISUALIZATION.
With the »Smart Function Creator«, you can create scenes and smart home functions very easily and intuitively. Simply add visualization elements to a scene with drag & drop and use clocks und events as triggers. You can combine multiple triggers with AND resp. OR connections. That’s how easy it is to create smart home functions with CUBEVISION 2.
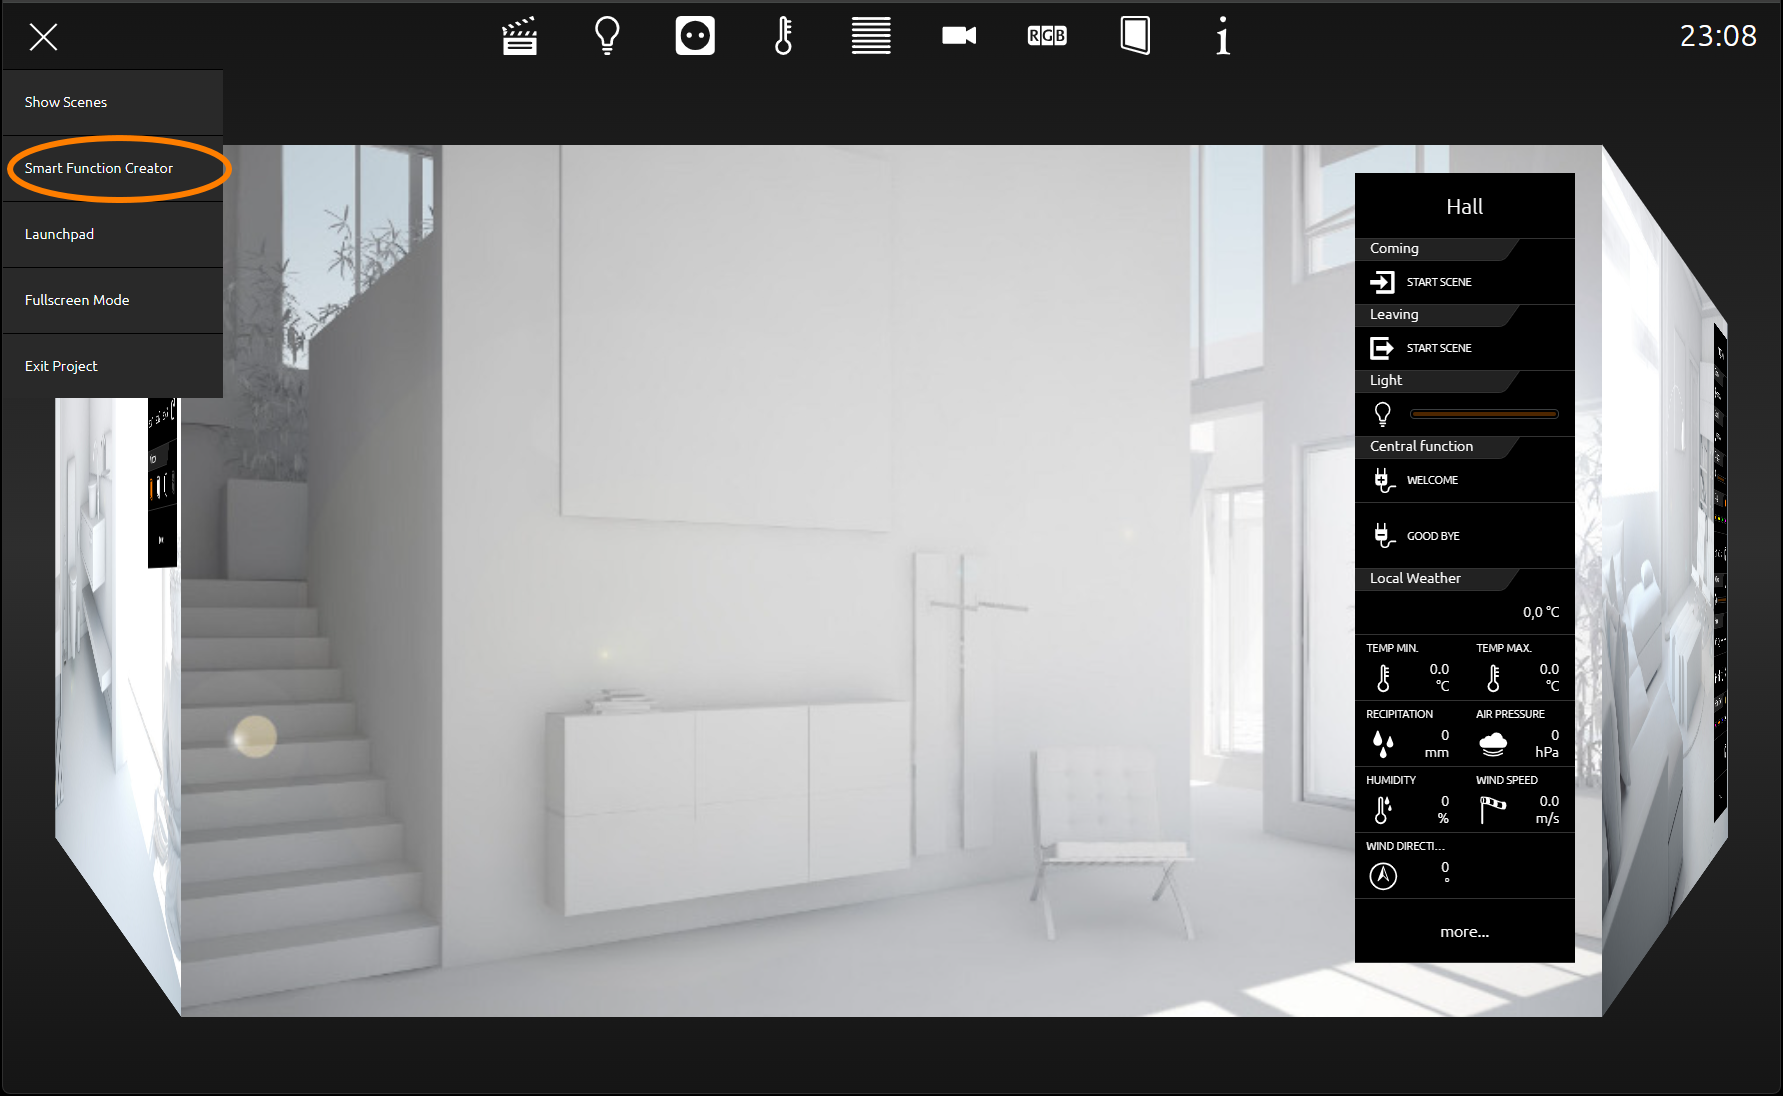
Open Smart Function Creator
Pressing the „burger menu icon“ will open the menu. Pressing „Smart Function Creator“ will enable the drop zone (figure).
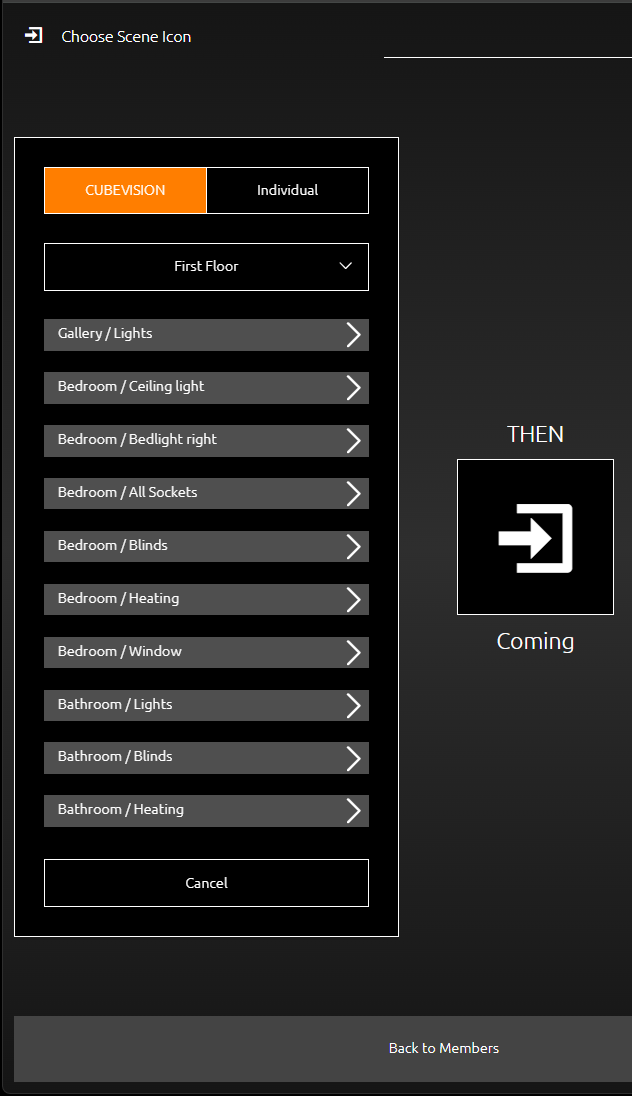
You can drag & drop the desired elements from the Instant Control Panel [ICP] or Extended Control Panel [ECP] into this drop zone (figure).
Drop Zone
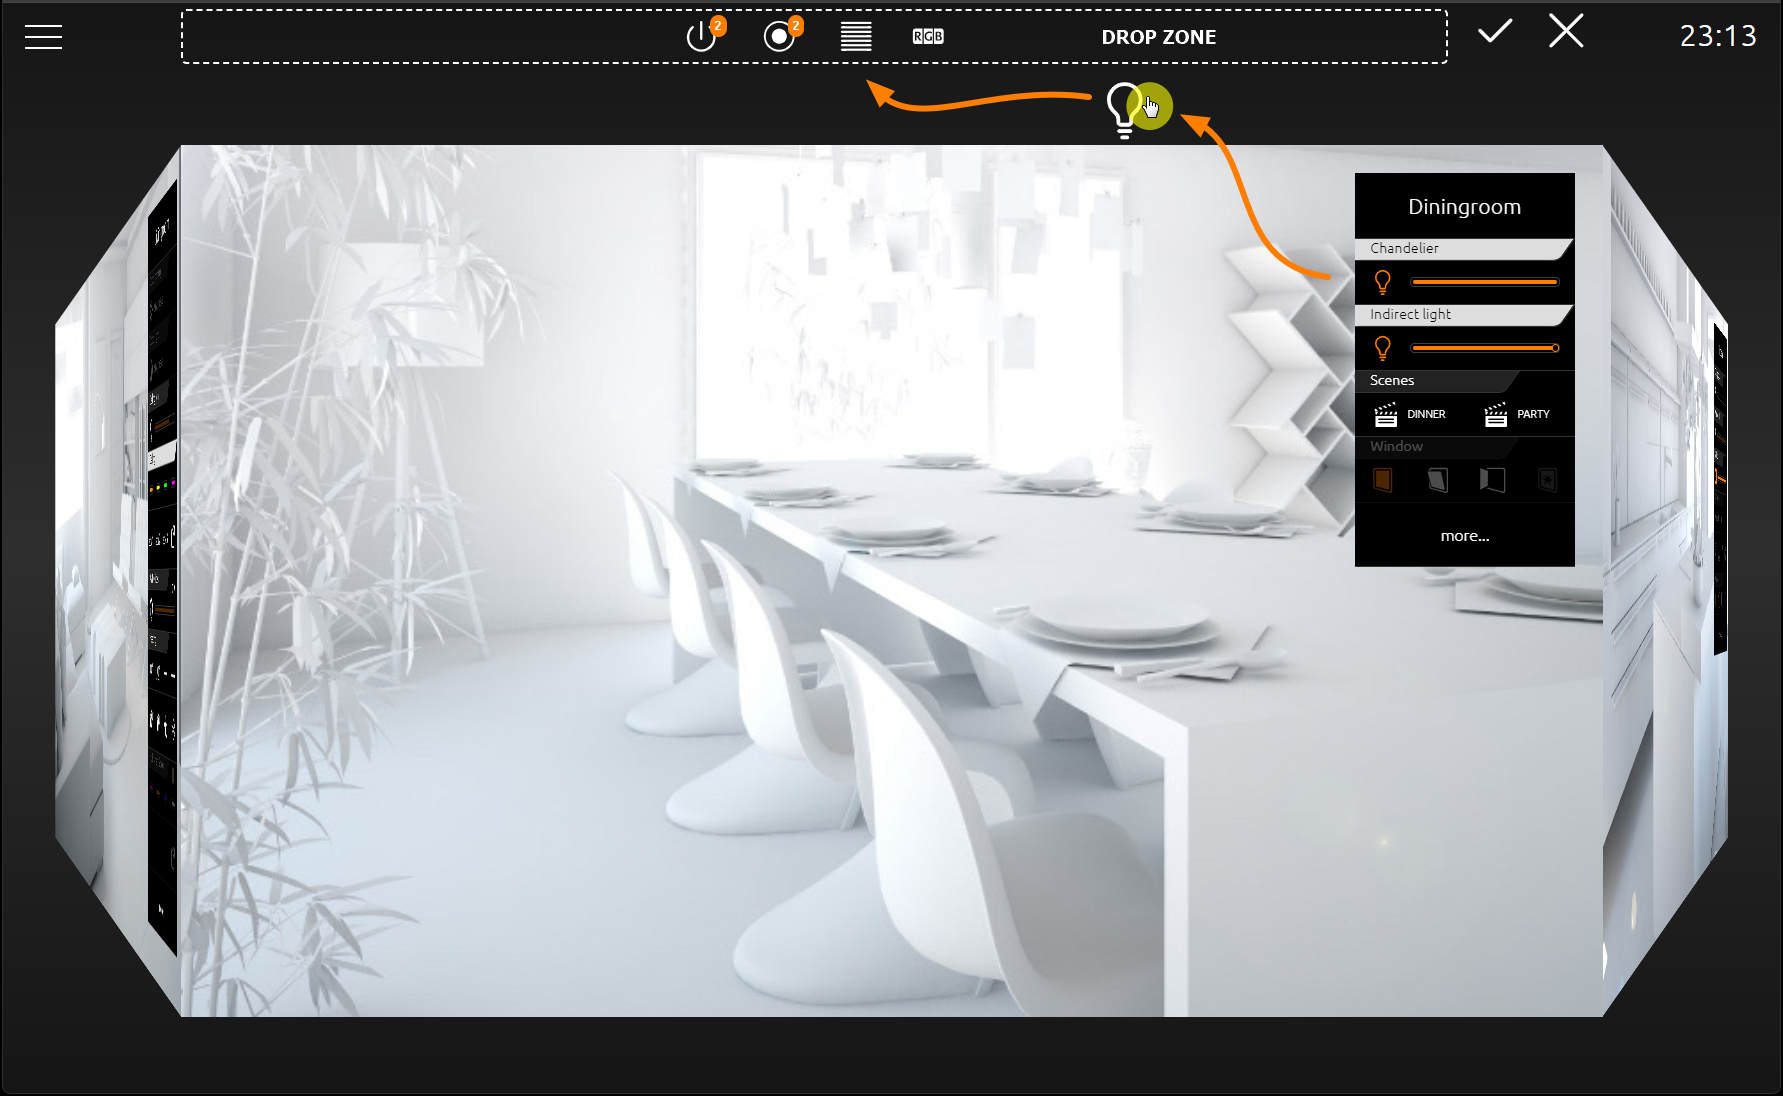
Drop Zone
Drag the desired elements from the Instant Control Panel [ICP] or the Extended Control Panel [ECP] into the drop zone using drag 'n' drop. You can switch between the individual rooms and assign all the desired elements to the drop zone. Once all elements are in the drop zone, confirm your selection by clicking on the confirmation symbol (tick). You are automatically taken to the scene overview.
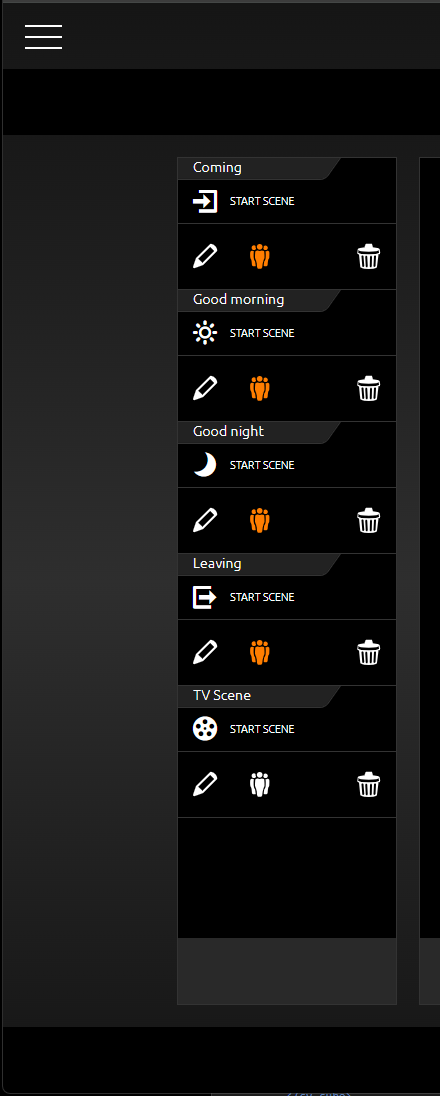
Scenes Overview
The scene overview lists all the elements you added to the drop zone (see figure). The order corresponds to the order in which you added them.
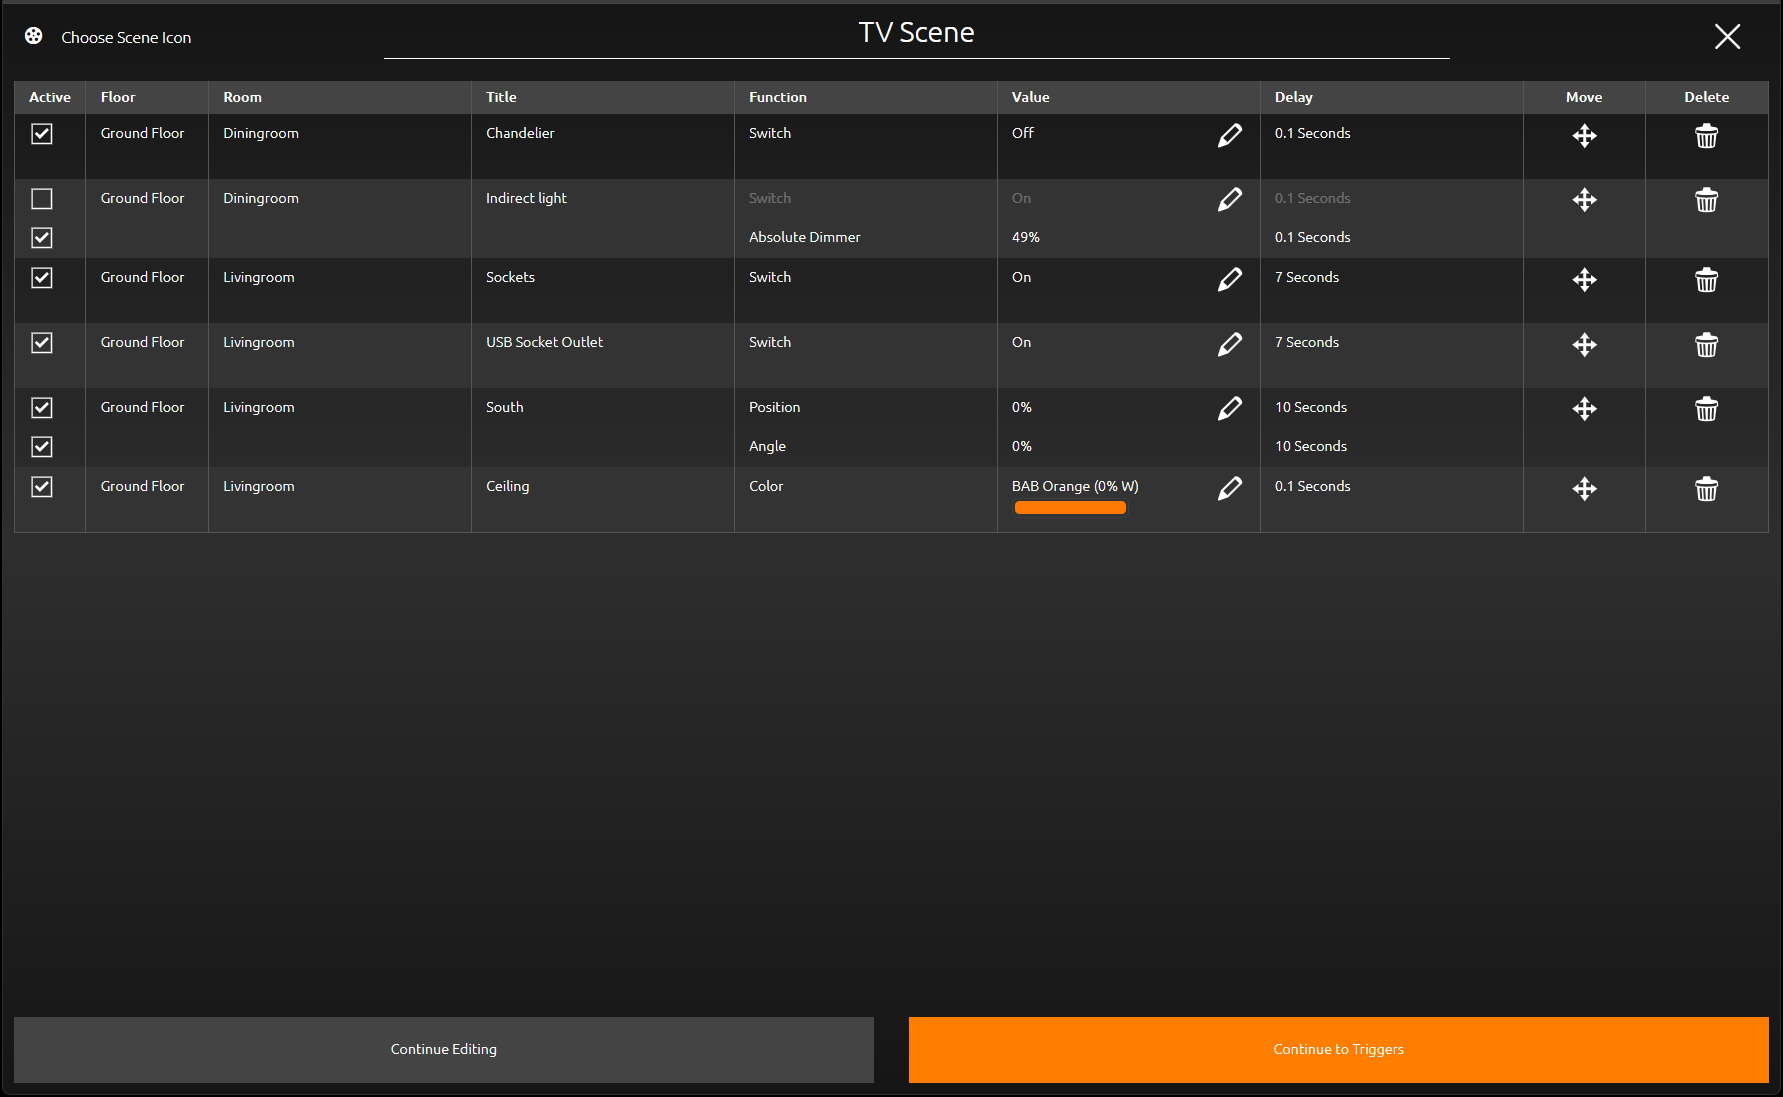
Scenes overview
You can edit individual elements in the scene overview at any time.
Active Every element is active by default. If an element has multiple functions, they all will be active. Uncheck the box here to deactivate an element or individual function of an element.
Deactivated elements or functions will be ignored when executing the scene. You can reactivate them at any time by checking the box again.Floor The name of the floor in which the room with the element is situated. This name is assigned in the CUBEVISION Editor.
Room The name of the room to which the element belongs. This name is assigned in the CUBEVISION Editor.
Title The name of the element itself. This name is assigned in the CUBEVISION Editor.
Function Lists the functions of the element.
Value Lists the values of the elements as they will be set in the scene. You can edit these values here, with the exception of the RTR element. The values of RTR Elements can only be changed in the Instant Control Panel [ICP] or Extended Control Panel [ECP] prior to adding them to scenes.
Delay You can configure a delay between individual elements of your scene. The delay is set in seconds.
Example: You configure a 5 seconds delay between switch „Reading Lamp“ and switch „ind. lighting“. If you start the scene now, the first two elements will be executed without delay, then the scene pauses for 5 seconds before continuing to execute the other elements.Move Drag and drop this icon to chance the order of the elements.
Delete Press the delete icon to remove elements from your scene.
Give your scene a title. This will help you distinguish between scenes later on. Press or left-click into the field „Please enter a scene title“. In addition to a title, you can also assign an icon to your scene. Press „Choose scene icon“ and choose one of the 450 provided icons. The icon will appear in manual triggers and the Launchpad, if configured.
If you need to add additional elements to your scene at this point, press the button „Continue editing“. The cube and the drop zone containing the elements you added so far will be visible again, you can add more elements and check out the scene once more.
Otherwise, press „Continue to triggers“, to configure how your scene should be triggered (cf. figure).
Scenes Trigger
There a three types of scene triggers: „Time and Date“, „Event“, and „Manual“
You can use individual triggers or combine them with „AND“ as well as „OR“. If a scene for instance should run automatically on a schedule, provided some conditions are met, you must combine the time and event triggers with „AND“. You could however additionally configure a „Manual“ trigger. This trigger is then combined with the first trigger in a „OR“ way.
The scene will start either automatically, if time and event conditions are all met, or it can be started manually, independent of the event conditions of the time trigger.
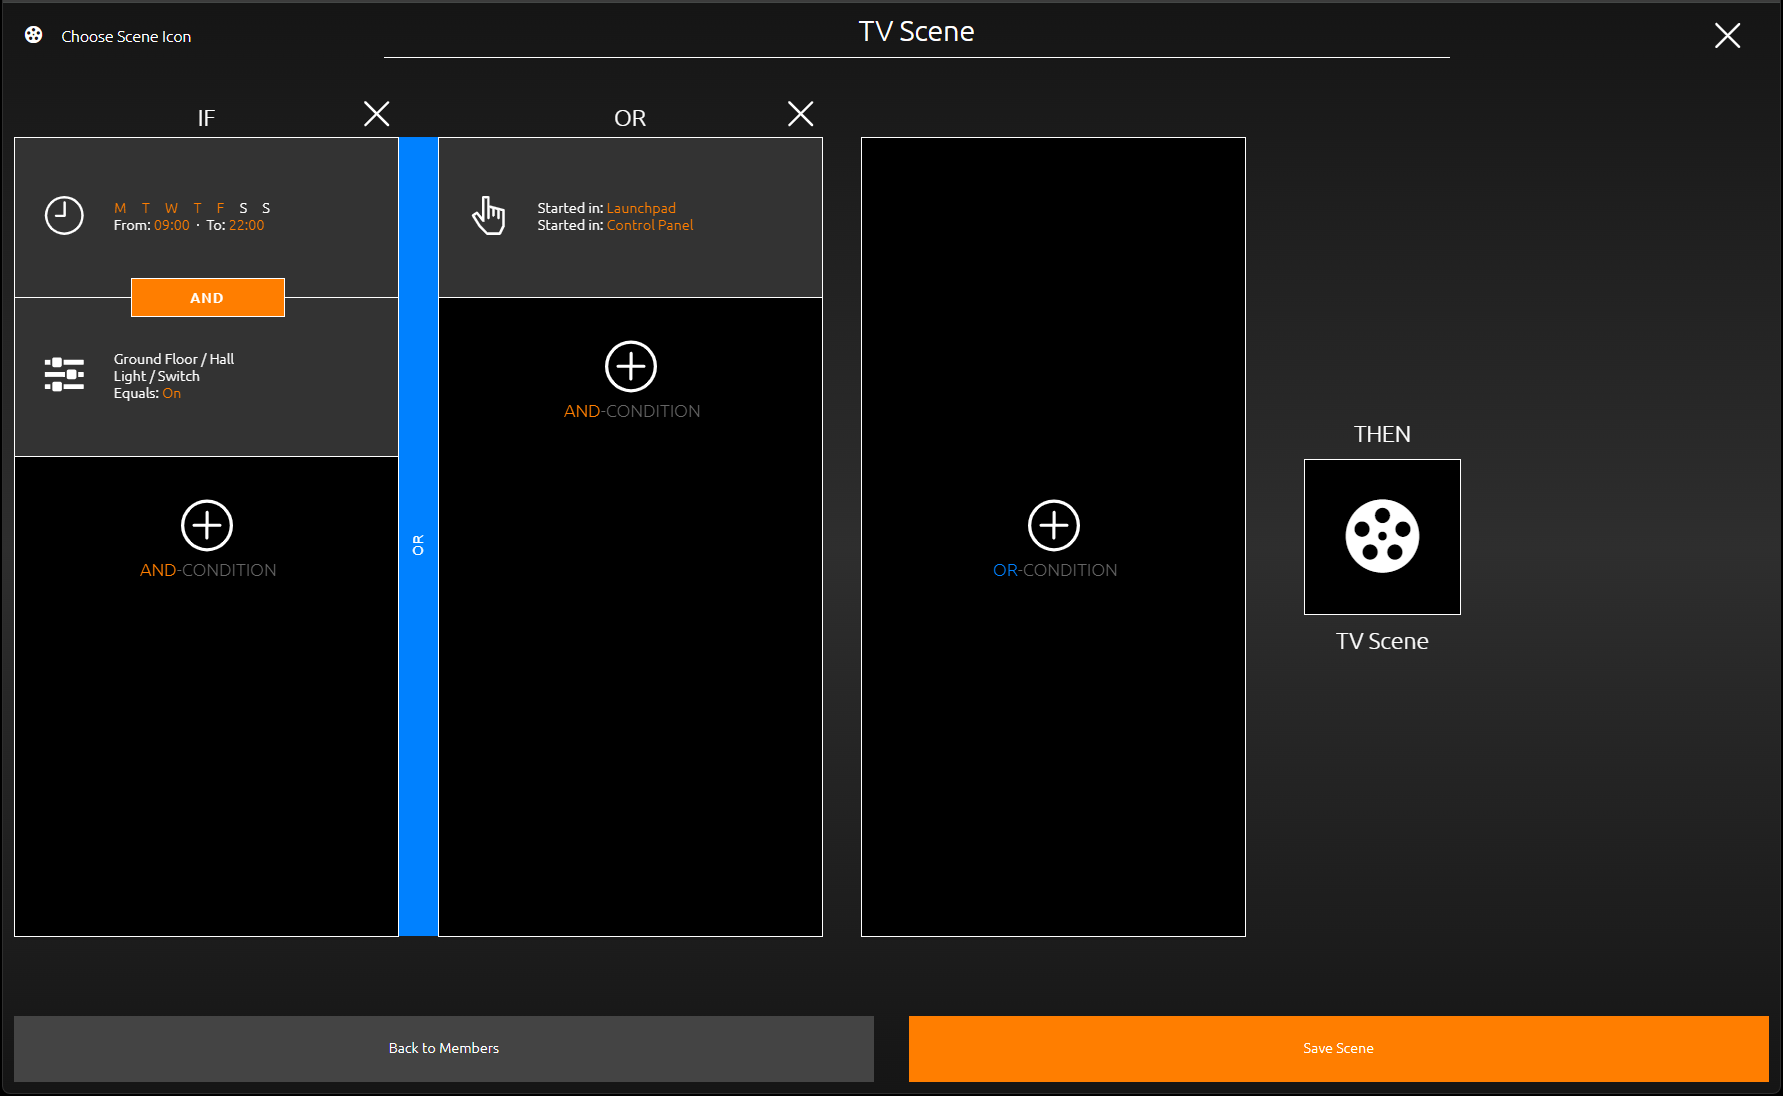
Scenes Trigger
Trigger Types
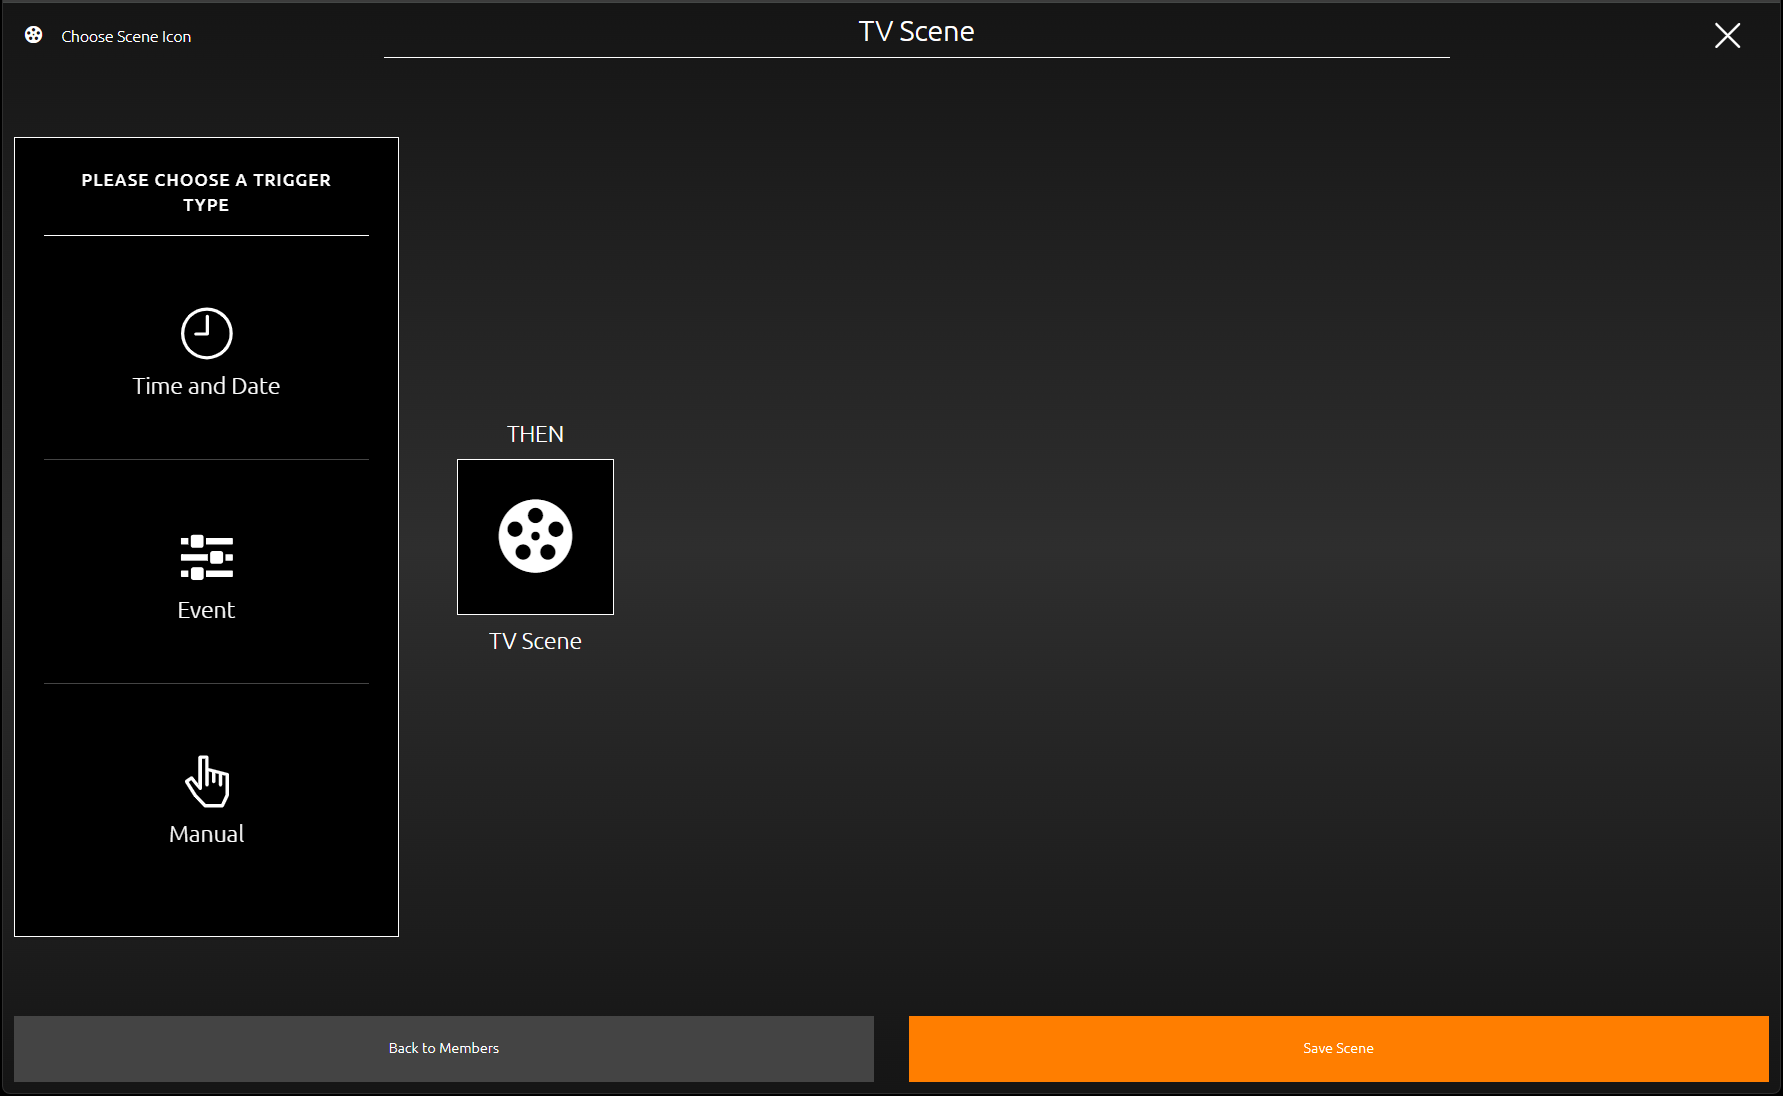
Trigger Types
Time and Date
This trigger type is a simple weekly timer, with optional “astro” timer functionality.
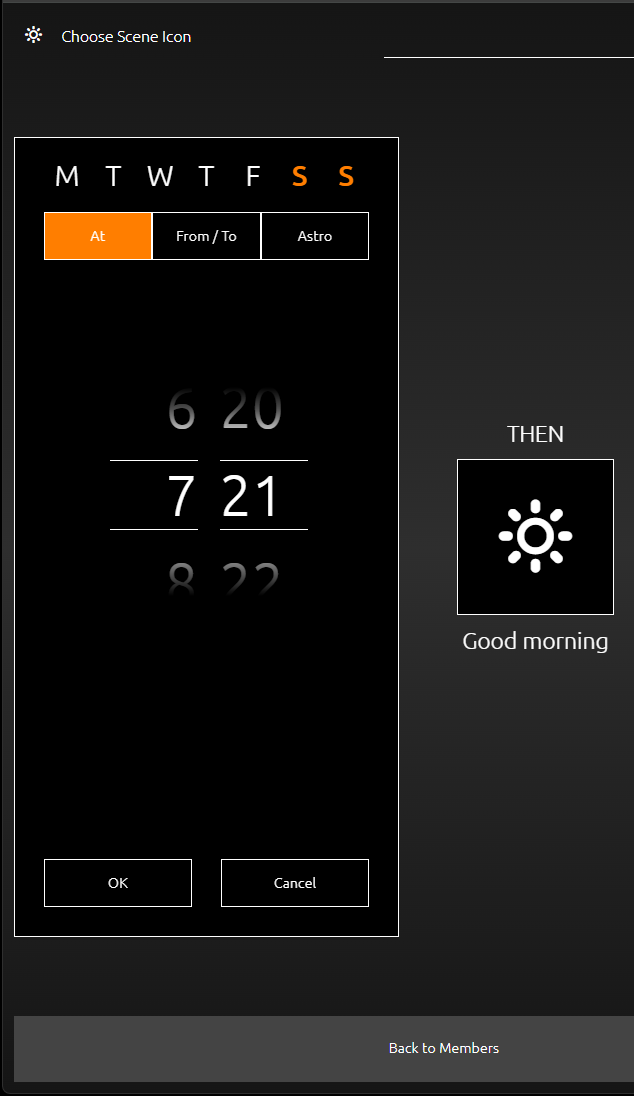
Type: At
At: In this mode, the scene will be triggered at the exact configured time, on the selected days of the week. Selected weekdays are highlighted in orange. At least one weekday must be selected in order to activate the timer.
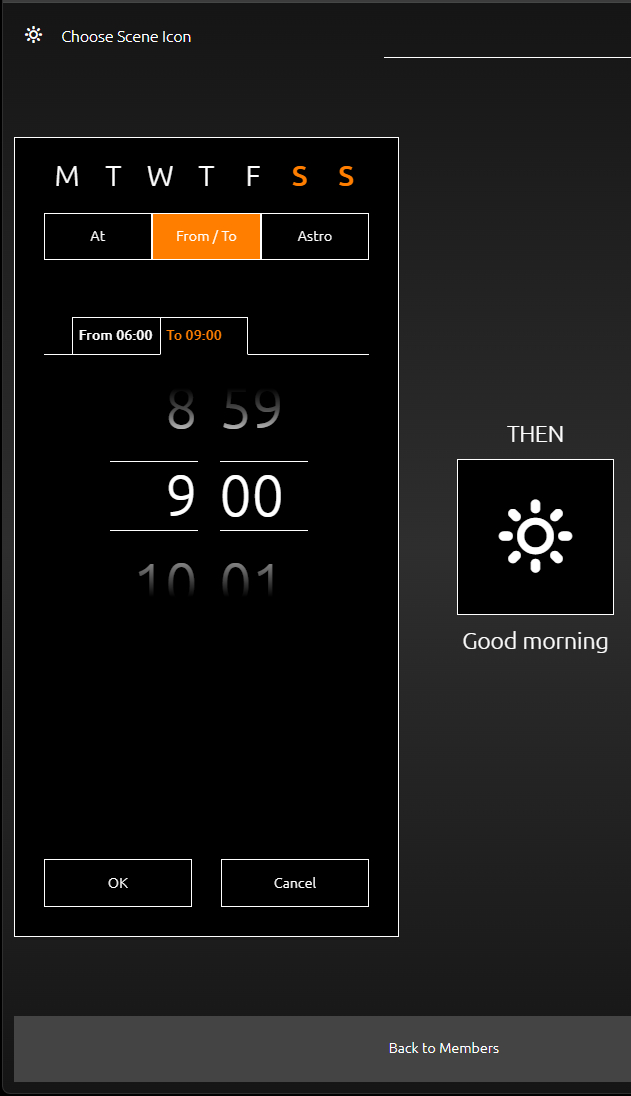
Type: From / To
From/To: Use this setting to combine events and time restraints with „AND“.
For example, the front door light can be turned on sometime between 7 and 10 pm, if the ambient brightness falls below a threshold configured in an event trigger. Should the ambient brightness only fall below the threshold sometime after 10pm, the scene will not be triggered anymore.
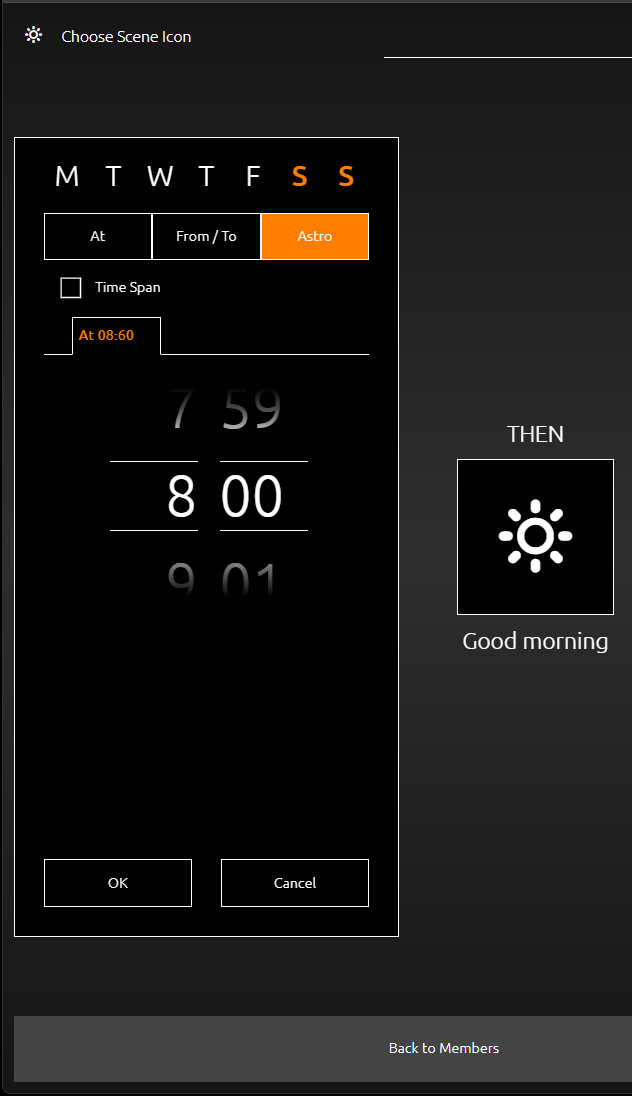
Type: Astro
Astro: The time you configure here denotes the scene start time at this exact day. It represents the position of the sun at your configured location (find the Location configuration under the menu “general”) at this time on the day you configure this element. Every day the scene start time is adjusted to ensure the position of the sun is as it was at the time you wanted the scene to start on the day of the configuration. If you open the configuration weeks later, the time here will differ from what you configured, because the sun is at the desired position at a different time of day.
Example:
Your blinds should open at dawn. You configure the time by choosing the time dawn occurred that very day. Dawn varies every day, thus the scene start time shifts every day, with possibly multiple hours difference throughout the year, depending on your location.
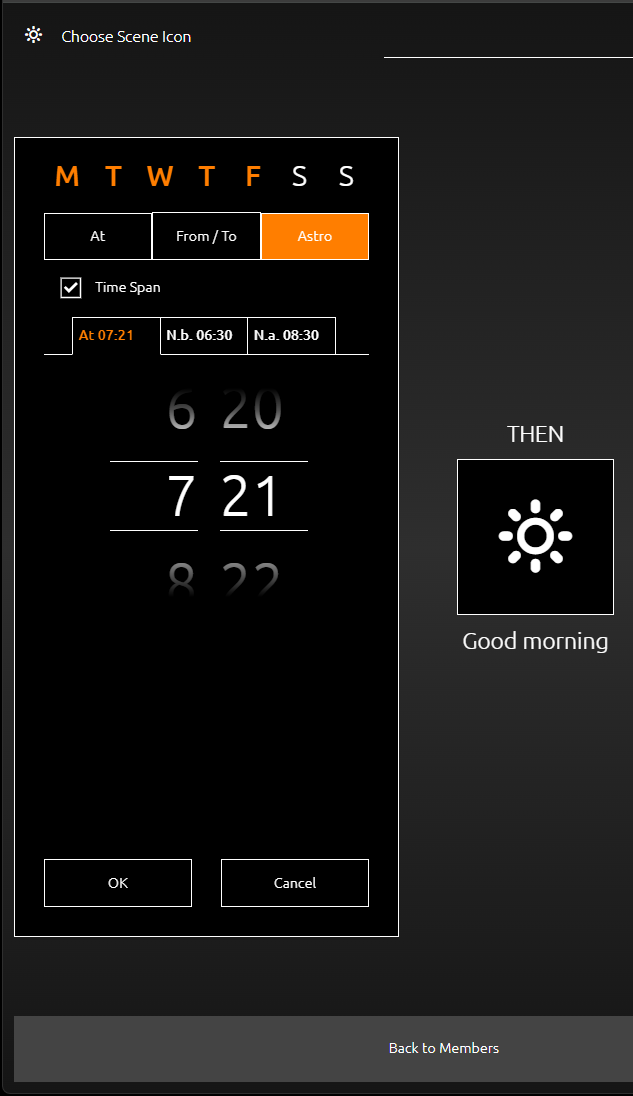
Option - Time Span
Time Span: This option can be used to specify a time range. This time range is defined by an "earliest" (N.v. = "Not before") and "latest" (N.n. = "Not after") time.
Example: Your blinds should open at dawn. Yet, during summer dawn is too early for you. Using time span limits, you can force the scene not start before 7am.
Event
Trigger Type - Event
This trigger type starts a scene when a predefined condition is met. All available conditions of all the elements which you configured in the CUBEVISION Editor will be automatically listed.
Individual events can also be configured.
For this purpose, a group address from the KNX project is entered in the "individual" area. The correct data point type must be observed.
Send always:
If the "Send always" option is deactivated, a filter is set that triggers the scene only once, even if subsequent values meet the condition. Only a value that does not fulfill the condition resets the filter. If after resetting the condition the scene is triggered again.
If the option "Send always" is activated, no filter is set and the scene is retriggered with every new value that fulfills the condition.
Manuell
Trigger Type - Manuell (placed in room)
You can manually start scenes with this trigger type.
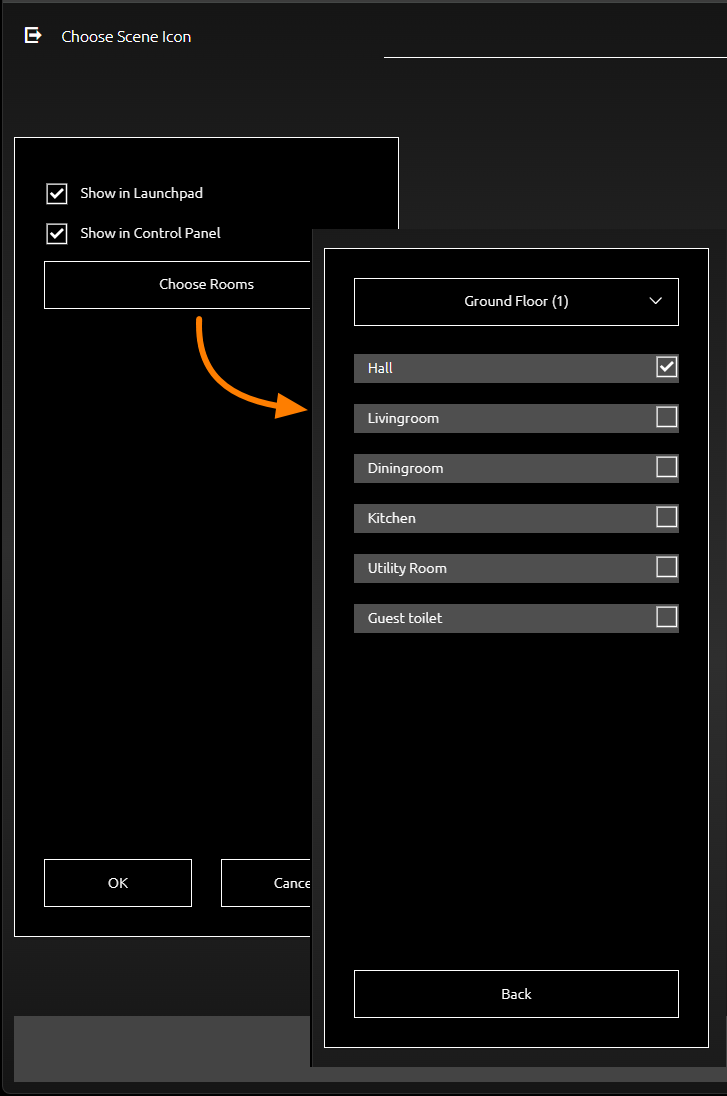
The scene button with which to trigger the scene can be assigned to the Launchpad (see Launchpad), the Control Panel, or both.
If you enable „Show in Control Panel“, you can then select one or more rooms in which you want the scene button to appear. Scene buttons are automatically placed at the top of the Instant Control Panel [ICP]. If you add more than one scene to a panel, they will be sorted alphabetically. Each button will show the title and icon you configured for the scene (see following figure).
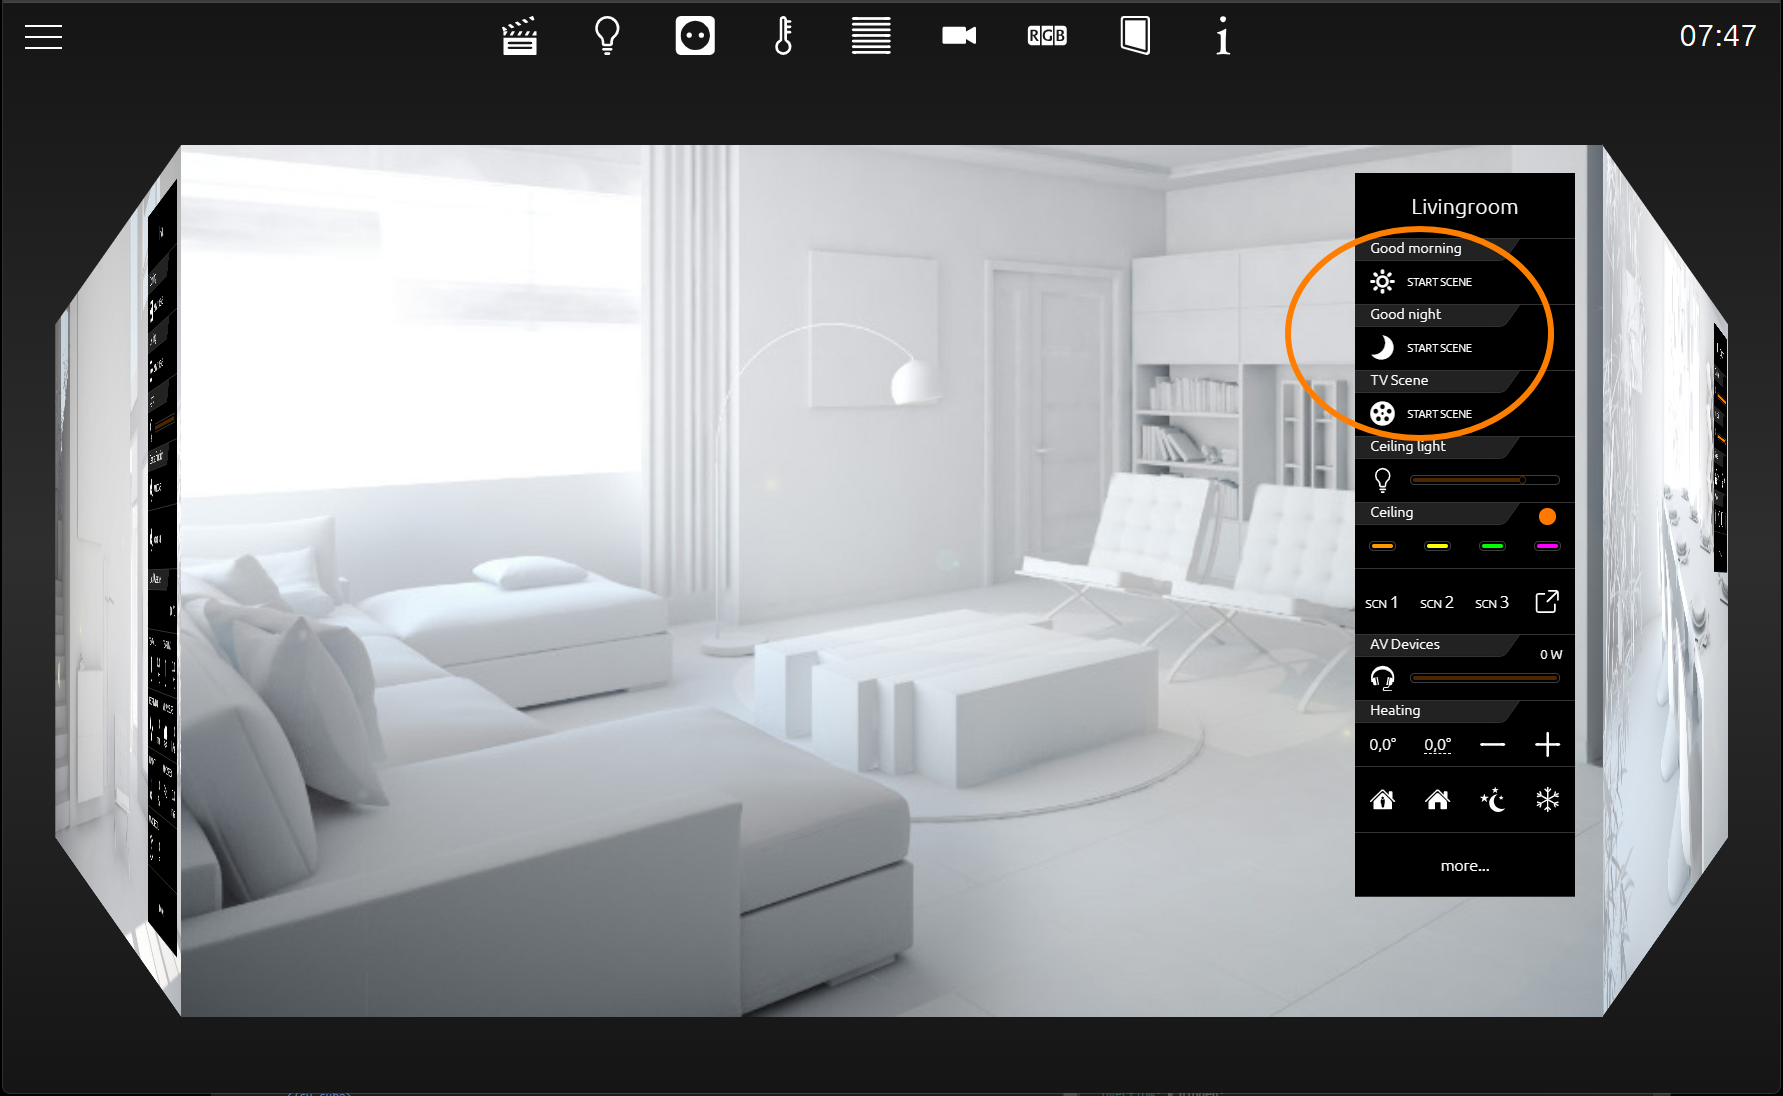
Instand Control Panel mit Szenen-Schalter
Userspezified scenes
Display of all Smart Functions
If a user administration has been created for the CUBEVISION visualization and is active, then when creating scenes via the users, these are provided with a group symbol.
Here the user can determine whether the scene should only be used individually or for everyone. For example, each family member can create individual favourite scenes.
If the group symbol is pushed and thus activated (orange), this scene is available to all users. However, only the creator of this scene can continue to edit or delete this scene.
Example with 3 scenes:
Scene "Breakfast"; created by user 1 and released for use by all others. Only user 1 can edit or delete the scene further.
Scene “Good morning (user 1): created by user 1 and only he can start, edit or delete the scene.
Scene "Leaving home": Scene created by another user or by the admin. User1 can only start this scene, e.g. switching on power supply of a camera.
///