8 Configuration
Saving the configuration
As soon as you have applied changes, such as on the name and the IP address of the APPMODULE and want to save them, click on the button "Save configuration".
General
Click on “Configuration” to make changes to the general settings.
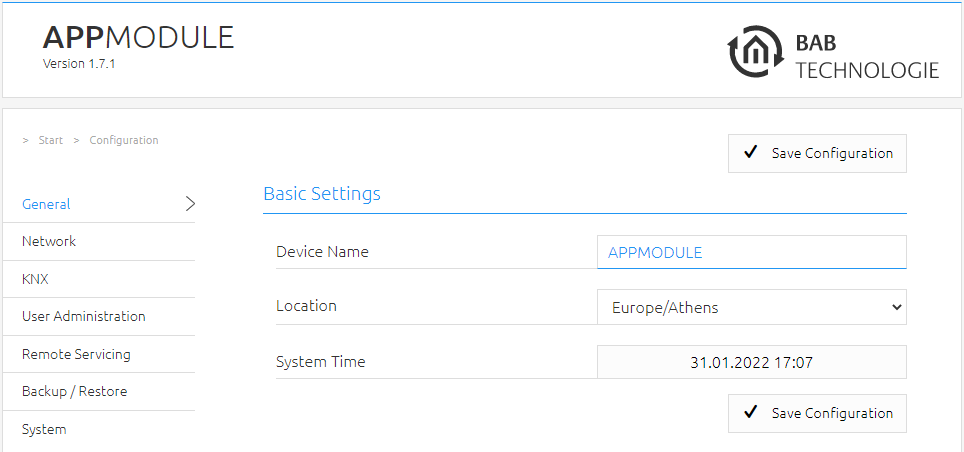
Figure 49: General configurations
Device name: | Here, you can assign an individual device name for your APPMODULE. This name is then displayed in the “Discovery Tool” and BAB STARTER and used as the host name. |
Location: | Edit the installation site so that the correct time zone can be set. |
System time: | The current system time of the device is shown. Clicking the button synchronises the system time of the device with that of the local PC. To synchronise the system time automatically, please use the NTP service. See “Network”. |
The system time must be correct for the software to run properly. Please make sure that the system time is always correct. If synchronisation with NTP is not possible, correct the system time manually.
Network
DHCP: | If DHCP is active, the device automatically obtains the network settings. A DHCP server must be available in the local network. |
IP address / network mask / gateway:
| If DHCP is not active, the network settings must be carried out statically. In case of doubt, contact your network administrator as to which settings are to be carried out. Please note that an IP address may never be assigned twice! |
DNS server: | DNS is the abbreviation for Domain Name System. The DNS server converts Internet addresses, for example "http://www.bab-tec.de " into the IP address "85.214.89.170" and vice versa. Without a valid DNS entry, NTP-, weather- and UPnP-service do not work. |
NTP server: | NTP is a free service for synchronising the system time of Internet-compatible devices. If time synchronisation is not possible, please correct the system time manually. See “General”. NTP server list: e.g. http://www.pool.ntp.org/zone/europe
|
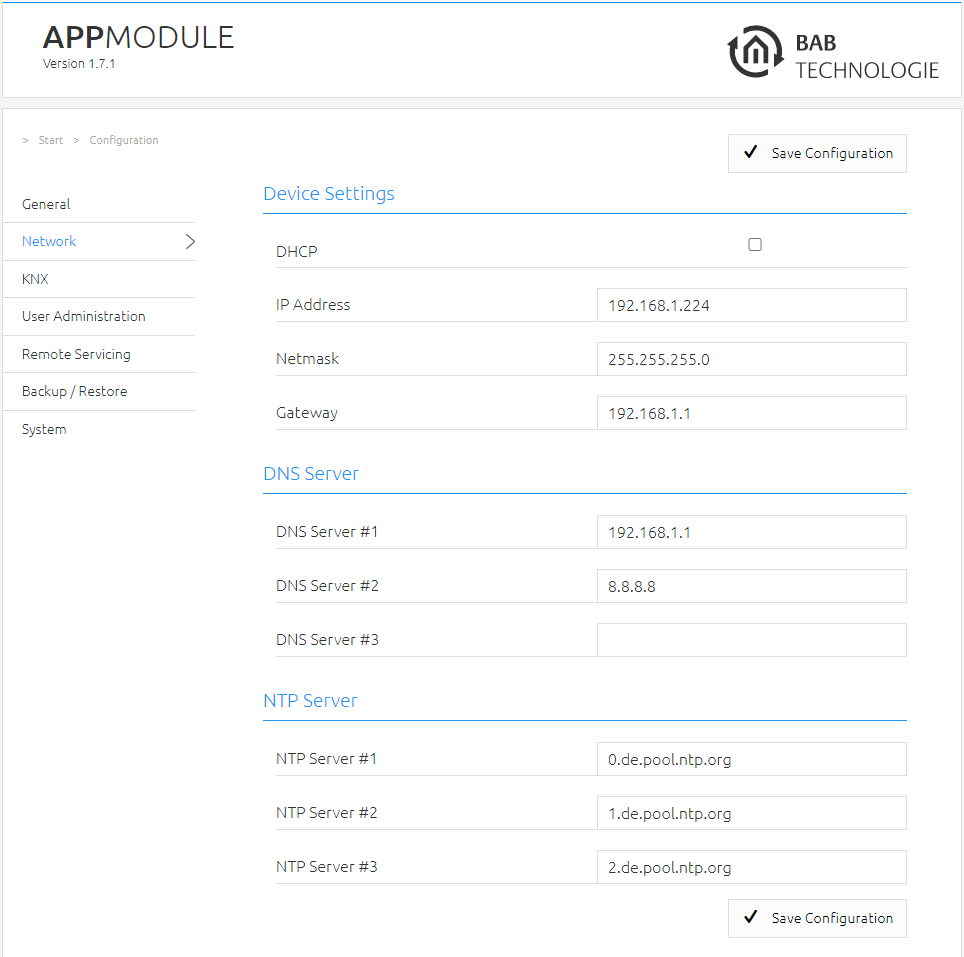
Figure 50: APPMODULE – Network settings
Module
The “Module” configuration menu is used for configuring the KNX parameters. The parameters are relevant for all APPMODULE versions, IP (10491), KNX (10495) and EnOcean (13501). With IP (10491) and EnOcean (10495), the configuration regulates KNXnet/IP communication. For more information, please see “KNX configuration”.
EnOcean Editor
Displayed with the EnOcean APPMODULE device module (13501). More information on configuration is available in “APP MODULE EnOcean”.
User administration
The user data required to access the APPMODULE Web interface is managed here. This user data is also requested when you access the EnOcean Editor from BAB STARTER. To change or add users, click “User administration” in the “Configuration” menu item.
Make sure that you always assign secure passwords and follow standard password guidelines
Disable Password Recovery
If this option is selected, the password cannot be reset and the device must be sent in if you lose the password.
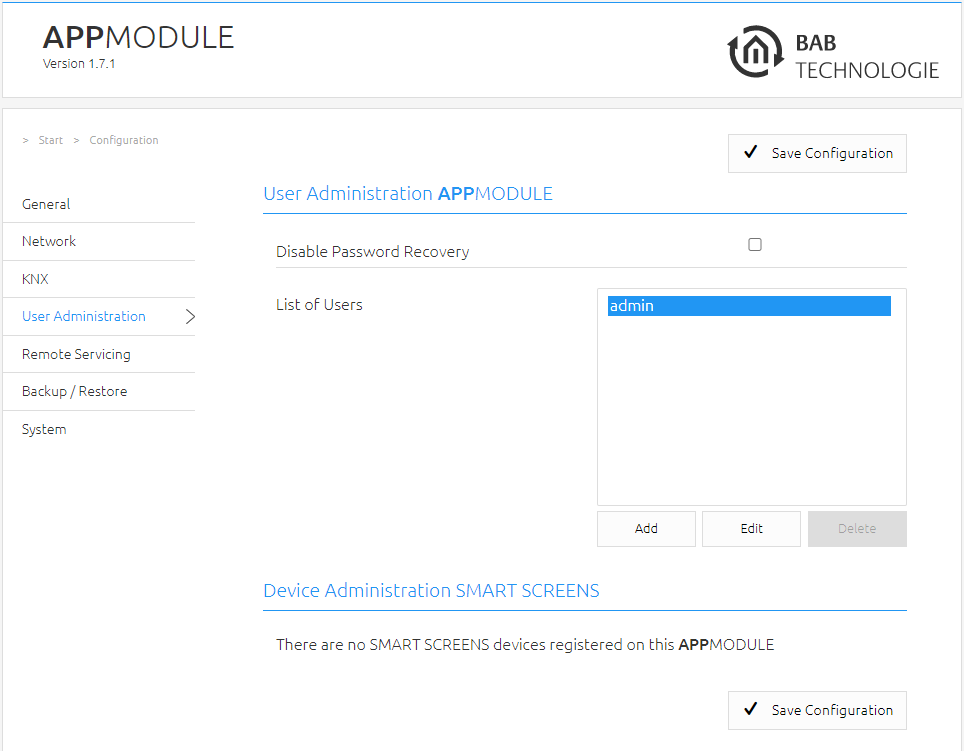
Figure 51: User administration
Smart Screens
The displayed device names here are used to inform which devices have been registered via the Smart Screens function. You haven’t influence to this login procedure and the stored credentials yourself. The registration is required for the synchronization of the mobile devices. If a mobile device should no longer be used, this device can be deleted and for memory released.
The functionality of the Smart Screen is described in a separate documentation.
Remote Servicing
Remote Servicing is available as of firmware version 1.3.7.
Activate the Remote Servicing Access of the APPMODULE. Select a time between 2-12 hours after which the Remote Servicing Access is automatically closed. Remote Servicing Access is also deactivated again if the APPMODULE is restarted, this is independent of the set time. Remote Servicing Access can be deactivated at any time by clicking on "Deactivate Remote Servicing Access".
Activate the Remote Servicing Access by clicking on "Activate Remote Servicing Access".
Remote Servicing access is started. This process takes a few seconds and the Remote Servicing Access ID is displayed. Copy the ID and send it to info@bab-tec.de.
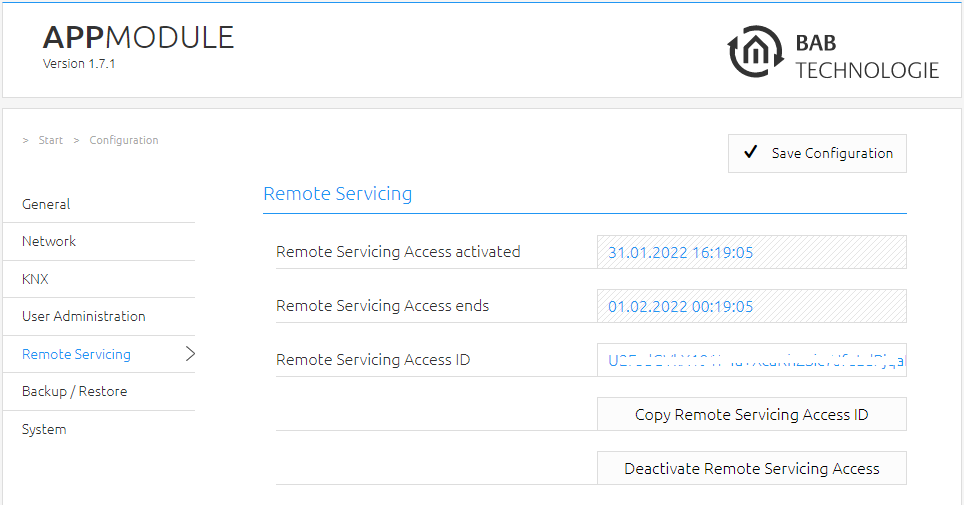
Figure 52: Remote servicing
Before you activate Remote Servicing Access, contact Support.
Backup the settings
The configuration data of the APPMODULE should be backed up at regular intervals in order to ensure that the current configuration status can be restored at any time.
Please note that apps and app instances must be saved separately. This is particularly important before a firmware update.
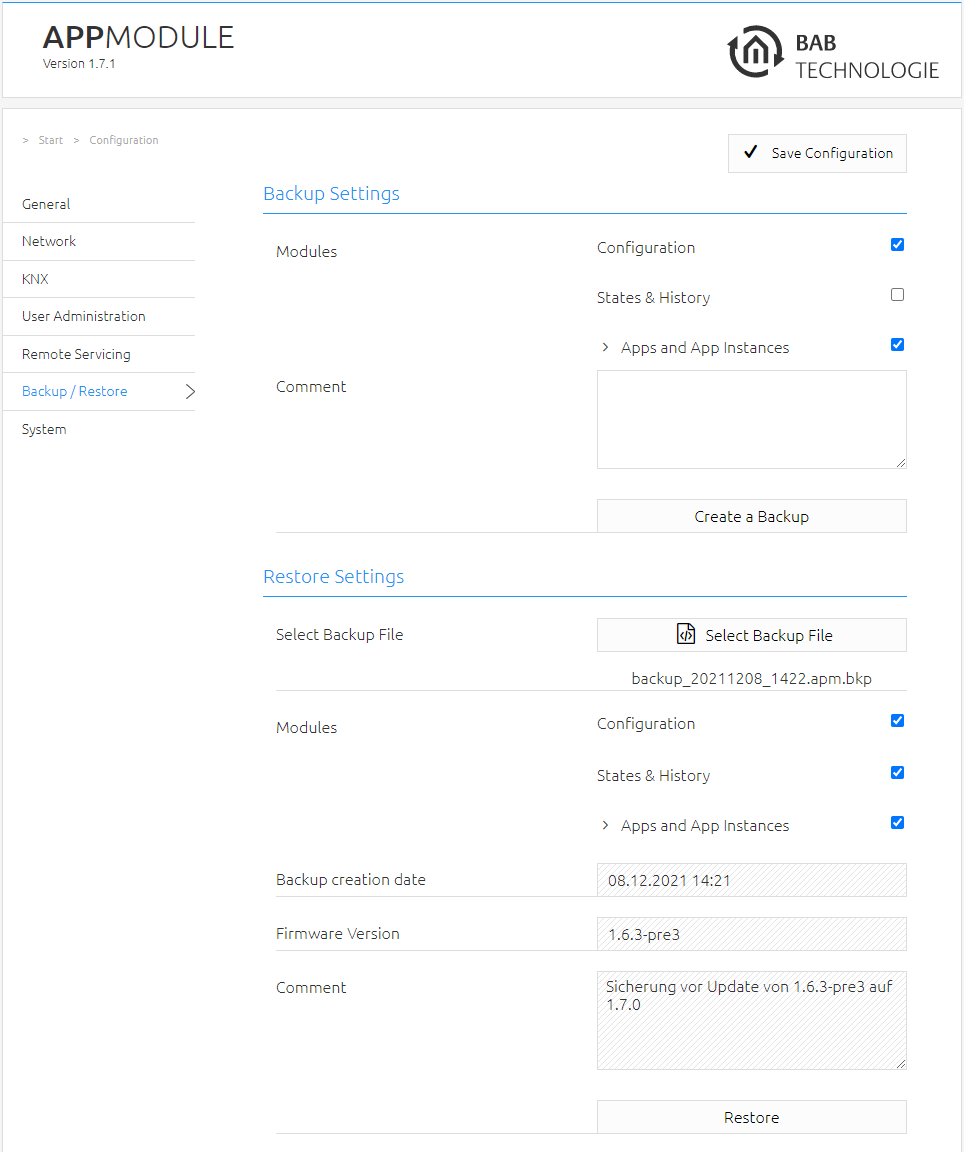
Figure 53: Backup / Restore
Creating a backup
Select the checkboxes under “Modules” to set which configuration data is to be backed up.
Configuration: All configuration data except for app configuration data.
The network settings are not backed up; these are separate from the backup data.
Statuses & logging: The address status table and logging table are backed up. This is important, as it ensures that the status information can also be restored.
Otherwise, status information will be established on the basis of the current telegram communication.Apps and app Instances: Backs up all app-related data. Individual apps and instances can be selected for backup from the drop-down menu.
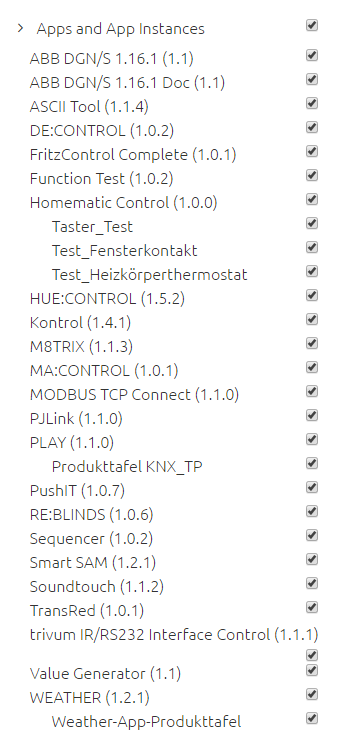
Figure 54: Selecting apps and app instances for backup
Comments regarding the backup can be added in the “Comments” field.
Click on “Create backup” to launch the backup process.
The backup file is generated by the system and provided automatically for download using the browser download dialogue.
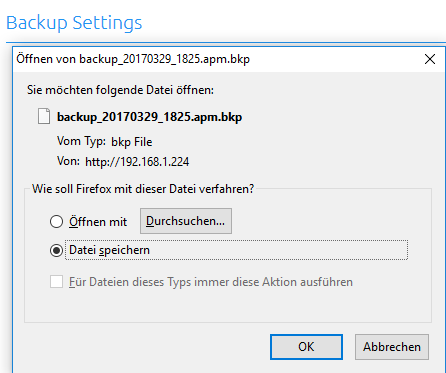
Figure 55: Downloading backup
Restoring a backup
Select an APPMODULE backup file using the “Select backup file” button. The files have the extensions “*.apm.bkp”.
Information for the selected file is displayed in the “Backup created on”, “Firmware version” and “Comments” fields.
The “Modules” field shows which modules are available in the selected backup file. You can also use the checkboxes to select which modules are to be restored.
Configuration: All configuration data except for the app configuration data.
The network settings are not part of the backup file.
Statuses & logging: The address status table and logging table are restored. This is important, as it ensures you can access the status information in the apps after restore.
Apps and app instances: Restores the app-related data. Individual apps and instances can be selected for restore from the drop-down menu (see figure above).
System / firmware update
Service
Here, you can restart the control software for the apps and the apps (“Restart software”), or the entire device (“Restart device”).
Firmware update
Each APPMODULE can be updated. The firmware update is free of charge. The current firmware files can be found on the BAB homepage. Proceed as follows to update the device:
Download the current firmware image from the download area www.bab-tec.de.
Unpack the file to any folder.
Generate a new backup including all apps and app instances before you launch the update (see “Backup the settings”). The update process restores the factory settings.
Open “Configuration” – “System”.
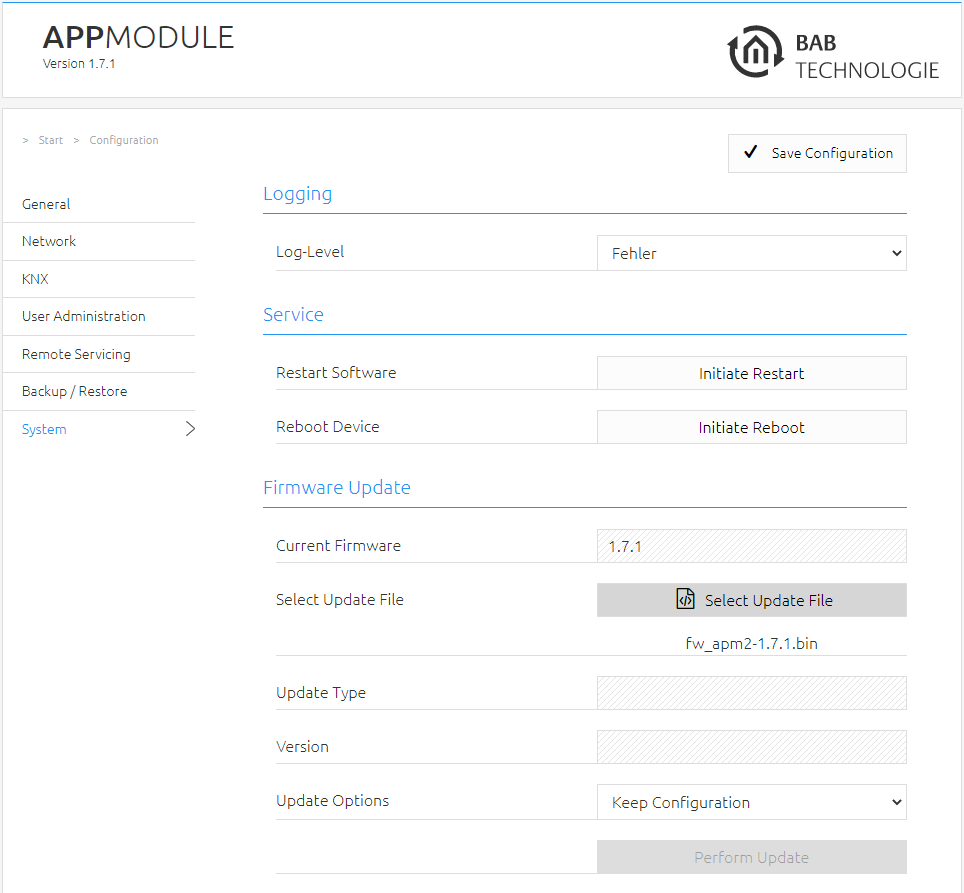
Figure 56: Configuration – System
Select the firmware image file (*.bin extension) using the “Select update file” dialogue. Update type and version are displayed.
Please choose one of the update options
Keep Configuration: All settings, apps and instances will be preserved
Keep Network Settings: Only the network settings will be preserved.
Caution: all other settings as well as all your apps and their instances will be deletedReset Configuration: The device will be reset to factory defaults during the update.
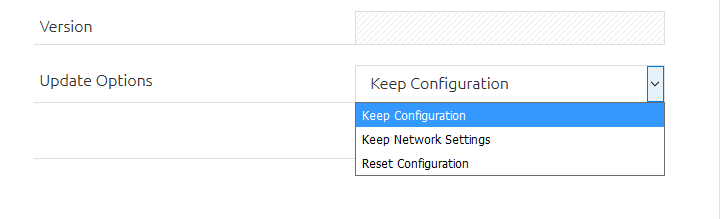
Figure 57: Keep network settings
If the “Keep network settings” checkbox is not selected, the APPMODULE can be accessed at the default IP address after the update.
(For factory settings, see “Initial Operation”)
Launch the update by clicking on “Perform Update”.

Figure 58: Perform update
Wait until the update is complete. The Web interface is updated automatically once the process has been successfully completed.
The update restores the device factory settings (except for the network settings; see above). Individual settings are only loaded again when you restore a backup (see “Backup the settings”).
///