5 APPMODULE EnOcean
eInitial operation of APPMODULE EnOcean
Please connect the plug of the magnetic base antenna to the SMA connector at the housing. Without an antenna, the device has only low transmission and received powers. As soon as the device has started, the EnOcean interface can be used.
Further information on the teaching and controlling of EnOcean devices can be found in chapter "Usage of the EnOcean Editor".
Technical details about the EnOcean Interface
EnOcean (868 MHz): |
|
|---|---|
Operating frequency: | 868.3 MHz |
Range: | 300 m in the free field / 30 m in the building (depending on the building material) |
Input Objects: | Any number |
Output Objects: | 128 |
External antenna: | 2.50 m cable, magnetic base and SMA plug connector.
|
EnOcen compatibility
Eltako
Profile | Description | Products |
80-02-01 | Eltako Dimming | Eltako FUD14 / FUD61 / FDDT65B |
80-03-01 | Eltako Shading | Eltako FSB14 / FSB61 |
80-04-01 | Eltako Motion detector + Sensor | Eltako FBH65S |
80-07-01 | Eltako Tipp-Funk-Taster-Tracker | Eltako TF-TTB |
Four Byte
Profile | Description |
a5-10-05 | Temperature, set point, presence |
a5-08-01 | Bewegungsmelder mit Licht, Temperatur Sensor |
One Byte
Profile | Description |
d5-00-01 | Input contact |
RPS
Profile | Description |
f6-02-01 | Rocker Switch |
f6-03-01 | Pushbutton with four rockers |
f6-10-00 | Window handle |
Calling up the EnOcean Editor
A detailed description for the EnOcean Editor can be found in chapter "Usage of the EnOcean Editor"!
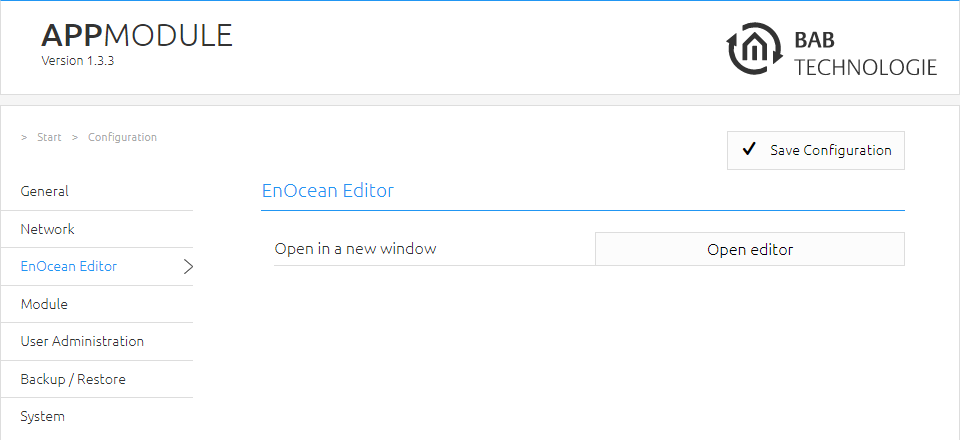
Figure 24: Configuration – EnOcean Editor
You call the EnOcean Editor directly in the browser.
Usage of the EnOcean Editor
In order to open the EnOcean Editor please follow the description in chapter “Calling up the EnOcean Editor”!
Operating principle EnOcean
An EnOcean radio network consists of sensors and actuators. The sensors utilize your ambient energy to transmit the corresponding radio signal. So that an actuator can interpret and respond to the signals of a sensor, the actuator must be adapted to the sensor. The so-called EnOcean Profiles (EEP) determine how the data provided by the sensor are to be interpreted. Thus, it is important that sensor and actuator utilize the same EnOcean Profile (EEP).
Device categories / sensors
EnOcean distinguishes between three device categories in its sensor technology. The device category gives information about the kind of EnOcean signal involved and simultaneously about what the receiver can expect.
Switch module: A module which sends out a corresponding radio signal via user interaction. That is switches, rockers, position and key card switches as well as window handles.
1-byte sensor: A sensor which sends out information of 1-byte size.
4-byte sensor: A sensor which sends out information of 4-byte size.
Actutors
Actuators will perform their controlling on the basis of sensor signals. Therefore, sensor and actuator have to be adapted to each other. Thus, it is important to know which EnOcean profile is to be emulated to address a LINKMOUDULE actuator correctly. The actuator manufacturer will inform you about which profile the actuator utilizes.
EnOcean Profiles (EEP)
The EnOcean profiles (EnOcean Equipment Profile - EEP) define the device category, the function and the device specification. During the APPMODULE configuration, the KNX parameters automatically adapt to the selected profile. The profile consists of 3 number pairs separated by a hyphen: XX-XX-XX
The different positions represent the following: ORG-FUNC-TYPE
ORG determines which messages form the communication base (see also 'Device categories/sensors').
FUNC determines which device is involved, that is e.g., a switch or a temperature sensor.
TYPE determines the exact specifications of the device functionality.
Transmitter ID (Trans. ID)
Is a definite device address which only exists once. This address allows the sending device to be identified.
Teaching Telegram / LRN Telegram
Is a special telegram used to "teach" the sensor to recognize the actuator, that is, to adapt the actuator to the sensor. It is important for the actuator to know from which hardware address it gets its sensor data. There are several kinds of adapting mechanisms. Please consider the respective descriptions.
EnOcean Configuration
The APPMODULE internally works with the KNX group address system. In order to continue to use received EnOcean signals within the device or to trigger EnOcean telegrams, KNX group addresses must be used. You will find information about this in chapter "KNX Addressing".
In order to access the corresponding APPMODULE configuration mask, please consider the chapter “Calling up the EnOcean Editor”). The window generally consists of three areas:
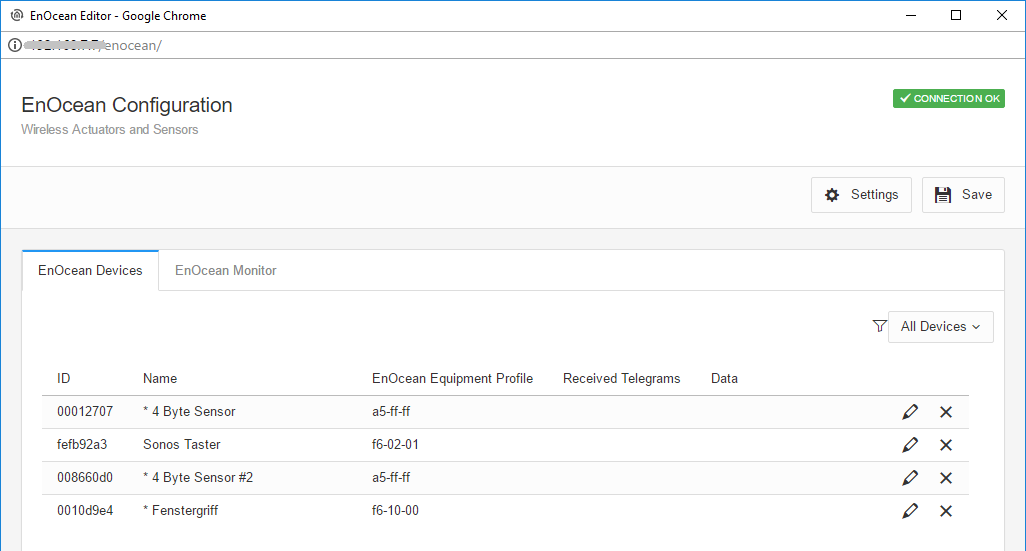
Figure 25: EnOcean Configuration - Devices
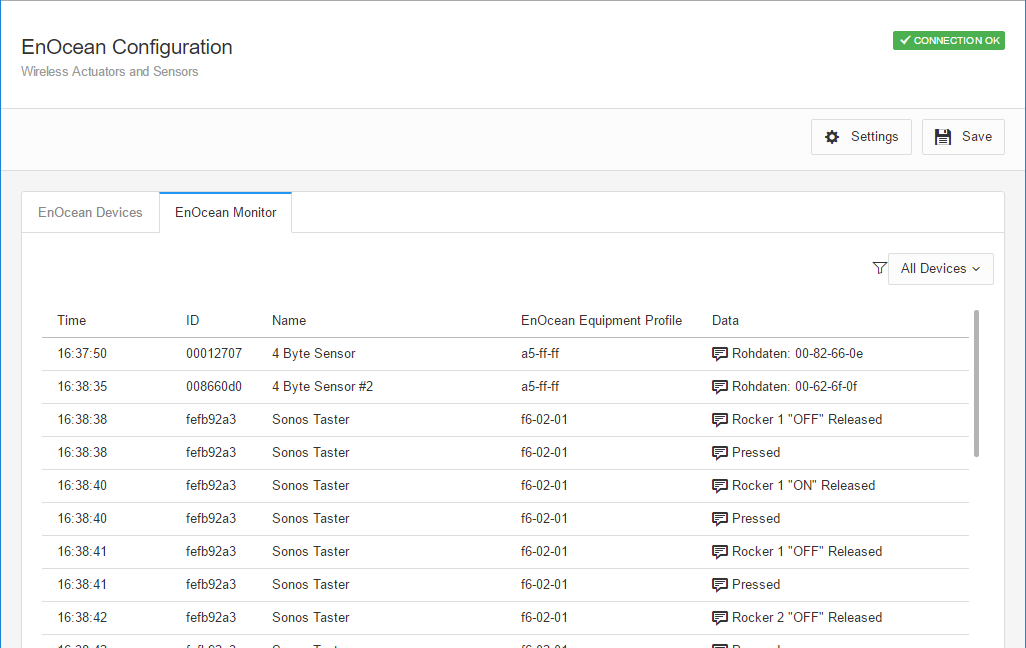
Figure 26: EnOcean Configuration - Monitor
Settings:
Settings: You can configure the EnOcean module here.
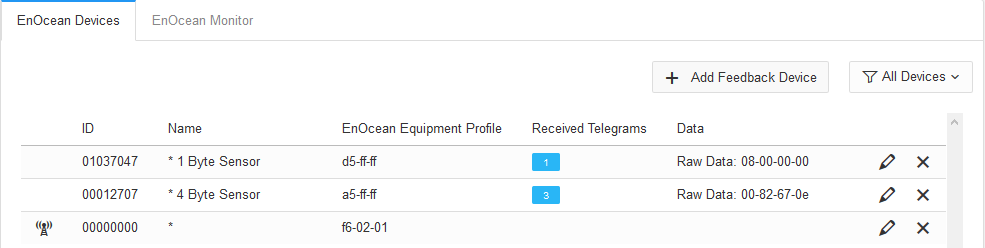
EnOcean Devices: Lists all EnOcean devices sorted by device id (trans. id).
EnOcean Monitor: Lists all received EnOcean telegrams sorted by the time at which they were received.
EnOcean Settings
The EnOcean settings show the hardware parameters of the incorporated EnOcean module (TCM 300 Transceiver). The following settings can be performed:

Figure 27: EnOcean Settings
EnOcean active
Here, you can switch the module on or off.
Repeater
The repeater function is used to repeat a receiving signal in order to increase its range. The following settings are available:
Check box activates: Repeater function is turned on.
Level 1: The telegram is repeated by one repeater only.
Level 2: The telegram is repeated by two repeaters.
RX sensitivity
Determine the receiving sensitivity in which you want the EnOcean module to work. You can choose between "Low" and "High".
EnOcean device teach-in procedure
All EnOcean devices within range are displayed both in the device list and in the telegram list as they are sending something. As already mentioned, the EnOcean telegram must be connected with a group address in order to make it usable for the APPMODULE. This is done as follows:
Mark the device of interest in the device list.
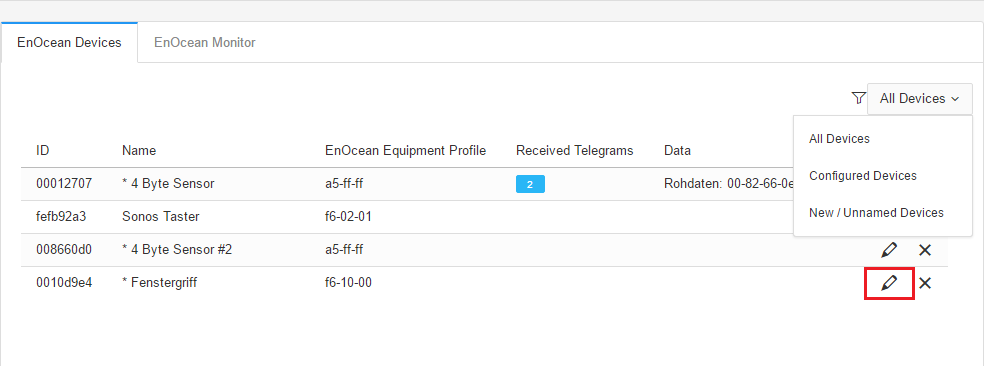
Figure 28: Calling up properties
All Devices: Show all devices
Configured Devices: Show only the devices which have already been configured
New / Unnamed Devices: Show only the new and unnamed devices
Advice: If you are not sure which device has which Trans. ID, activate the device of interest and look up in the device list for which device the telegram counter increases (column "telegrams").
When you have detected the device of interest, mark it with the mouse, press the right mouse button and click 'Properties'. Alternatively, double-click on the device.
The window "EnOcean Device Configuration" will open. Via this dialogue, the EnOcean devices will be "adapted.
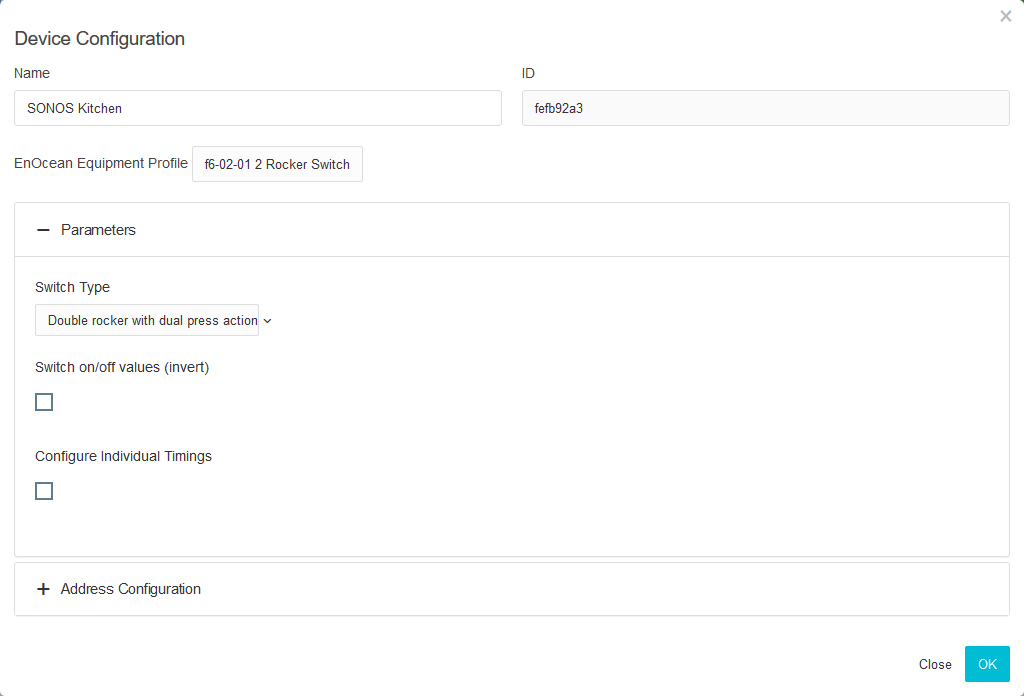
Figure 29: EnOcean Device Configuration
Initially, assign a definite "Device Name", referring to the device function. In the input screen, you will further find the following parameters:
ID: This is the unique device address through which the device is identified.
EnOcean Equipment Profile (EEP): The different EnOcean devices are defined via so-called profiles. Hereby, the device category involved is detected as early as at the signal input and a pre-selection is made. Then it is also possible to select from the profiles known from the APPMODULE. As soon as a profile is selected, the corresponding KNX parameters are shown underneath.
Select the corresponding profile of your EnOcean device. If you are not sure about which profile your device 'speaks', please contact the manufacturer of the device:
Different parameters appear depending on which profile has been selected. If one switch (rocker) has been selected, various additional functions can be carried out (see chapter "Configuration example for EnOcean ").
Choose your switch type in "Parameters".
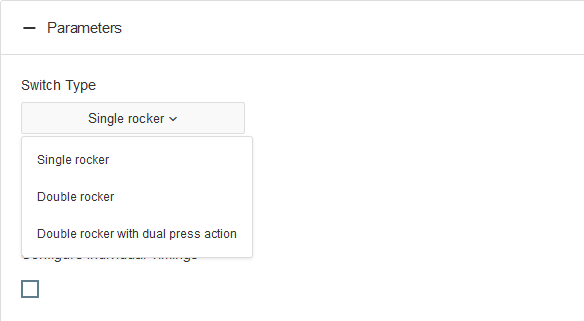
Figure 30: Parameters

Single rocker
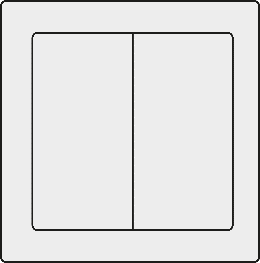
Double rocker
If you choose switch type "Double rocker with dual press action", the APPMODULE will give your two rockers switch a third switch function. This function will be triggered when you press both rockers simultaneously.
Next, open the "Address Configuration" configuration panel
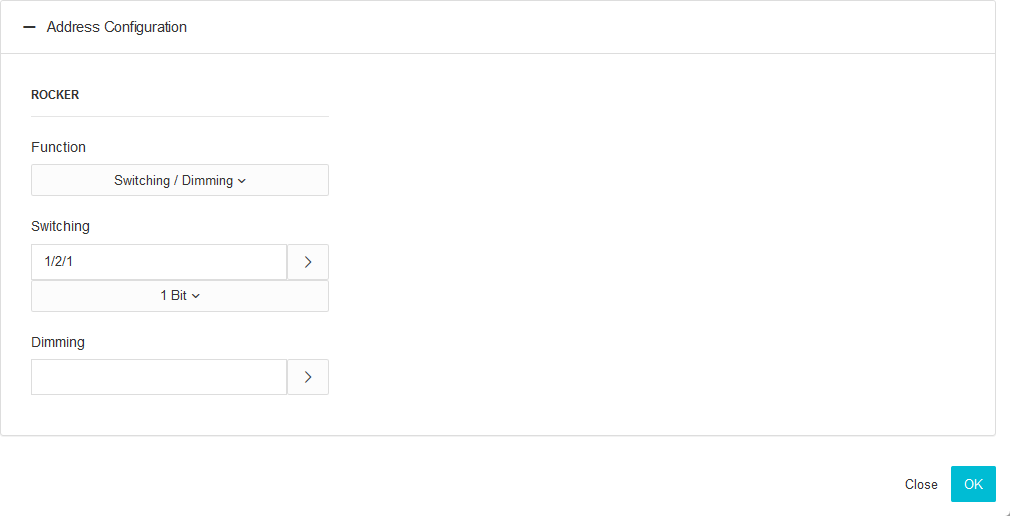
Now, enter the corresponding KNX group addresses in the address fields to obtain a connection to the selected EnOcean device. You will find detailed information about the KNX group addresses and their assignment in chapter "KNX Addressing".
When you have entered the addresses in the parameters as requested, close the EnOcean Device Configuration window.
Save the changes in the window "EnOcean Configuration" via the button “Save & Close” or "Assume" (the window stays open).
As soon as this step is taken, the entered KNX telegrams are triggered via EnOcean signals. In order to be able to use the addresses more easily later, you should enter them into the ESF data with a definite designation (see Chapter "KNX Addressing")
Emulating EnOcean devices
The APPMODULE provides a Transceiver Module which not only permits receiving but also sending EnOcean telegrams. In order to do this, the APPMODULE emulates an EnOcean device. Via a configuration mask, you can determine which device is emulated with which KNX telegram by the APPMODULE (the device internally works with KNX group addresses also during the EnOcean execution).

Creating an emulated device
Click on the button “Add feedback device” to create a new emulated EnOcean device. A new window will be opened.
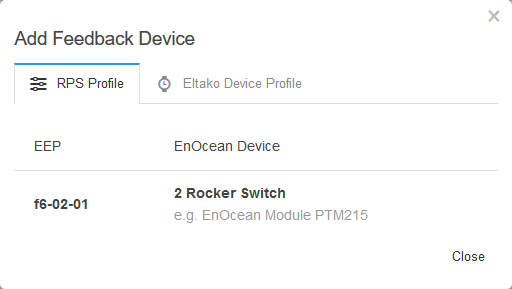
Add feedback device
Depending on which actuator is supposed to be controlled, the matching device profile needs to be determined. The new emulated device will be added to the list of “EnOcean devices”
Defining emulated device
The device assigned in this way is initially provided with a definite device name. Additionally, the following parameters are presented

ID: Is the definite hardware address you have selected before. Can not be modified at this point.
EnOcean Equipment Profil (EEP): Here, the profile the emulated device should use is selected.
For more information regarding parameter and address configuration, please see „Configuration example for EnOcean “.
Simulate push the button
Here you can simulate a push button for each rocker, which sends a telegram.
KNX Addressing
The APPMODULE addressing concept is based on the group addressing of the KNX system. Sending EnOcean Telegrams as well as transmitting received telegrams is performed based on KNX group addresses only. The KNX group address is a 16-bit address which is split in a so-called 'real' and a 'virtual' section. Additionally, there is a 2-digit as well as a 3-digit representation:
3-digit:
MG= Main Group / CG= Central Group / SG= Subgroup
MG / CG / SG
2-digit:
MG= Main Group / SG= Subgroup
MG / SG
The APPMODULE interface only supports the 3-digit representation.
Real / Virtual Address Space
The KNX address space ranges in total from 0/0/0 to 31/7/255 (in the 3-digit representation). Therein, the range from 15/7/255 is designated as real address space and the address space from 16/0/0 to 31/7/255 as virtual address space.
For the communication between EnOcean and KNXnet/IP Routing, only the real address space is used.
Configuration example for EnOcean Push-Button (Rocker)
In the following, an exemplary configuration for sending and receiving of an EnOcean push-button (Rocker) profile (profile "05-02-01: 2Rockers, Light & Blind") is shown.
APPMODULE as the receiver (actuator)
This switch provides either one or two rockers and transmits their status within a radio signal. In order to link these radio signals with KNX, various functions are available:
Configuring Parameters:
Invert: Inverts the telegram content sent on the KNX addresses. Telegram value “1” becomes “0” and vice versa.
Individual Timings: Individual timings determine the length of button presses for switch, move, step.
Separate Action: You can assign further KNX addresses for the separate action “both rockers at the same time”.
Please note that this is only possible for buttons with two rockers.
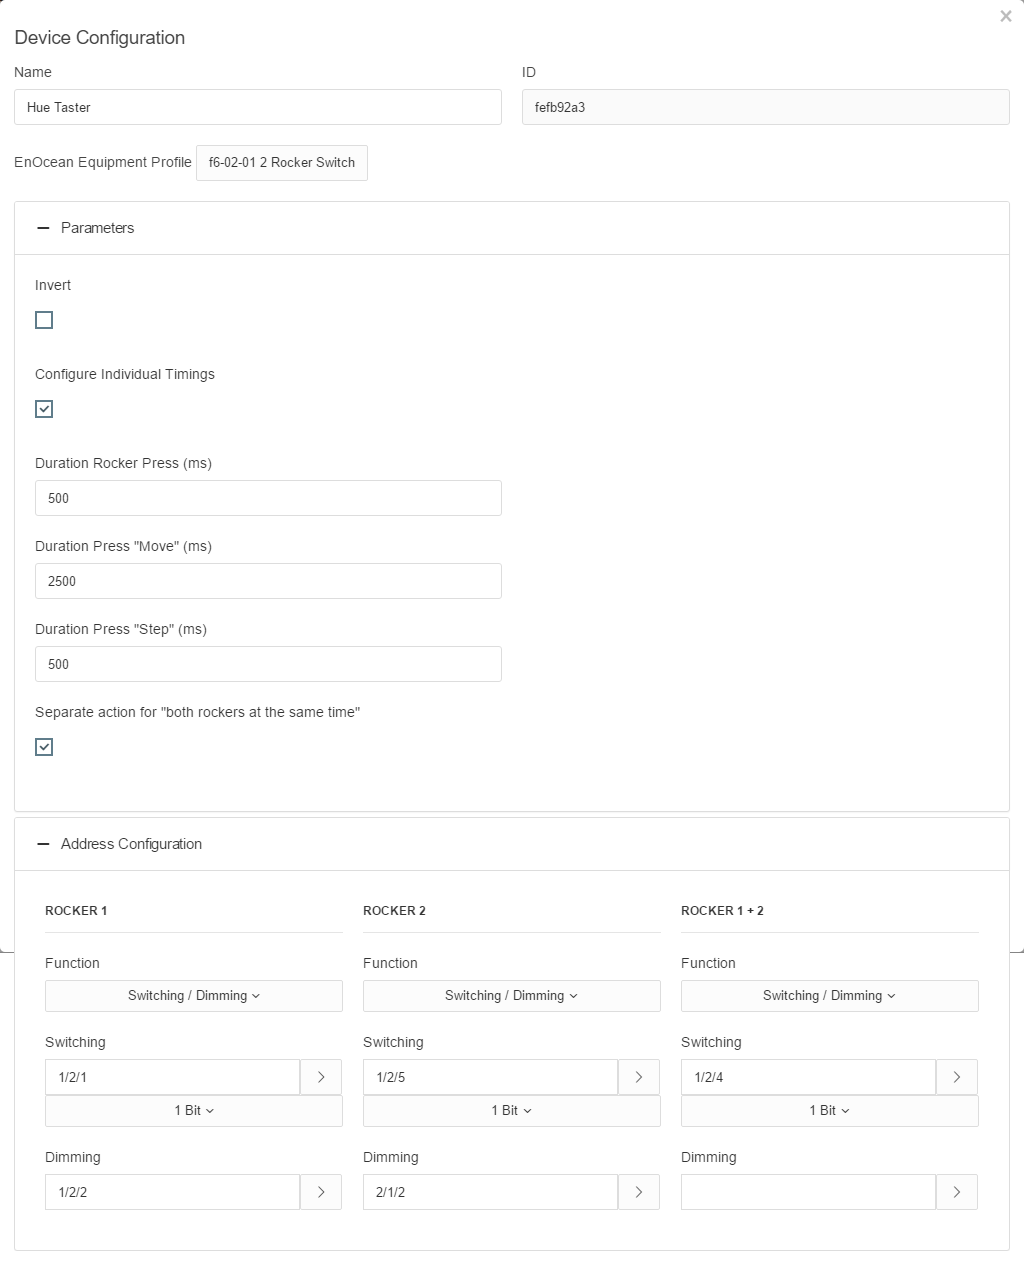
Assigning Addresses:
Switching / Dimming: The EnOcean button can be used as switch and dimmer. A long-press will be interpreted as a dimming command. When used as a switch, the button will send a 0 on “Off” and a 1 on “On”.
Push Button: Pressing “Off” will send an EIS 1 telegram with value 0. Upon releasing the button, another telegram with value 1 will be sent. Pressing “On” will send an EIS 1 telegram with value 1. Upon releasing the button, another telegram with value 0 will be be sent. You can assign one address for either position (I and O).
Blind: Assign one address each for the commands “Move” and “Step” (EIS 1).
Delete EnOcean devices
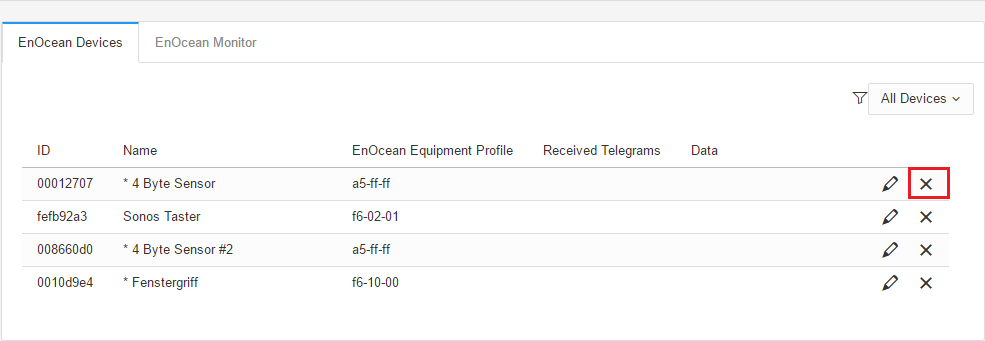
Figure 32: Devices delete
In order to delete an EnOcean device, click on the x symbol. You will be prompted to confirm that you really want to delete it.
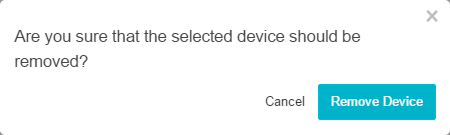
Figure 33: Devices delete confirm
Click on “Delete” to delete it. Afterwards, save the settings. Only then will the device really be deleted. If you do not save the settings after deleting devices, they will only be removed from the list but reappear with their configuration intact once they are rediscovered.
///