
Step 1: Connect the Power Supply
First, connect a 12–32 V DC power supply to the corresponding pluggable screw terminals.
Next, connect the DUODMX GATEWAY to the network.
The Power LED lights up solid green when the device is ready for operation.
Step 2: Configure the Network Settings
For configuration over the network, the PC must be located in the same IP subnet as the DUODMX GATEWAY.
If it is not possible to change the network settings of the PC, the network configuration can alternatively be transferred using an SD card.
-
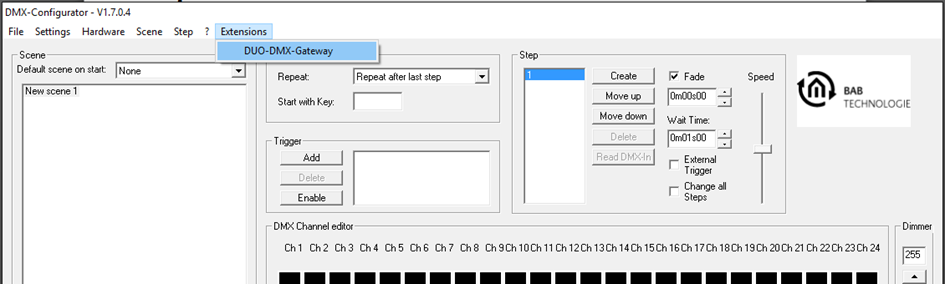
Start the DMX Configurator.
-
Select "Extensions" → "DUO-DMX Gateway" from the menu.
Select the Device Type
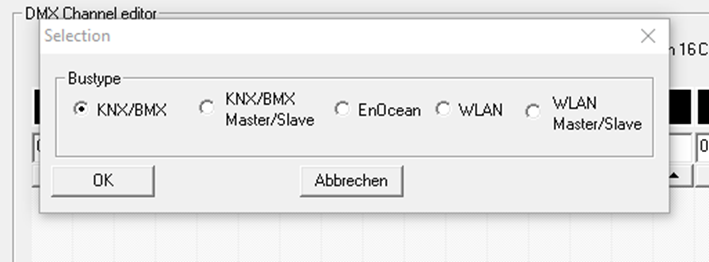
When opening the extension for the first time, you will be prompted to select the device type.
A detailed explanation can be found in the chapter "Programming / Extensions Menu".
Figure 8: DMX Configurator – Device Type Selection
|
Selection |
Supported Device Type |
|---|---|
|
KNX |
KNX SR REG (Art. No. 12521) |
|
KNX Master/Slave |
KNX SR REG (Art. No. 12521) |
Depending on the selected device type, different configuration windows are available. For more information, refer to the chapter "Extensions".
For configuration via the local network, the PC must be in the same IP subnet as the DUODMX GATEWAY.
If configuration over the network is not possible, the project data can alternatively be transferred using an SD card.
Open the Network Settings
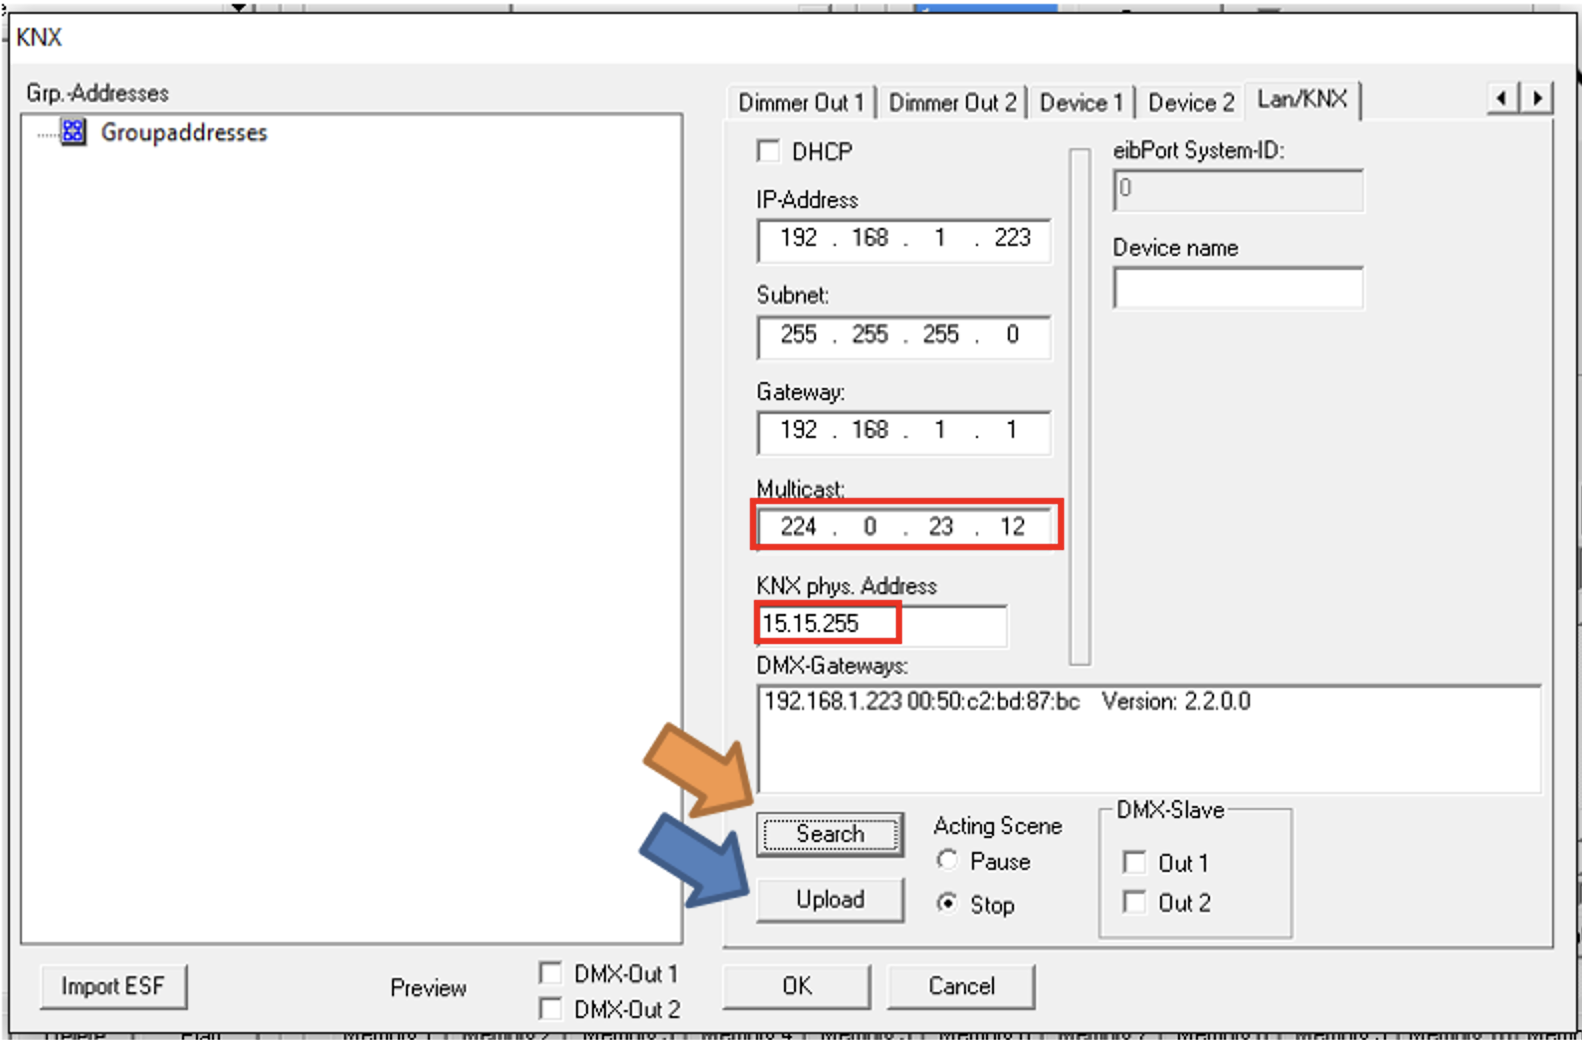
Open the network settings using the following tab:
-
KNX and KNX SR device types → "LAN/KNX"
The following figure shows the configuration window for the KNX device type.
Configure the Network Settings
-
Click "Search" below the "DMX Gateways" list.
-
All available DUODMX GATEWAY devices on the network will be displayed, regardless of the current IP settings of the PC.
-
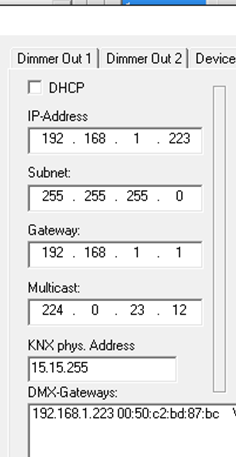
Check whether the displayed IP address needs to be changed.
-
If necessary, enter the required values for:
-
IP Address
-
Subnet Mask
-
Gateway
-
-
Change the Multicast Address only if required.
-
Close the Extensions window and save the project using "File" → "Save".
Upload the Configuration via the Network
-
Select the DUODMX GATEWAY to which the configuration should be transferred.
-
Click "Upload".
-
After a successful transfer, the message "Upload successful" will be displayed.
Transfer the Configuration via SD Card
-
Close the configuration window and confirm with OK.
-
Save the project using "File" → "Save" or "Save As…".
-
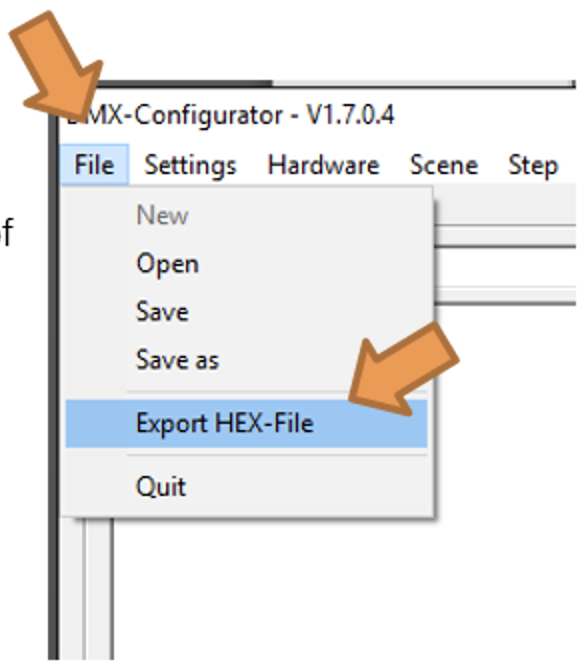
Select "File" → "Export HEX File" and save the generated file with a unique name.
-
Insert an empty SD card into your PC's card reader.
-
Copy the generated HEX file to the SD card.
-
Rename the file on the SD card to "config.par".
-
Insert the SD card into the SD card slot of the DUODMX GATEWAY while the device is powered on.
The Status LED briefly turns off while the configuration data is being read. Once it lights up solid green again, the configuration has been successfully loaded.
Only FAT-formatted SD cards are supported.
Step 3: Verify the Network Configuration
-
Restart the DUODMX GATEWAY by disconnecting and reconnecting the power supply.
-
Open the DMX Configurator.
-
Use the device search to verify that the new network settings have been applied.
From this point on, all further configuration changes can be transferred conveniently via the network (see chapter "Transferring Configuration Data").
For additional information, refer to the chapter Programming → Extensions → LAN/KNX.
///