Configuring Alexa device in the LOGIKEDITOR
To configure "Alexa devices", open the LOGIKEDITOR and create a "New Logic Group". Add the "Alexa Device" element to the logic group by clicking "Add", a new window with the available elements opens. Select the "Alexa Device" element and specify the desired number you want to add to this logic group. To confirm the selection, click on "Add selection".
Click with the left mouse button on the "Alexa device" element added to the logic group, it opens the configuration interface (red) in the right area of the LOGIKEDITOR.
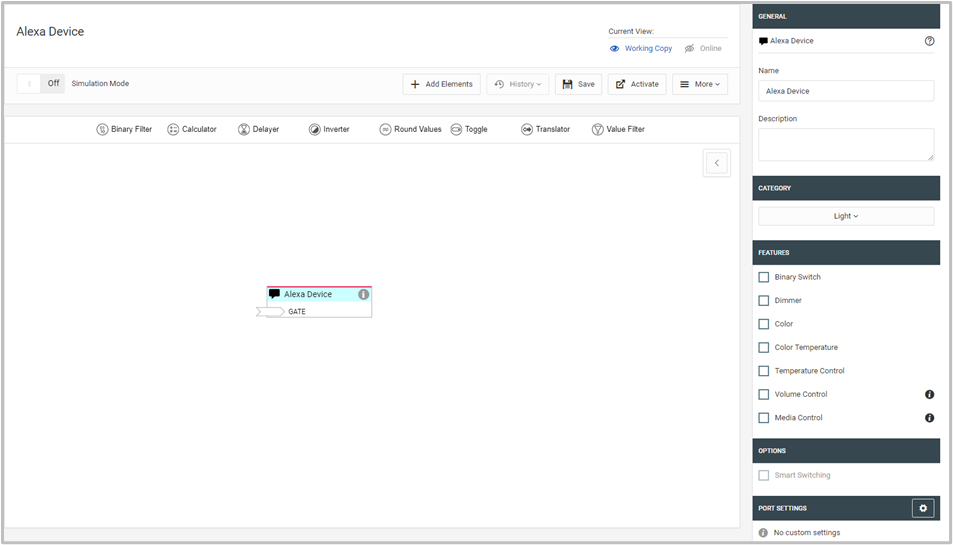
Enter a unique name (device name (orange)), e.g., ceiling lamp, for the "Alexa device". This name is used for voice control. Select a function (green). Select a category (yellow) to which the device to be controlled belongs. At the time of the last update of this documentation (June 2018), Amazon only used this information to assign a corresponding icon to the device in Amazon's Alexa app, i.e. a lamp icon for Lamp category, a thermostat icon for temperature control, etc.
If you select "switch" and "dimmer" simultaneously, or "switch" or "dimmer" in combination with "colour" or "colour temperature", then you can activate "intelligent on/off" (blue). This option switches the switch on automatically as required, e.g., off when the dimming value 0 is received or on when a colour command is received but the switch is still off. This setting is for operation and display in Amazon's own Alexa App.
Assign a unique name, e.g. living room ceiling lamp, to the "Alexa device".
///