Password protection for visualisation
Access to the various visualisations can be secured via the user account management "Security settings" in the editor.
Note: In the condition on delivery, the security settings are disabled
For security reasons, please always set up authentication for your visualisation. The authentication can be set up on the appropriate control client so that the circumstance of recurring login does not occur. To activate password protection, please proceed as described below.
Access to all visualisation interfaces is administrated in the security settings (JAVA CONTROL, CONTROL L, CUBEVISION and CONTROL S). Access can be set up individually for each user. For CUBEVISION, CONTROL L and JAVA CONTROL, entire projects or just individual pages can be enabled.
Note: there are two user administration systems in EIBPORT: the “Security settings” for access to the visualisations and “User administration” for access to the editor and system.
Switching to security settings
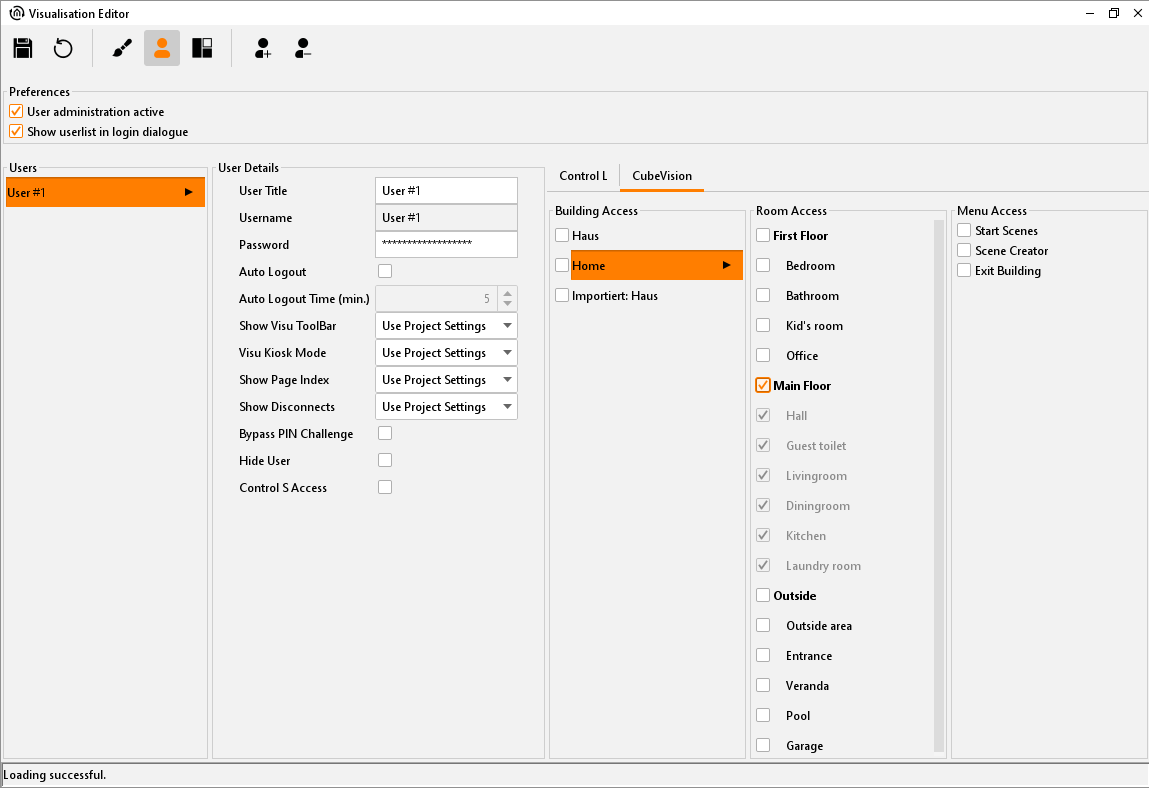
The security settings are opened using the corresponding button in the menu bar of the Visualisation Editor. You can switch between “Visualisation”, “Security settings” and “Layout plan” here. The button for the selected view is always marked.

Switching between visualisation and user management
Settings
The user administration can be activated or deactivated. If the user administration has been deactivated, no user login is carried out. It is activated in the condition on delivery. If user administration is activated, then individual user display can be suppressed through “User list in login - show dialogue”. The username must be typed in.
Adding/deleting users
A new user is created via the corresponding symbol. As a first step, you must assign a unique name. This name is automatically adopted in the “Username” and “User title” fields. To delete a user, you must first mark the respective user in the user overview. The user is irrevocably deleted without any security warnings.

Editor - adding/deleting users
User
All users added are shown here one below another.
Editor - user administration
User details
Each user is allocated general settings:
User title: the title is shown in the selection menu of users. When starting visualisation, the user is identified using this.
Username: the username is requested for login. If the user list is activated for login, then the username is communicated through selection of the user title in the login dialogue.
Password: the user must identify themselves with this password.
Automatic log out: if this function is activated then the user is asked to login again once the configured amount of time has passed.
Parameters for project settings: Each user can be assigned individual settings in relation to the “Visu toolbar”, “Kiosk mode”, “Page index” and “Connection problems” project parameters. The administrator can assign the user their own settings (yes/no) or the project settings (use project settings). The “yes/no” settings overwrite the project settings.
Skip PIN request: if this box is activated then this user is not asked for the PIN.
Hide user: this user is not shown in the user list upon login.
CONTROL S access: in this case, the user data is also requested upon login to CONTROL S. CONTROL S is then parametrised using the “CONTROL S editor” which can be reached through the “Window” menu.
CONTROL L / CUBEVISION project access
The approvals for the user marked under “User” for the respective project data can be administrated under the “CONTROL L” and “CUBEVISION” tabs. Here, the user can be granted full access by marking a project/area, or, through marking of individual pages/areas, can just be given limited access to them. The settings for CONTROL L also apply for JAVA CONTROL!
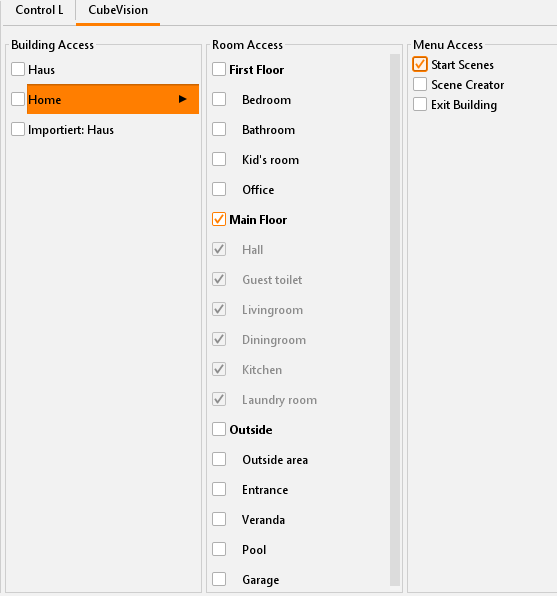
Selective project access
Pages access & start page
To assign only individual pages of a project to the user, the desired project is marked in the column. All pages of the project can be assigned individually by checkbox. Behind the page name the start page is selected, which the user should receive. If the pages of different projects are concerned, the user also gets a project selection after the login.
Save settings
The created user is saved by clicking on the "Save" button in the menu bar (diskette symbol).
Note: For the settings to become active, the visualization must be reloaded.