The EIBPORT editor consists of several editors:
-
Visualisation Editor
-
Job Editor
-
CONTROL S Editor
-
CUBEVISION Editor
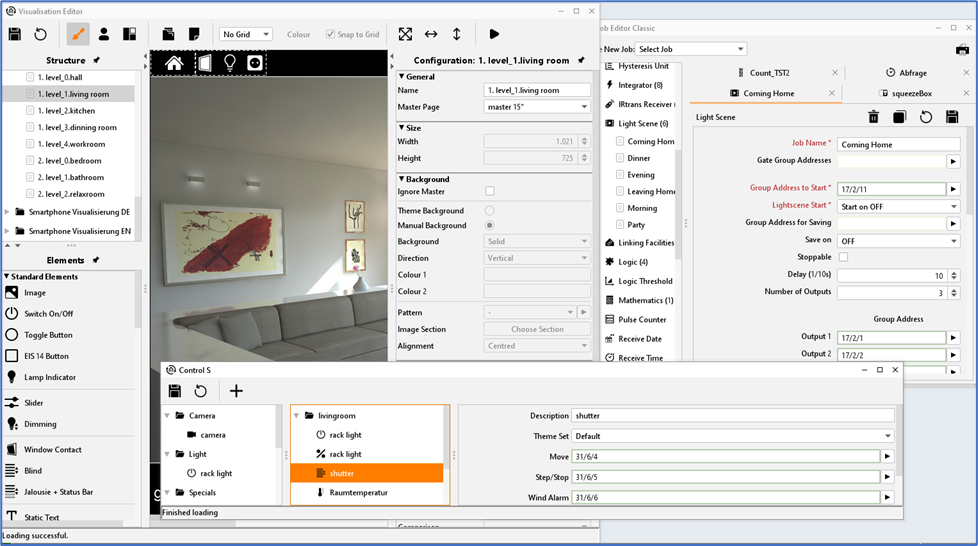
The editor window is loaded with the Visualisation Editor the first time it is started. Switching between the editors takes place within this window. Basic settings are made in the menu bar of the editor window.
Contents
Menu bar of editor
The editor window offers a menu bar, in which you can do basic settings. You can change between the editors there or loading data to EIBPORT. The editor windows can be opened simultaneously. When minimizing one of the windows, it will be displayed at the left edge below. There it is also written by which address you are connected to EIBPORT. Further functions are described as follows:

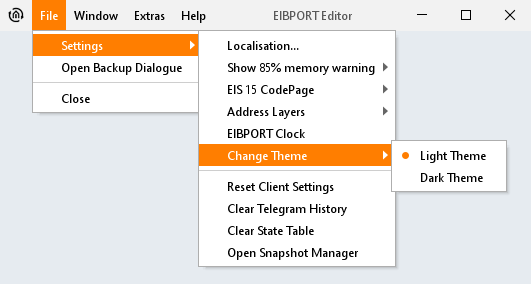
File
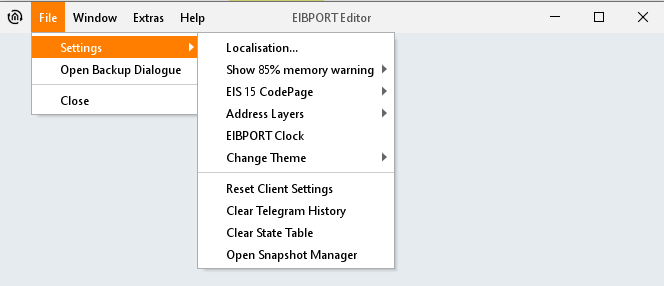
In menu item “File”, you can choose general settings, open the safety-dialogue or close the editor himself. (For security dialogue "Close the Editor" chapter).
Localisation
Localisation means adaptation of software to its linguistical environment. To customize the language of EIBPORT, you can choose between the English and German speech. One of these speech files, you can download on your PC, to change it with the help of any text editor. The same procedure allows you to upload the modified speech file to EIBPORT again. Upload dialogue connects the speech file with desired country code. In order that JAVA will use the right speech file, you must modify the setting of the speech in your JAVA control panel (Change the language). The dialogue of localisation must be unlocked by using the EIBPORT string.
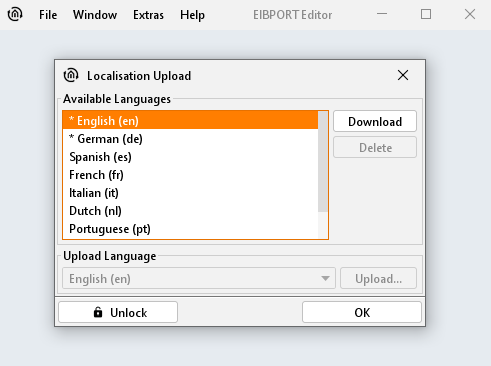
Please note: When editing a localization file, it is strongly recommended that you save the file with UTF-8 encoding.
Please note: Activation with the aid of the EIBPORT string works for one editor session and is effective also for all other dialogs which must be activated with this string.
85% memory warning
EIBPORT Java Control, Editor and System (Java-based applications) register if more than 85% of the Java working memory are used during execution. In this case a warning in this respect appears. This warning can be disabled here.
EIS 15 Code Page
Select here which Codepage EIBPORT is to use for EIS 15 texts.
Address-layers
Group addresses are displayed from the editor in double or in three figures. Visualisation Editor converts existing group addresses, if necessary, opposite to the job editor, which doesn`t convert addresses.
Please note: Changes of notation works only after restarting the editor.
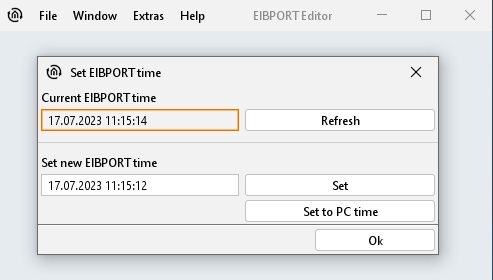
EIBPORT Clock
This menu item allows you to adjust time and date setting. The first line shows you the current date and time of your EIBPORT. Below this line, you can set a new date and a new time. This can happen directly with your keyboard, or you will press the button „Set new eibPort time”, which transfers actual time from your PC to your EIBPORT.
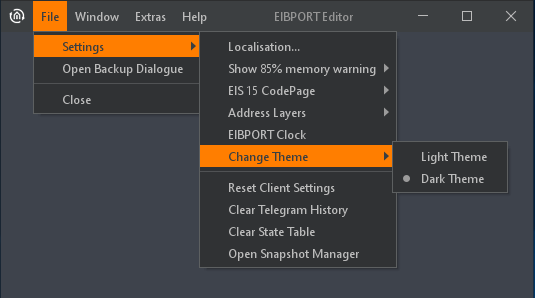
Change Theme
The theme of the EIBPORT Editor can be changed:
|
|
Reset client settings
This function resets all user settings of starting values, which includes:
-
Position of editor window and its size.
-
Start setting of all windows if editor will be started.
-
If safety dialogue will be displayed, when you will close editor.
-
Setting of directories, in which backup files are stored.
On other settings, this function has no effect.
Clear Telegram History
The EIBPORT stores 500,000 messages. These lie in an SQLite database and can be used by the graph in the visualization. The last 20,000 telegrams simultaneously in the operating system itself EIBPORT deposit to you as with external programs to read. With this function, this record is deleted immediately, which are preserved 500 000 telegrams in the SQLite database.
Clear state-table
This table stores the state of all given group addresses. These entries will control working of visualisation and jobs, which are arranged in your EIBPORT the last condition is determined with the aid of the telegrams’ time signature. The state table can be erased without rebooting the EIBPORT.
Snapshot management
Each night, EIBPORT makes an automatic security copy of the visualisation data. The backup data of the last two days is kept. To restore the backup data, proceed as follows:
Note: The Snapshot backup only contains the visualisation data. All other data must be secured by making regular backups.
-
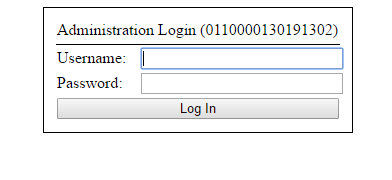
Click on "Restore a Snapshot". You will be transferred to a web site with login window.
-
Log in using the editor user data.
-
After you have successfully logged in, you will be transferred to a web site showing the two most recently created snapshots.
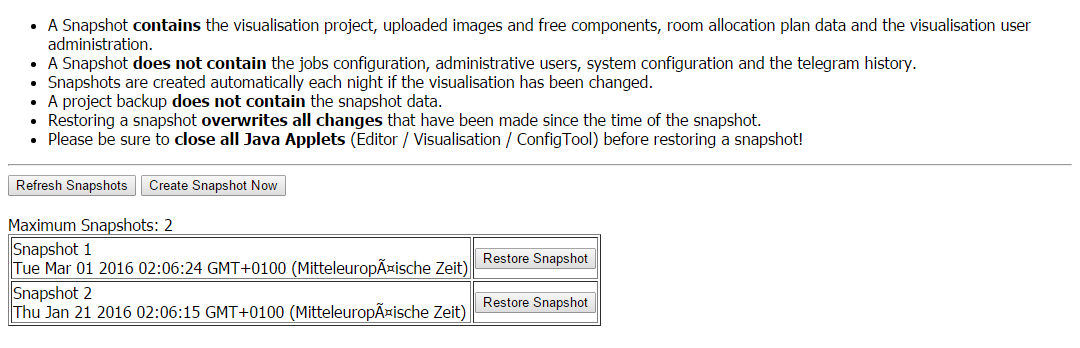
-
Click on "Restore a Snapshot" next to the desired entry. After the snapshot has been successfully restored, the following message will be displayed: "Successfully restored Snapshot".
-
Now, restart the editor. The restored data is now available.
Window
With the help of menu item “window”, you can change between offered editors. Furthermore, you can find a link to the configuration surface of EIBPORT, the ConfigTool
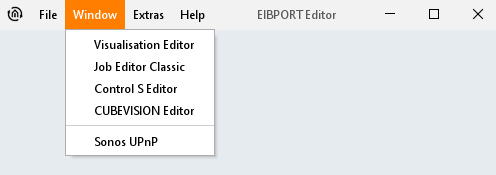
Visualisation Editor
The editor window for creating visualisation surface opens.
Job Editor Classic
In this window, jobs (services) of EIBPORT will be configured and parameterised.
CONTROL S Editor
Visualisation on mobile phones will be realized best with CONTROL S. The surface is created with the aid of this editor. See chapter “CONTROL S”
CUBEVISION Editor
This menu item opens the editor for the CUBEVISION. The CUBEVISION is a web-based visualisation that is generated automatically. It can either be embedded as a visualisation element in an individually created visualisation within the editor, or it can be called up on its own or with the help of the CUBEVISION app.
UPnP
Opens in the browser the configurator for the Sonos sound system. See chapter "UPnP".
Extras
This menu is used to load important files (ESF, images, freely definable switches) into the EIBPORT and delete them again. In addition, the status table and telegram recording can be viewed.
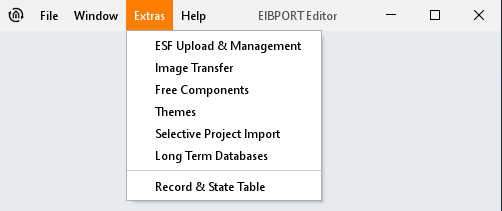
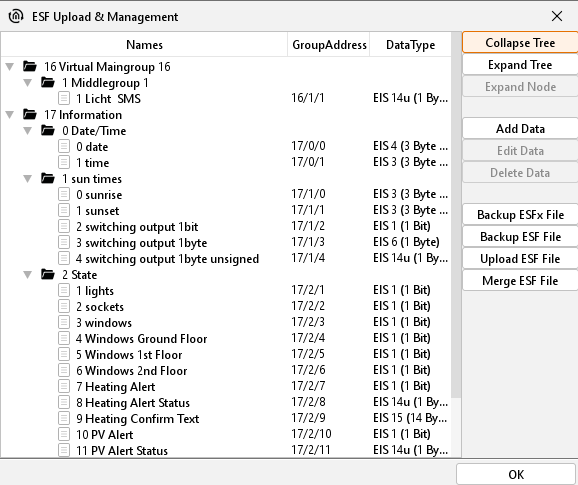
ESF Upload & Management
All group addresses and your EIS typecast with their identifiers are stored in ESF-file. This file will be generated in ETS 3.0 over File > data exchange > export to OPC-server. Data of ESF-file match the kind of project, which is created in ETS. Loaded up to EIBPORT, this file offers the convenience, that the placing and the clearness of group addresses will be simplified.
For the virtual group addresses or for changings on the existing address data the dialog offers the possibility to maintain the address file. You can enter addresses and identifiers.
Please note: If you have made alterations in ESF data of EIBPORT already and if you are uploading this new data from ETS, your modifications will be overwritten by new data.
Exporting an ESF file from the ETS
Chapter Export the Group Addresse from the ETS (ESF File) describes how to export an ESF file from the ETS.
Collapse tree / Expand tree:
A tree outlines the complete address space of the ESF-file. In case the tree is collapsed, only main groups are displayed, otherwise (expand tree) all groups and their addresses are shown on the screen. Opening and closing of data entries inside the tree works by key click on considered arrow symbols.
Expand node:
The address space of one main group is called node. Opening one node, you can have a look at a certain part of the tree.
Add data:
This function allows filling in new, not yet existing addresses. You can enter address as well as the identifier.
Edit data:
In a marked address, you can edit the name, but you can`t edit the address.
Erase data:
Selected group address will be deleted from the ESF-file.
Backup ESFx file:
This item runs a backup from EIBPORT as an ESFx file (xml type), to a free chosen directory.
ESF file backup
The file will be as original ESF file saved as well as the ETS generated.
Caution: As with the original ETS export any data type links to go out EIS1 lost!
Upload ESF-file:
This button opens the file explorer to select the desired ESF-file. Click on item “Upload” will start uploading at once, without further confirmation.
Merge ESF File
Opens an additional menu that allows a new or second ESF file can be merged into the present. An existing ESF file can thus be easily expanded with a more recent case have subsequently result in changes to the ETS project.
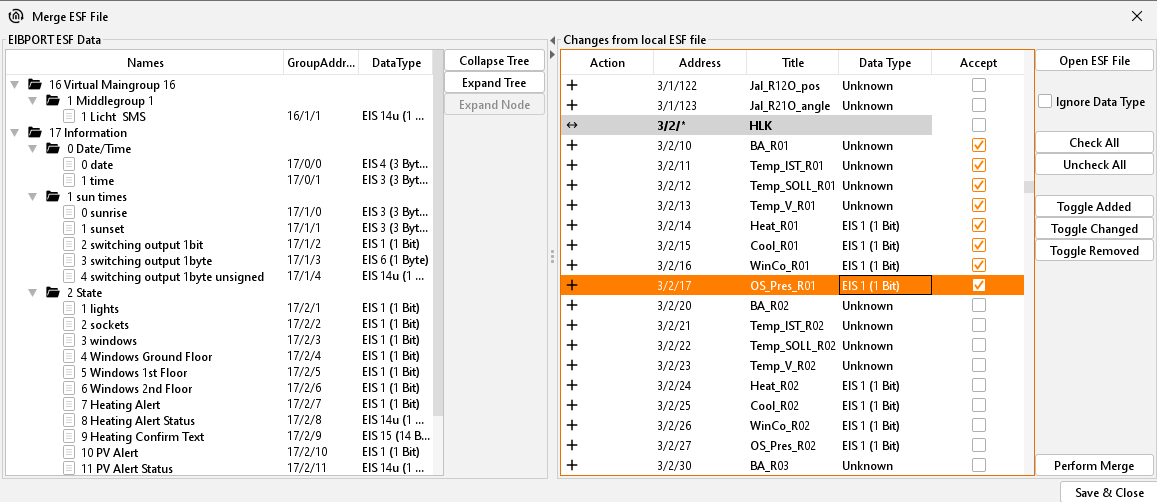
The "Merge ESF File" is divided into two halves. In the left half of the existing ESF file is displayed. In the right half of the change (not file a second ESF) which would result in merging the two files are displayed. To identify which operation is performed with which group address, the data in the column "Action" will be marked with a symbol.
A "+" symbol indicates that the corresponding address of the existing ESF file is added. A "¬" means the address of the existing file will NOT be added, and the "<>" marks the addresses by the new data will be overwritten. After all necessary steps have been made, the window must be on the button "Save & Close" closed. In addition, the following switches:
-
Open ESF File: This button opens a file browser with the ESF, the desired file is selected with the extensions.
-
Ignore Data Type: If this box is checked the data types are ignored during the merge.
-
Check All: There are all those actions in the local file with the hook marked "Accept.".
-
Uncheck all: The current selection is removed; all the hooks are removed in "acceptance".
-
Toggle Added: There are selecting only the addresses (or actions) is added to the new addresses.
-
Toggle Changed: There will be selected all the addresses (or actions) in the existing addresses replaced by new ones.
-
Toggle Removed: There are all selected addresses.
EnOcean configuration
This menu item will only appear if the device disposes of an EnOcean interface. EnOcean is a wireless bus system which is particularly energy-efficient and can be easily upgraded. For more information regarding the EnOcean wireless module in EIBPORT, refer to the documentation "EIBPORT EnOcean Documentation". The documentation is available on the supplied CD or at www.bab-tec.de.
Image transfer
This dialogue stores and manages images for visualisation in EIBPORT. The images could be sorted to various categories or be deleted from EIBPORT.
Allowed file formats are JPEG (JPG), PNG, GIF and Animated-GIF.
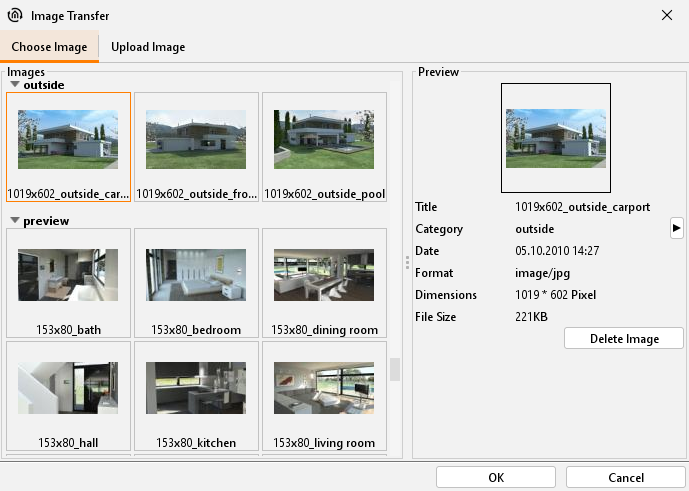
Choose Image: In this tab, all uploaded images are managed. If you mark a picture, a „Preview“ is shown in the right window. With the help of item “category”, you can refer the image to an existing or a new category. Categories and referred pictures appear in the left-hand window. Button “Delete Image“ erases the marked picture out of category.
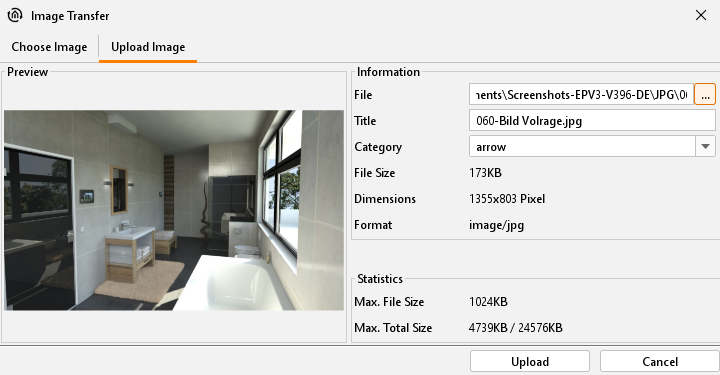
Upload Image: This tab makes possible to upload new images. Along with it, you choose a picture, which you can see right in window and then you enter a title to this image. In the file browser it is allowed to select multiple images. With the help of “category “, you refer a category. Image information appears directly after selection on the screen.
-
In the area “statistics“, maximal permitted data size and actual used data space of your image are shown. Key click on “Upload“ starts to store images directly.
-
Images could also be uploaded by using “drag & drop“. Pull the desired image e.g. from desktop to visualisation surface and the dialogue “Upload“ opens automatically then.
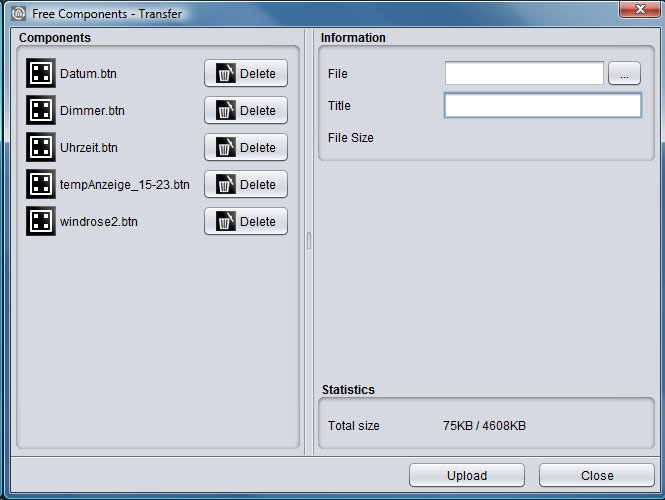
Free-Components - Transfer
Using this dialogue, you can upload switches to EIBPORT, which were created by the COMPONENTBUILDER. COMPONENTBUILDER allows to create own switches by connecting pictures with desired functions. It is available in the download area www.bab-tec.de for free.
Note: These switches only work in the Java-based visualisation JAVA CONTROL. They cannot be used in any of the other visualisations.
-
Information: To upload a switch, click on item “file“ and mark desired data or pull per drag & drop this file to visualisation surface. This file should get a distinct name for clear identification. If your chosen file has more than 100kb disk space, a warning will be displayed, that extended time for loading in visualisation will be expected.
-
Free Components: This window shows you all files, which are uploaded currently. You can see the name of switch and a button to erase this switch out of your component list.
-
Statistics: In the area “statistics“, you can see information about usage of disk space, left hand side the actual amount of used disk space, right the maximal capability of storage.
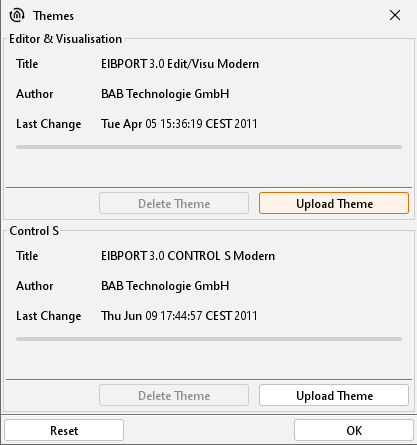
Themes
Since firmware version 0.10.1 it is available to exchange all elements and icons of the EIBPORT software by means of so-called themes. You can develop your own themes or use other existing themes. To edit themes and load them from the EIBPORT, a tool called "Theme Editor" is provided. The theme files can then be loaded into the EIBPORT via "Themes". Once a theme file has been successfully uploaded, the editor must be restarted for the changes to take effect.
-
Load theme: A file browser is used to select the desired theme file on the hard disk (extension *.thm).
-
Delete Theme: If the loaded theme is no longer desired, it can be removed by clicking the Delete button. The default theme will then be used again.
The Theme Editor is described in a separate document which is included on the EIBPORT CD. In addition, the various graphic sets resulting from the themes are described in more detail in the description of the elements.
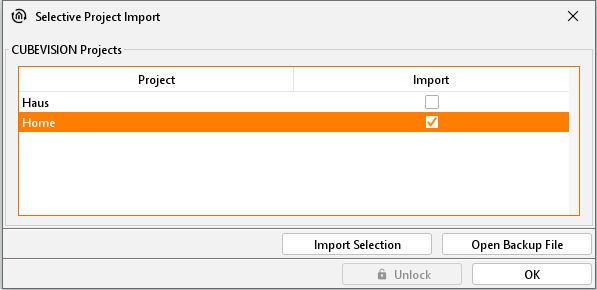
Selective project import (for CUBEVISION)
Selective project import allows for separate importing of CUBEVISION projects from EIBPORT backup data (you can learn how to create an EIBPORT backup here: including the relevant background images. Proceed as follows:
-
The dialogue must be unlocked with the help of the EIBPORT character string (information concerning character strings.
-
Then select an EIBPORT project which contains a CUBEVISION project using “Open backup”. All available “structures” of the CUBEVISION project are shown.
-
Select the desired project using the check box in the “Import” column and confirm using the “Import” button.
-
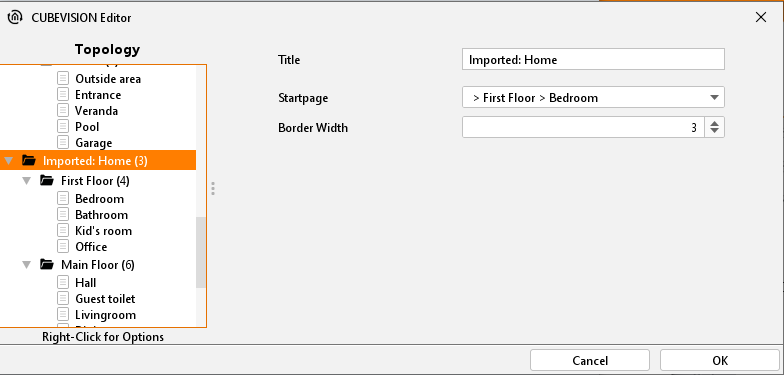
The imported project then appears with the “Imported:” addendum in the structure name in the CUBEVISION topology.
Import into Microsoft Excel
For the file in Excel will show up correctly, you must be imported as a text file. This is the file type "separateness" and as a source file 'Unicode (UTF-8) "option. The delimiters are tabs, and the address column should be defined as "text".
Long term database
In this menu you can see the current status of used long-term databases. Up to 20 databases can be activated and used in visualizations, CUBEVISION and CONTROL L. When the databases are created the respective group addresses and the DPT are taken over. After configuring the long-term database, it isn’t possible to edit. The long-term databases can be used as often as required for the corresponding visualization elements. In the subitem menu of these extras the long-term databases can also be deleted.
Long term database in CUBEVISION
For monitoring data over longer periods, you can enable long-term recording in the CUBEVISION visualization if the values are suitable.
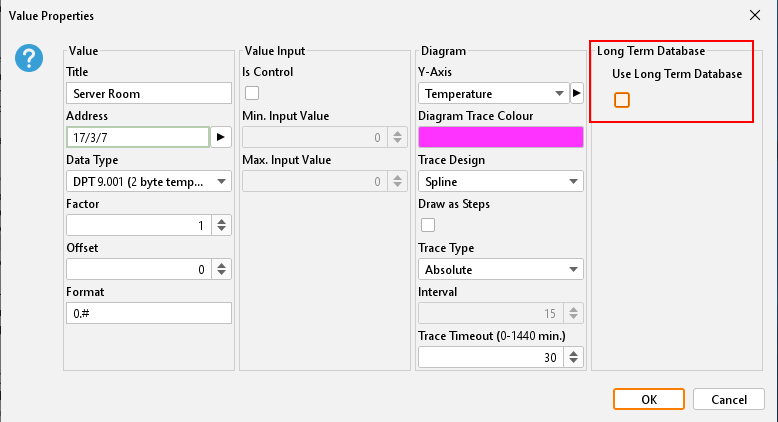
If enable that function it opens the window for managing the long-term databases, where are displayed and for selection existing long-term databases, as well as new databases can be created. Overall, the EIBPORT can manage up to 20 long-term databases. These databases get an internal database key.
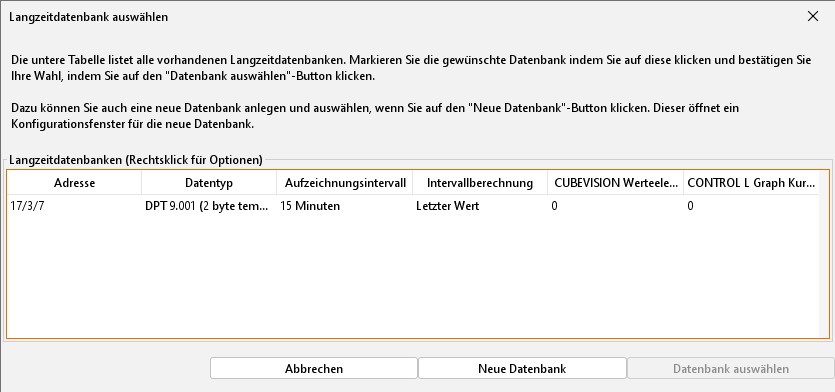
Create a new database:
-
Address
-
Data type
-
Record interval (live, 10 minutes, …, 24 hours)
-
Interval calculation (e.g., latest value, maximum or minimum value, average, etc.)
-
Value calculation (absolute value, difference value)

Long term database in CONTROL L
When in CONTROL L use the GRAPH visualization element the long-term database can be activated. (See chapter 6.6.40 GRAPH)
Therefore by configuration the visualization element now has an additional function “long-term record” to enable recording. By activation opens a window for the long-term database, as described in present chapter above by in CUBEVISION.
History & state-table
EIBPORT beneath the SQLite database (500,000 frames) stores a record of the last 20,000 messages (storage ring) and provides a state table that always displays the current status of all group addresses.
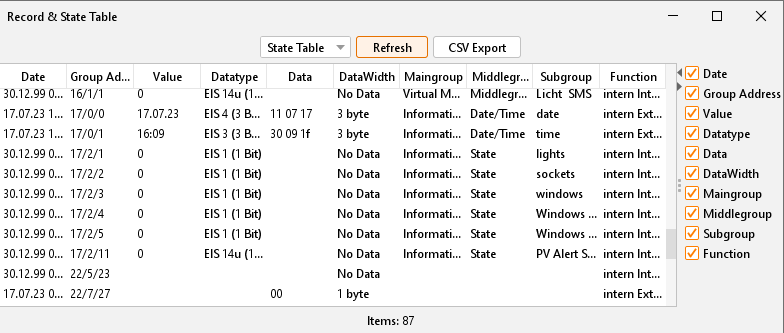
A state does not exist, when the address never was used. The actual state is defined by the moment of telegram is being received. Using a backup, state table and the history table are saved as well.
-
Refresh: You can choose between state table and history table. The „Refresh“ Button loads up actual table onto the screen. This may take a while.
-
Presentation: Data will be sorted by date. On the right side you can choose by the help of little checkmarks, which data fields should be shown. At the dividing line of the two parts, you can hide the one or the other information by clicking the little arrows.
Help
The menu „Help“offers only one item, at this time.
Info
This dialogue gives you important information about your EIBPORT. If problems in use of your EIBPORT occurs, you can have a fasten overview to essential data and settings.
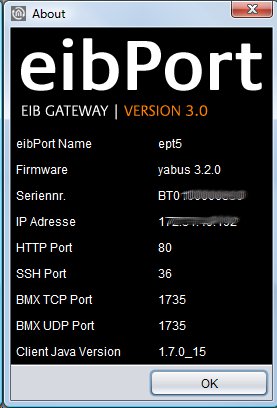
You can see:
-
EIBPORT name: Is set in the “ConfigTool”.
-
Firmware: Version of firmware (also seen in JAVA console)
-
Seriennr.: Serial number, also displayed in ConfigTool.
-
IP-address: Is set in the “ConfigTool” in “Configuration” > “network settings”.
-
Ports: Are set in the ConfigTool at “Configuration” > “extended EIB (yabus) settings”
-
Client Java Version: JAVA version of Client PC.